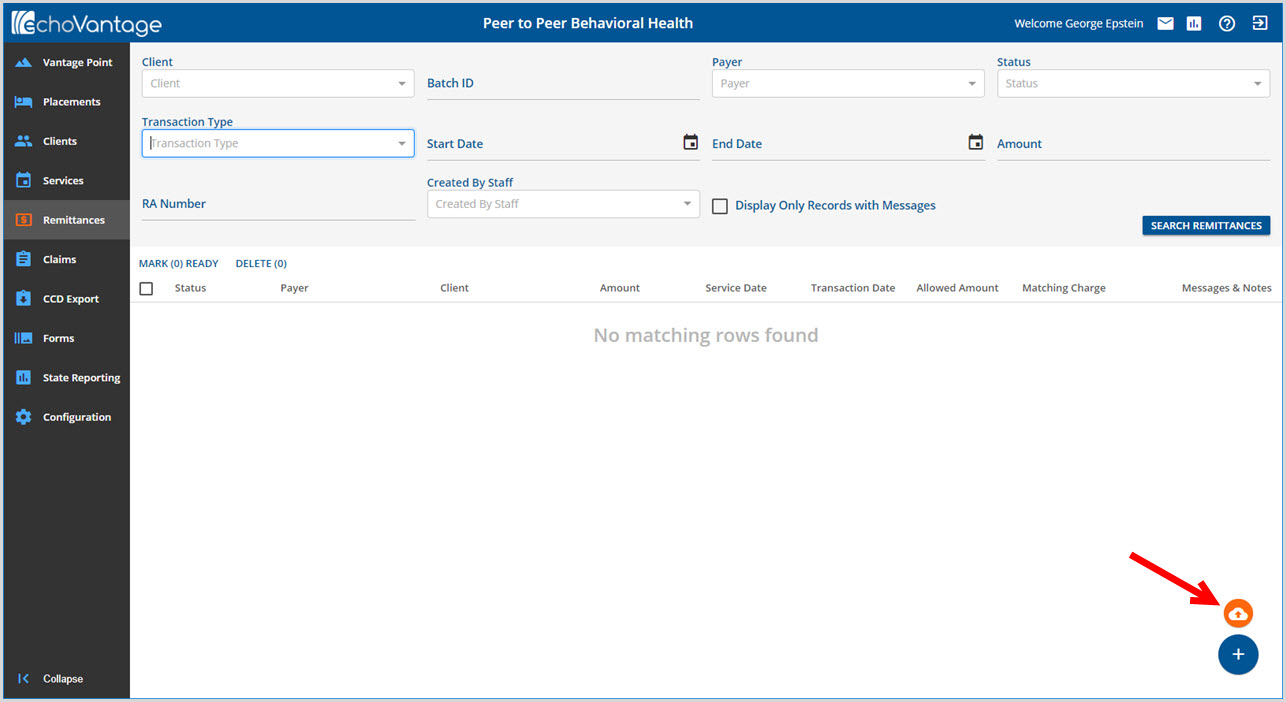
Hover the cursor over the blue plus "+" to display the orange cloud depiction. Click the cloud to bring up the file directory on the local machine. Navigate to select the desired 835.
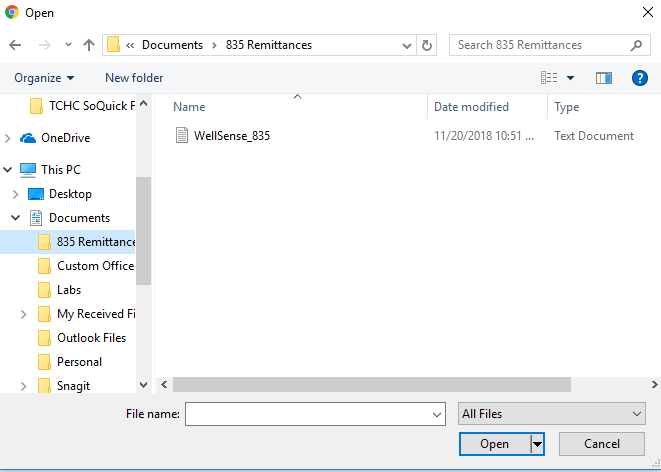
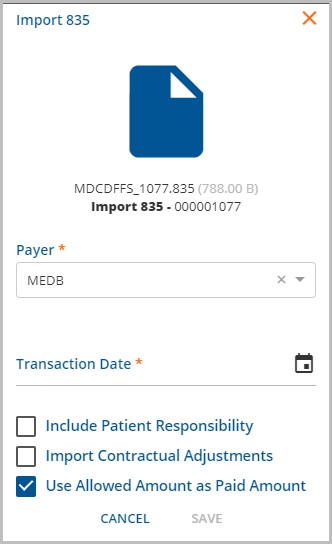
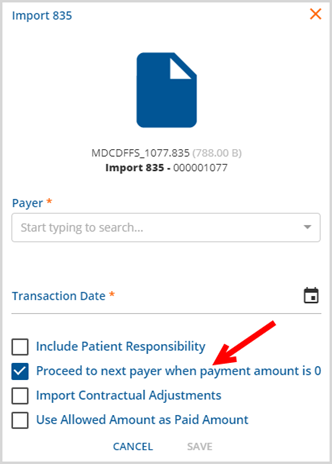
Click Open on the bottom of the window. The import screen will open with the file selected. For EchoVantage versions prior to release 2.34, the Import 835 screen will look like image (a) below. Starting with version 2.34, the Import 835 screen will look like image (b) below.
-
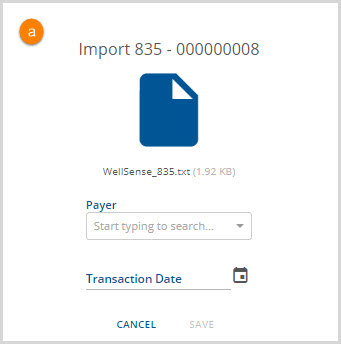
- Select the Payer from the drop-down list and enter the transaction date.
- Click the SAVE button. There is also a CANCEL button.
-
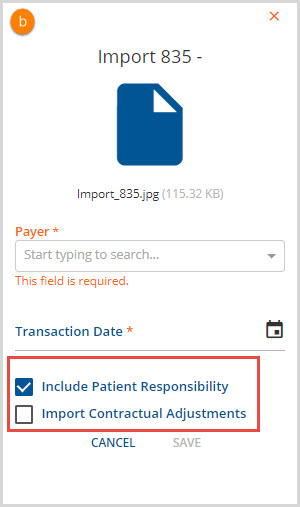
- Beginning in v2.34, the Import 835 screen has the option to Include Patient Responsibility amounts and/or Import Contractual Adjustments when the 835 File is imported.
- When the Import Contractual Adjustments is selected, the 835 creates a Remittance record for each CAS adjustments using a Group Code of 'CO' (Contractual Obligation).
- CAS adjustments with a reason code of '253' (Sequestration) are not imported.
- With the release of version 3.10, a third option to Use Allowed Amount as Paid Amount has been added. When selected and the import is complete, the Remittance Amount will be the same as the Allowed Amount on the Remittance screen.
- With the release of version 3.12, a fourth option of Proceed to Next Payer When Payment Amount is 0 has been added. Deselecting this option allows an agency the ability to continue to work on a claim that has been denied or zero paid.
- The checkbox is selected by default.
- If this box is deselected and the imported Payment Amount is 0, the Proceed to Next Payer flag in Remittance screen is set to false.
- If the Use Allowed Amount as paid Amount is selected for the import, then the Allowed Amount is used to determine the Proceed to Next Payer Flag.
Once the 835 file is uploaded, the claim payments will display on the Remittance screen.
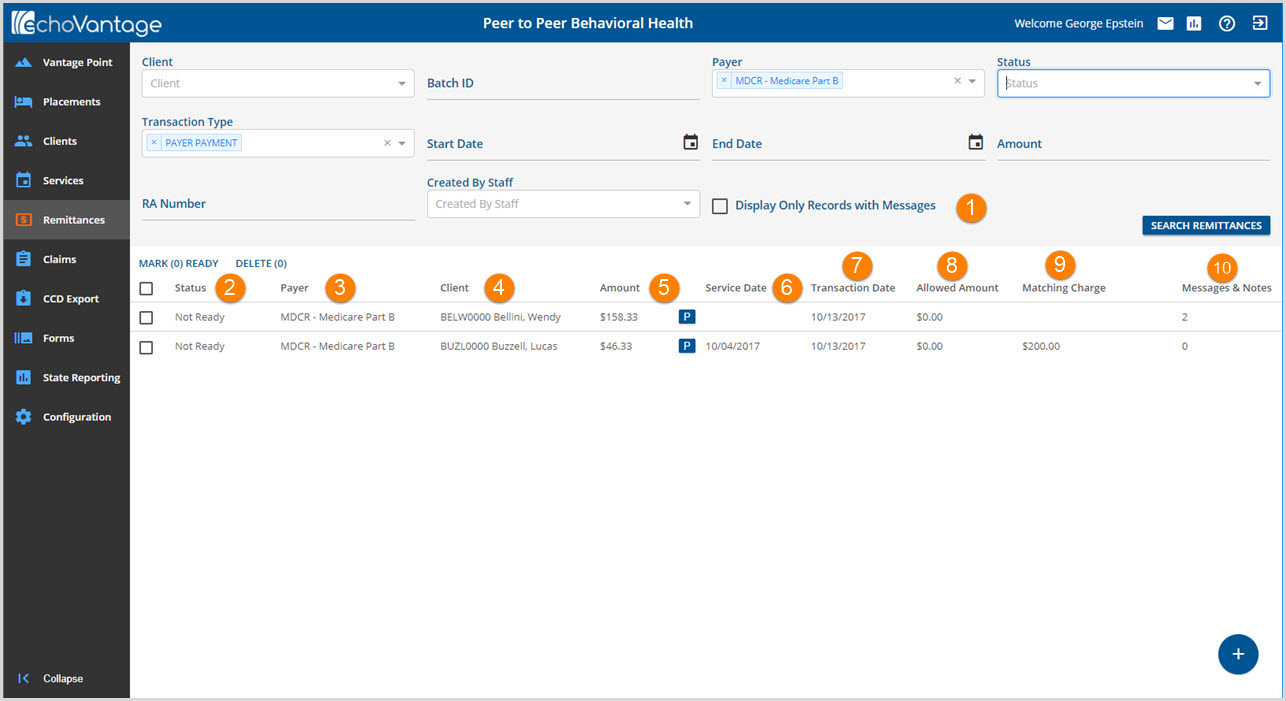
1. Fields in the grey Header area are used to filter information displayed on the Remittances screen.
- The Display Only Records with Messages checkbox is helpful when working with large 835 imports.
- Selecting this will limit the entries displayed to just those with messages or notes.
- The screen below shows the results after the box is checked. Note that there is now just (1) row.
-

2. Status - Payments imported from an 835 are posted on the Remittance screen in Not Ready status. This allows the payments to be reviewed before processing. Payments that are marked Ready are moved to Unprocessed Remittances. Click the link to review instructions for processing Remittances.
3. Payer - The payer is listed for each imported remittance.
4. Client - The client name and ID is imported with this remittance. If the client field is blank it means that the system was not able to match up the payment to an existing charge and client. The client the payment belongs to must be added before the remittance can be marked Ready.
5. Amount - Payment amounts are listed and a P in a blue block indicates that this was a Payer Payment or other payment response. The Remittances transaction codes and code descriptions are listed below.
- P PAYER PAYMENT
- O CONTRACT ADJ
- T EXPECTED ADJ
- A FEE ADJ
- C BALANCE ZEROING CREDIT
- C PAID BY OTHER
- P GUARANTOR PAYMENT
- A COPAY ADJ
- P Denial-Authorization Missing
- P Denial-Diagnosis Issue
- P Denial-COB Missing
- P Denial-Duplicate
- P Denial-Member Not Identified
- P Denial-PoS Issue
- P Denial-Ineligible Provider
- L Loss-Unpaid Self Pay Balance
- P Denial-Taxonomy Issue
- A Coinsurance
- A Deductible
- C Sequestration
- C Psychiatric Reduction
- A PATIENT RESPONSIBILITY
- CO Contractual Obligation** New in v2.34+
6. Service Date is listed to help identify the claim to which the payment is being applied.
7. Transaction Date defaults to the import date and is used as the General Ledger post date.
8. Allowed Amount is listed if the payer supplied this information.
9. Matching Charge - An amount listed under matching charge indicates that the import successfully matched the payer payment to a client charge.
10. Messages & Notes - The number of messages or notes related to the payment will show in this column.
- Select the row to display the Remittance Entry screen.
-
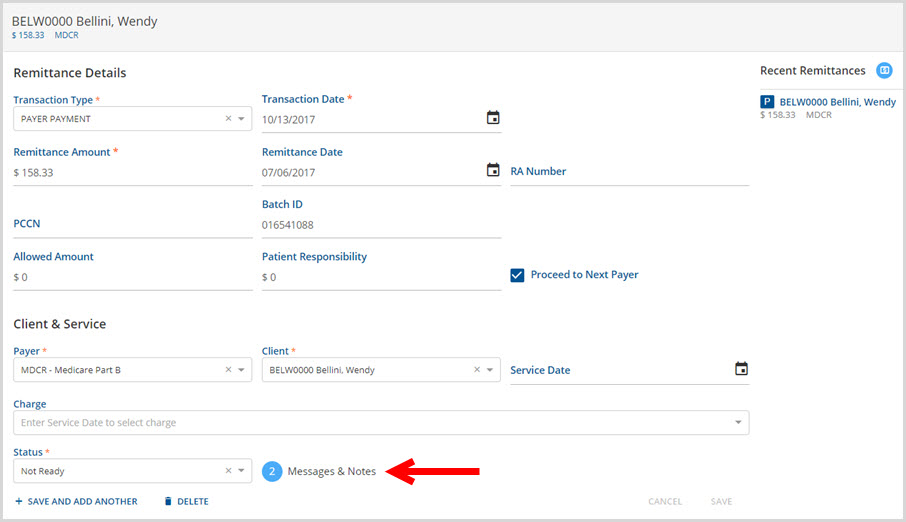
- Then select Messages and Notes button to view.
- CARC messages are stored here.
To Add a Client ID or make other edits to the Remittance, click the payment that needs to be edited.
Click HERE for detailed instructions on remittance entry.
The payment must have a Client ID, Service Date, and Valid Charge to mark it as Ready and move it to the Unprocessed Remittances page.
