Create a One Time CCD Export Job
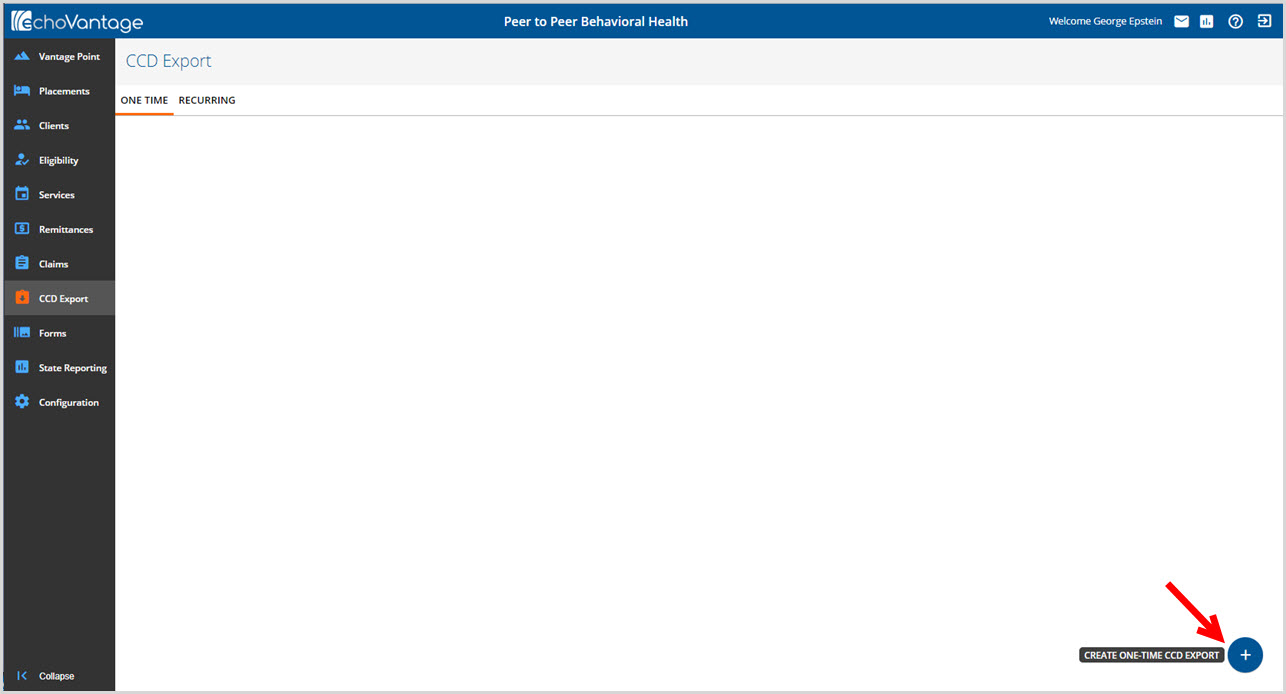
To create a One Time CCD Export Job, click on the Blue Plus "+" in the bottom right.
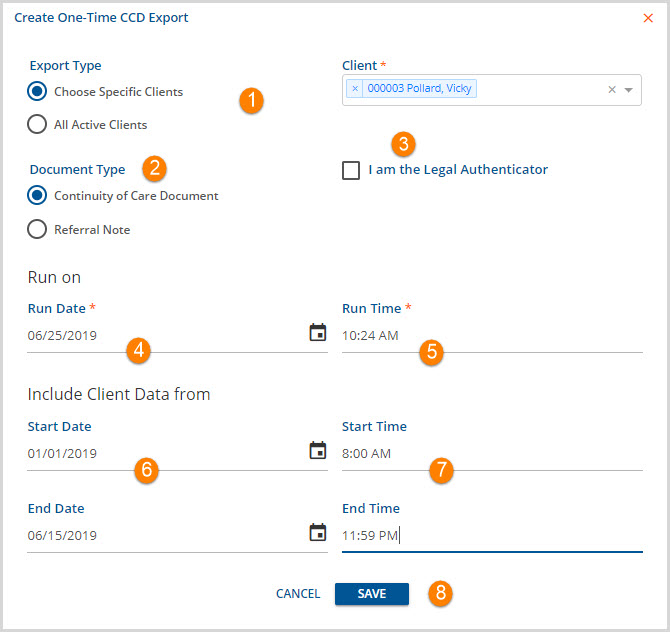
The Create One-Time CCD Export screen opens.
1. Export Type/Client - Specify if the export is for a Specific Client or All Active Clients.
- Choose Specific Clients - When this type is selected, the Client search bar is visible. The client or clients must be selected in order to create the CCD Export.
- All Active Clients - When this type is selected, the Client search bar is not visible. Every active client is included in the export job.
2. Document Type - Select the type of export document to create, either Continuity of Care Document or Referral Note.
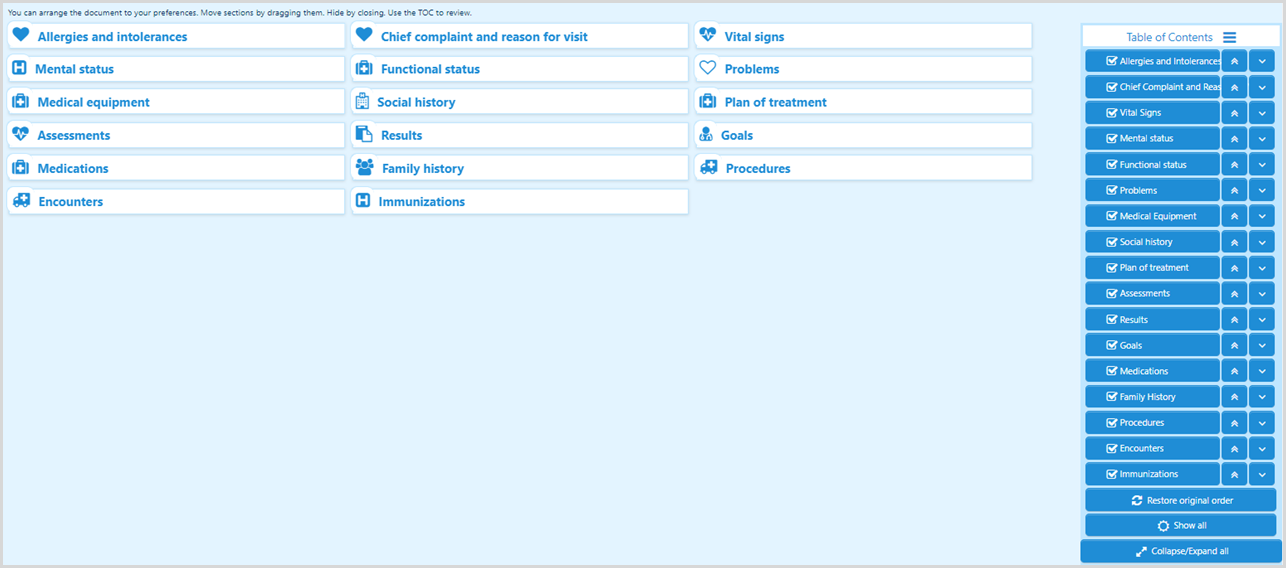
- Both types have 16 categories of information in common
| Allergies and Intolerances | Chief complaint and reason for visit | Vital Signs |
| Mental status | Functional status | Problems |
| Medical equipment | Social history | Plan of treatment |
| Assessments | Results | Goals |
| Medications | Procedures | Encounters |
| Immunizations |
- Referral Note includes an additional Reason for Referral category of information.
- Continuity of Care Document includes an additional Family History category of information.
3. I am the Legal Authenticator - Select this checkbox to indicate that the user creating the export job is indeed the legal authenticator. Agency policy should determine when and by whom this selection should be made.
Steps 4 and 5 define when the export job is created.
4. Run Date - This is the date the export job is created. It defaults to the current date but may be edited to run at a future date.
-

- A pending job may be canceled by clicking on the ellipsis (three dots) to the right of the word PENDING. The only action this offers is to cancel the job.
-

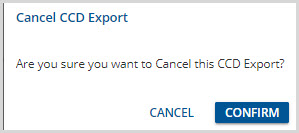
- If cancel is selected, a confirmation box displays.
-
5. Run Time - This is the time the export job is run. The default sets the Run Time to the current time. An agency may opt to schedule a future time, in the evening for example, so that larger jobs, like all active clients, have time to process.
Steps 6 through 7 define the date range from which to extract client data.
6. Start Date/Start Time - This is the earliest date and time used to include client information in the export.
7. End Date/End Time - This is the latest date and time used to include client information in the export.
8. Remember to click SAVE to record entries/changes. Select CANCEL to exit without saving.
Preview a Single Client CCD Export
Once an export job is saved, it may be downloaded from the job history listed on the One Time tab. If the export job was for a single client, a Preview option is available.

Select Preview to display the CCD or Referral Note export information.
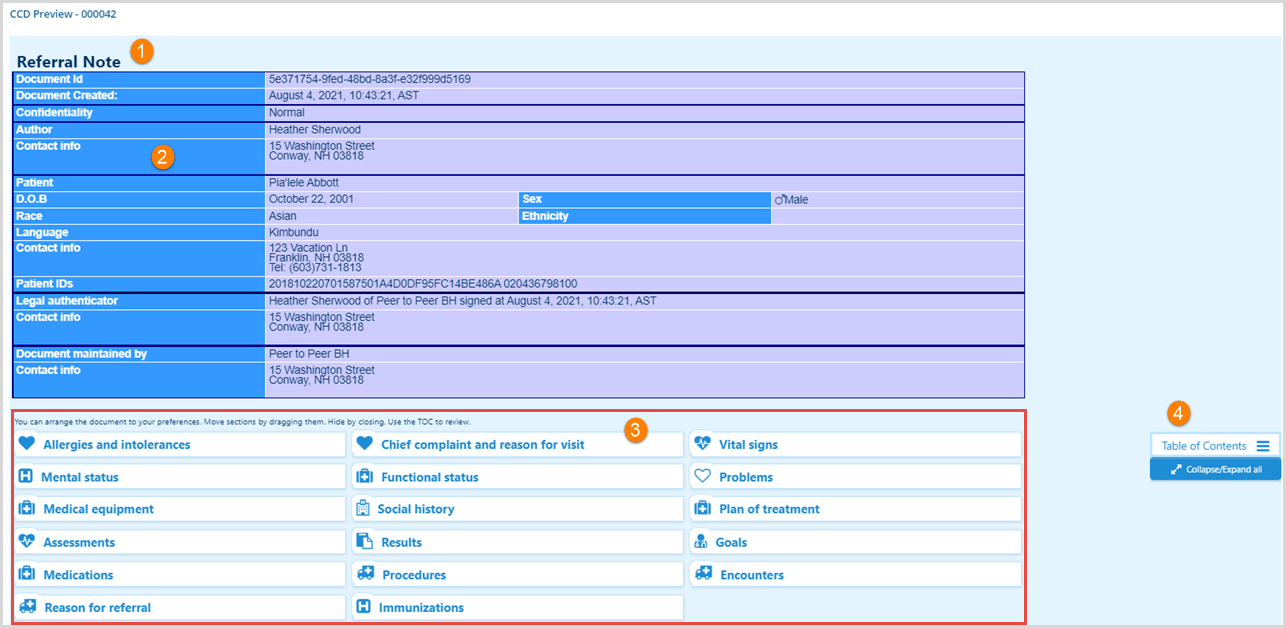
1. The type of document, Referral Note or Continuity of Care Document, is listed in the top left.
2. The Client's details display in the blue and purple header area.
3. The categories are listed beneath the Client details and can be rearranged by dragging and dropping or using an action button.

- Hover over a category to display the available actions, each is detailed below in order from left to right.
- Expand or Collapse the category in the preview.
- If the category is already expanded, this collapses it so only the name is visible.
- If the category is already collapsed, this expands it so all the detail is visible.
- Select the double arrow pointing up to move the selected category to the first position (top left).
- Select the single arrow pointing down to move the selected category down or to the right one position.
- Select the "x" to close and remove the category from the preview screen.
- Expand or Collapse the category in the preview.
- Once changes are made, the application remembers the changes until they are reverted to the original order.
4. The Table of Contents is a master list of the Categories. Use to reorder the display and restore removed Categories.
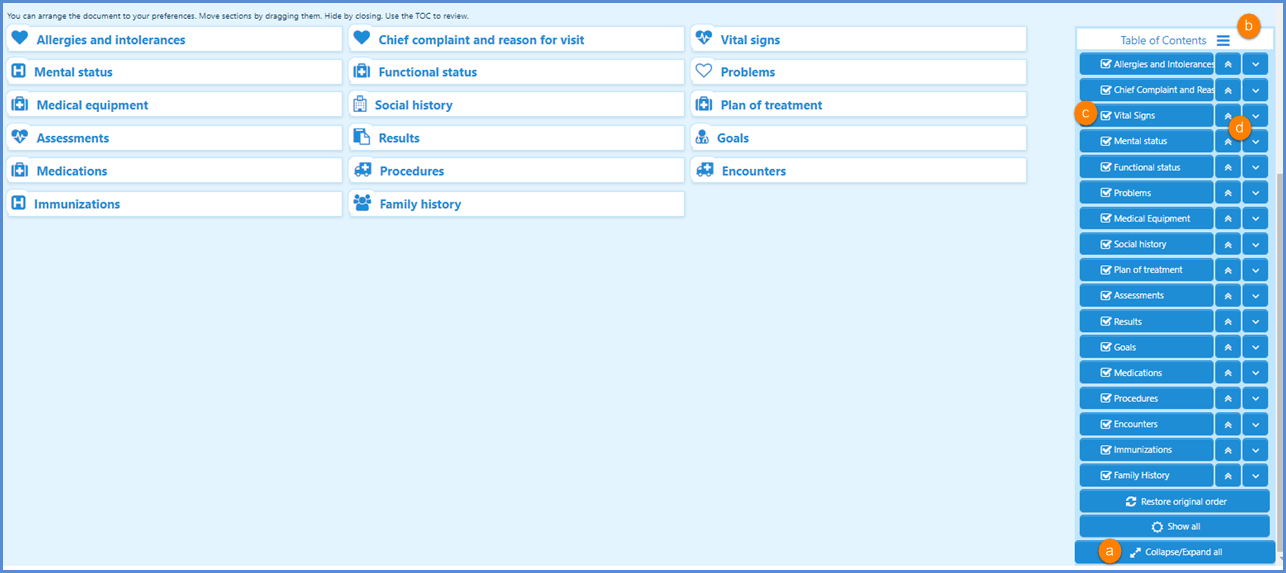
- (a) Select the blue Collapse/Expand all to view or hide all categories at once
- (b) Select the three horizontal blue bars to expand or collapse the list of categories in the Table of Contents
- (c) Use the checkboxes to hide or restore individual categories.
- (d) Use the double up or the single down arrows to rearrange the category display order or drag and drop a category.
Examples
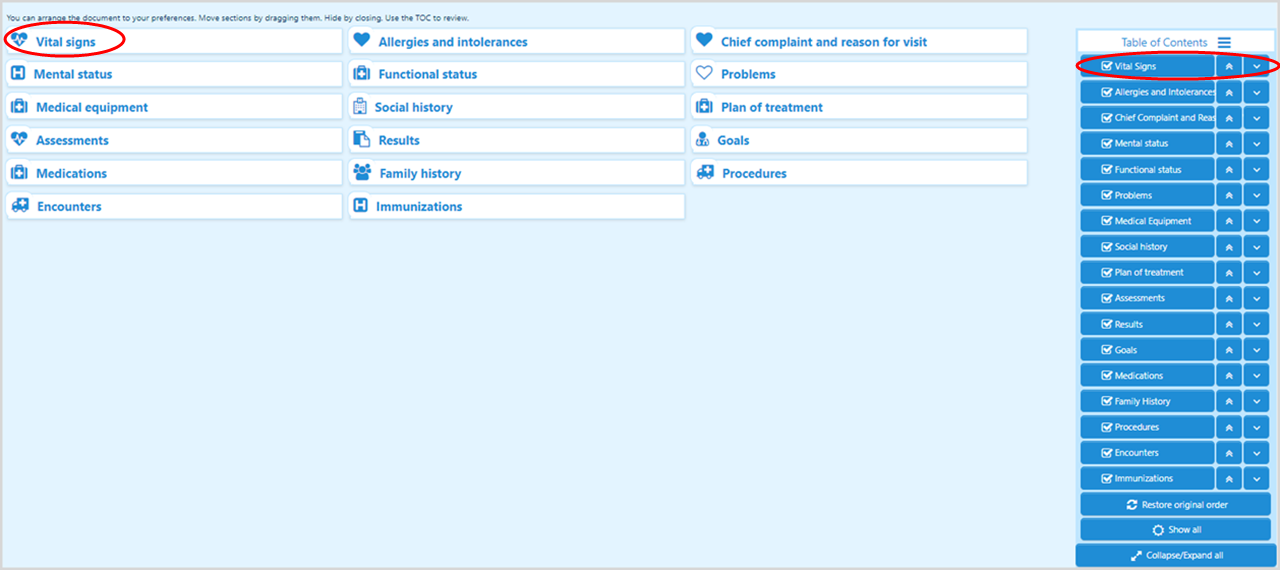
1. If the double up arrow to the right of Vital Signs is selected, Vital Signs moves up two rows in the Table of Contents, above Allergies and intolerances, and the category card moves to the left two places, coming before Allergies and Intolerances.
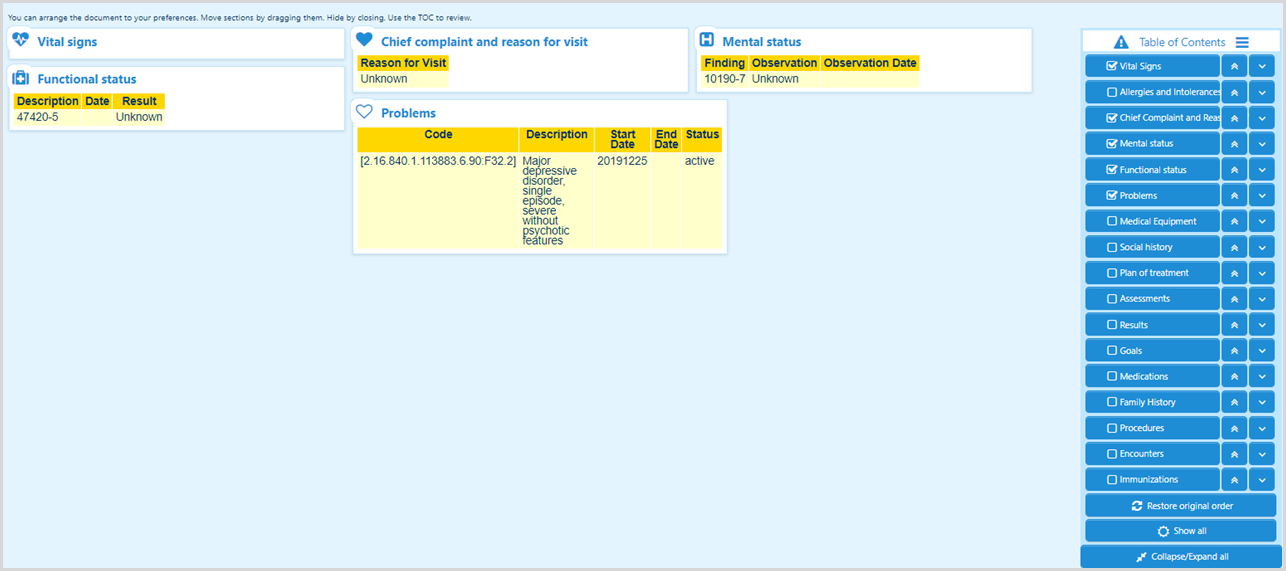
2. Selecting or deselecting the checkbox determines if the category is displayed or hidden. In the example, all categories are hidden except for Vital Signs, Chief Complaint and Reason, Mental Status, Functional Status, and Problems.
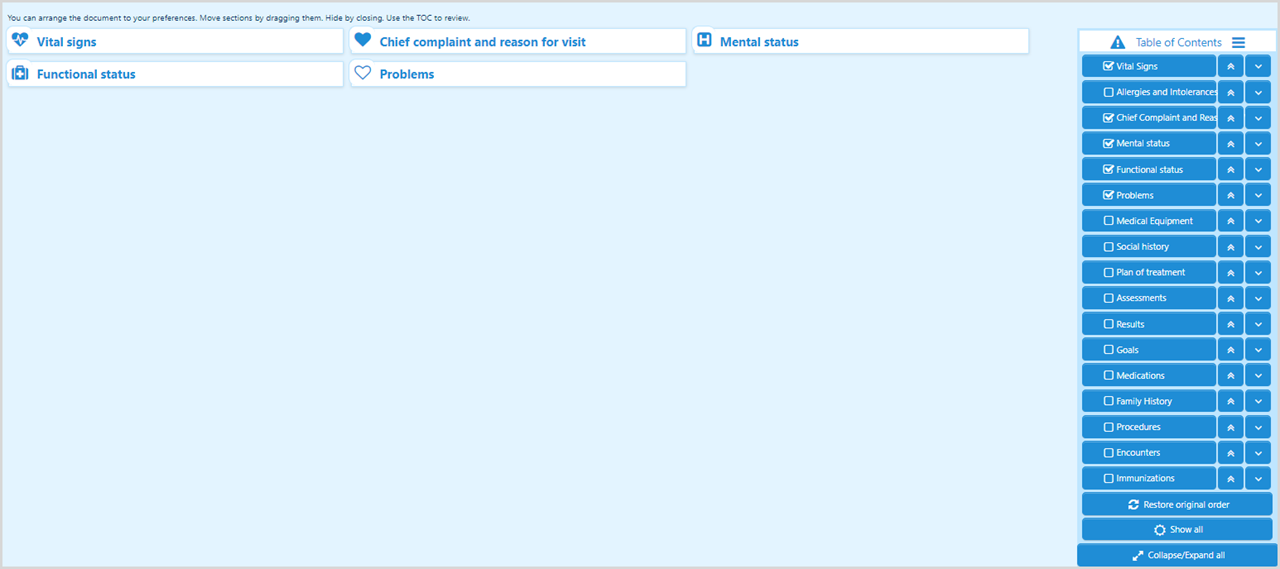
4. Selecting the Collapse/Expand all button expands the five remaining categories.
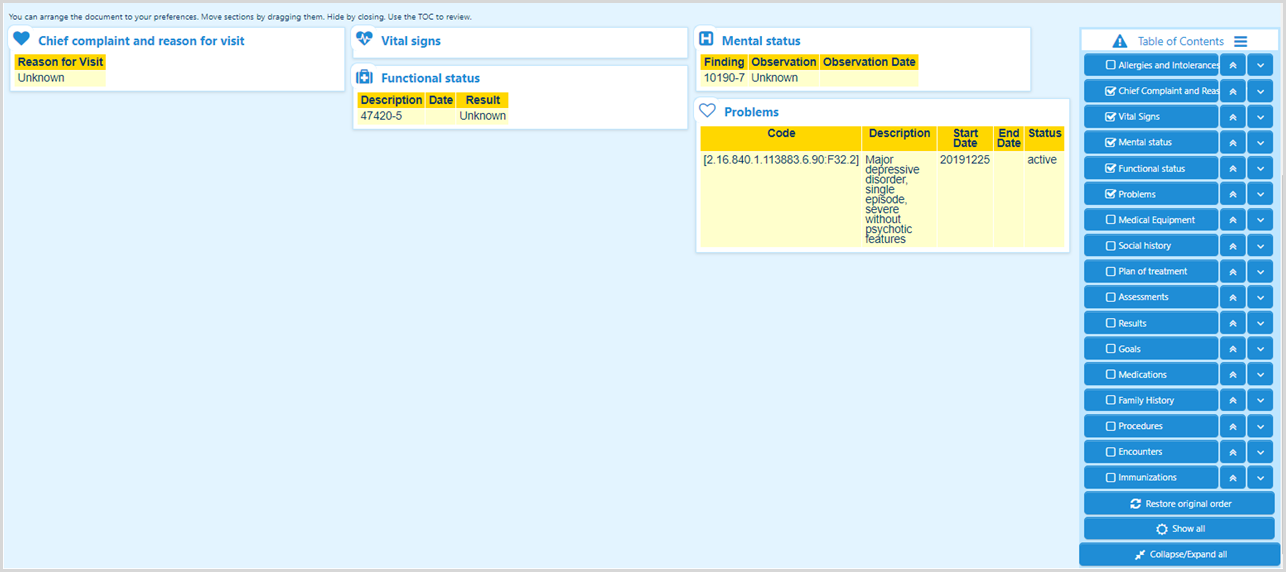
5. Restore original order reverts any position changes made to the original category order.
- A confirmation box will pop-up.
-

- Select OK for the restore order to display.
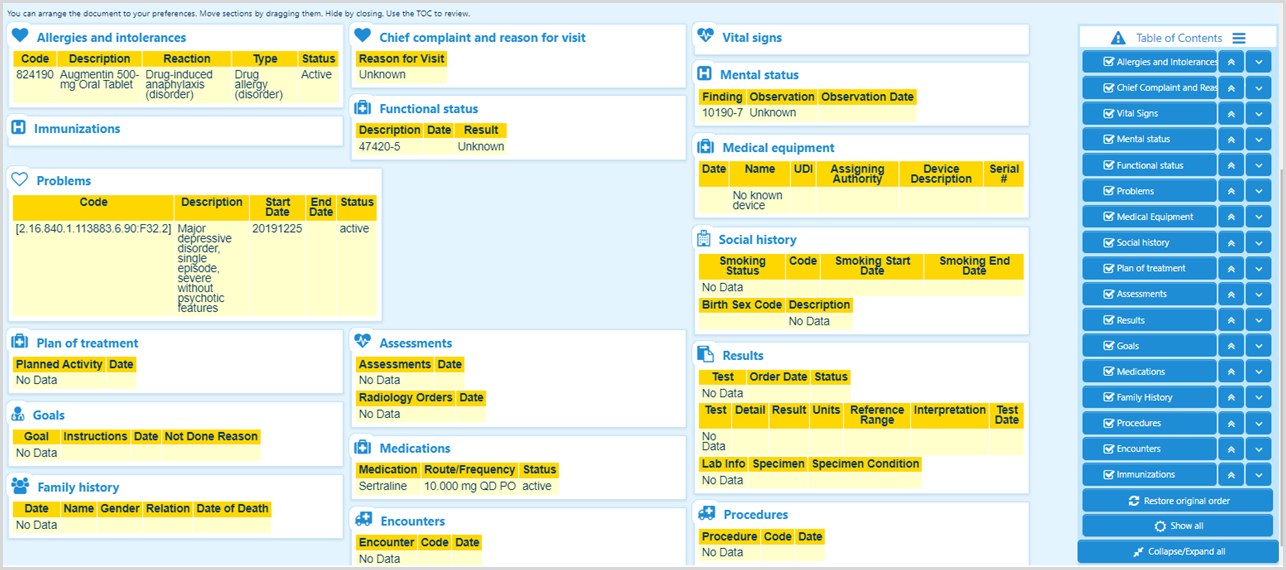
4. Show All restores any hidden categories.
5. Selecting the Collapse/Expand all button one more time collapses all categories.
