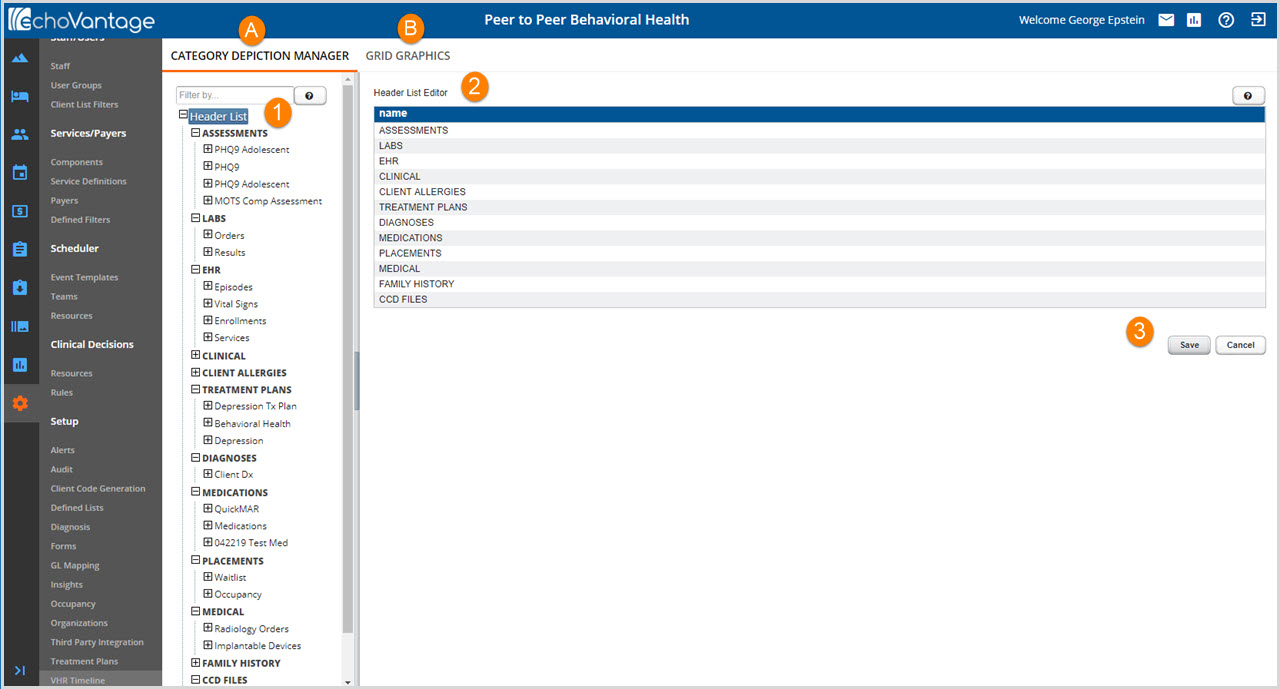
To configure the VHR Timeline go to Configuration > VHR Timeline. There are two tabs on this screen.
A. Category Depiction Manager - Use the options on this tab to configure the Timeline to display forms and depictions. The list of categories and forms that display on the Timeline can be setup differently for each User Group setup in the system.
1. The Header List is located on the left side of the screen.
- The Headers created in this list will display on the VHR Timeline if the User Group is granted access.
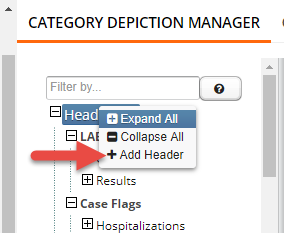
- To add a new Header, right-click on Header List, then click on + Add Header
- The Header Editor will display on the right-side of the screen.
-
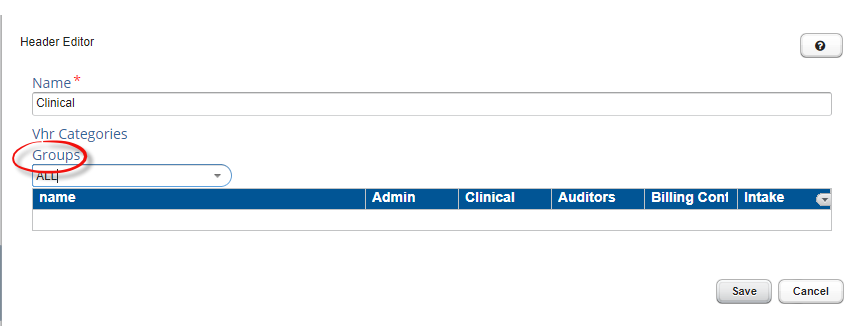
- The Name field is required.
- Use Groups to grant access to the new category header. If ALL is selected, all user groups will have access to the new category.
- Click Save.
- Permission to each form within the category must be enabled by selecting the checkbox.
-

- In the image above, only the Intake Satff have access to all three forms. Admin has access to the two PHQ9 forms. The remaining groups do not have access to any of the forms in the Assessments Category.
-
2. The Header List Editor allows users to adjust the order of Category Headers.
- To Move the category header, click the category header, hold and drag it up or down the list, then drop it on the appropriate spot in the list.
3. Click Save.
Adding Forms to the Category Header
- Right-Click on the Category Header the form will be added to.
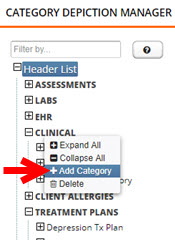
- Select + Add Category
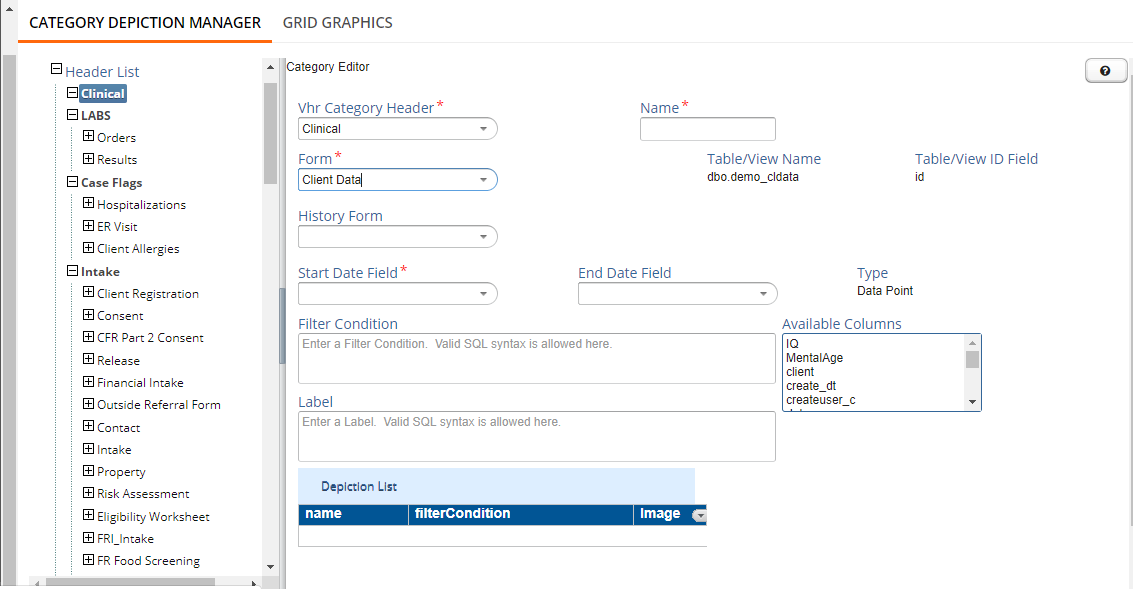
- Select the Category Header the form will be placed under. The system will default to the Header that was right-clicked. This is a required selection.
- Enter a display Name for the form. This is a required field.
- Select the Form from the drop-down list. Forms that were created in Form Designer will be available to select from the list. The name displayed is the Caption entered for the form for Form DesignEHR. If the form is not in the list, please refer to the Form DesignEHR instructions. This is a required selection.
- Table/View Name and Table/View ID fields will auto-fill once a from is selected.
- History Form is an optional selection. This fields allows a form/grid with the specific function of displaying a history of forms. History Forms are created in Form Designer.
- Start Date Field is required. Make a selection from the drop-down list. The list will display options available on the form selected. Example: create_dt, date, touch_date.
- End Date Field is optional. Selections from the form will be available in the drop-down list.
- Type is determined by the above two date selections, auto-fills and is read-only. If Start Date only is selected the value will be Data Point. If Start and End Dates are selected the value will be Data Bar.
- A Data Point is a single image on the timeline, based on the Start Date entered on the form. The Data Bar is a solid bar that displays on the timeline from the Start Date to the End Dates entered on the form.
- Type is determined by the above two date selections, auto-fills and is read-only. If Start Date only is selected the value will be Data Point. If Start and End Dates are selected the value will be Data Bar.
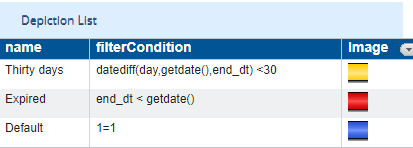
- Filter - This section is optional but recommended. Enter SQL condition(s) by which the form appears or does not appear on client timeline. Use available columns on the form to create the SQL conditions. The columns available to use will display to the right in the Available Columns list.
- Examples
-
- Examples
- Label - This section is optional. Enter SQL statement(s) to display information label on timeline events.
- Examples
- 'Allergy: ' + ISNULL(cast((select distinct c.conceptname from dbo.clientallergies ca join dbo.codes c on c.id = ca.allergycode and c.id = dbo.clientallergies.allergycode)as varchar(255)), '') + ' | ' + 'Reaction: ' + ISNULL(cast((select distinct c.conceptname from dbo.clientallergies ca join dbo.codes c on c.id = ca.reactioncode and c.id = dbo.clientallergies.reactioncode)as varchar(255)), '')
- 'Entity: ' + isnull(organization_vc, 'None') + ' Name: ' + isnull(firstname_vc,'') + ' ' + isnull(lastname_vc,'') + ' Expiration: ' + isnull(convert(varchar(11),expiration_d),'')
- 'Episode Status: ' + Status
- EPISODE: ISNULL(CONVERT(varchar,type),'') + ' - Period: ' + ISNULL(CONVERT(varchar,StartDate),'') + ' - ' + ISNULL(CONVERT(varchar,EndDate),'')
- ENROLLMENT: 'Program: ' + ISNULL(CONVERT(varchar,(SELECT ar.programcodes.description_vc FROM ar.programcodes where program_c = ar.programcodes.code_c)),'') + ', Location: ' + ISNULL(CONVERT(varchar,(SELECT ar.locationcodes.description_vc FROM ar.locationcodes where location_c = ar.locationcodes.code_c)),'') + ', Agency: ' + ISNULL(CONVERT(varchar,agency_c),'')
- CCD Exports: 'CCD File Exported By: ' + ISNULL(CAST((select distinct a.username from dbo.AppUsers a WHERE a.id = CreateUser)as varchar), '') + ' | ' + 'On: ' + ISNULL(CAST(CreateDate as varchar(11)), '')
- CCD Imports: 'CCD File Exported By: ' + ISNULL(CAST((select distinct a.username from dbo.AppUsers a WHERE a.id = CreateUser)as varchar), '') + ' | ' + 'On: ' + ISNULL(CAST(CreateDate as varchar(11)), '')
- Examples
Although Documents are displayed on the Timeline, the Documents depiction is not configured as a standard VHR Category Depiction because of the way in which Documents are stored in Alfresco, outside of the EchoVantage database. Categories, however may be assigned to Documents for filtering purposes.
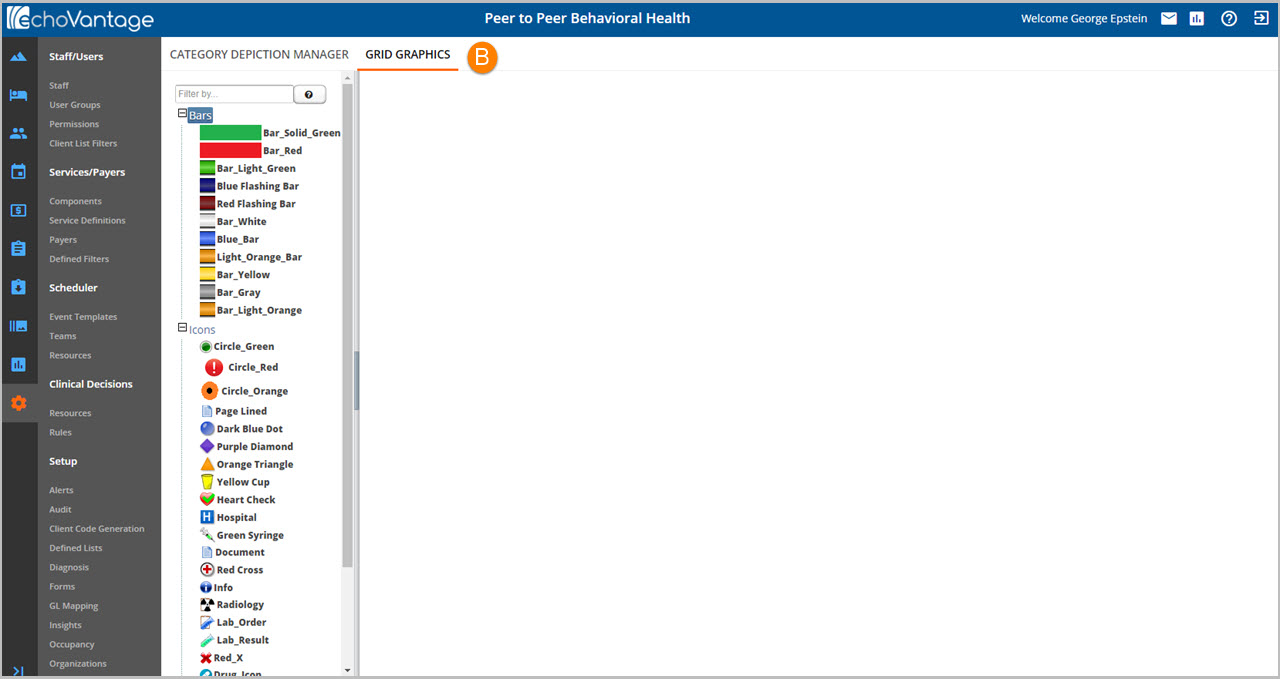
B. Grid Graphics - Use the options on this tab to select and configure the depictions that will be used on forms setup in Category Depiction Manager.
Before creating categories for timeline events, upload images to represent those events. The Grid Graphics tab provides tools for uploading and organizing these images.
Adding Icons
All fields are required and must be completed to save a new icon.
- Icons group header - Right-click and select “+ Add”.
- Name - Enter the new icon’s name.
- Select An Image File - Click to open a File Explorer window. Select the new icon image using this window.
- A file that is 20x20 pixels works best for depiction icons.
- Files need to be png to be added as a depiction icon.
- A jpeg file would need to be converted to png to work.
- Users should make certain that an image selected for use as an icon is either a) licensed to the Agency or b) free to use and not subject to any copyright rules.
- Image Name - will automatically populate with selected icon’s file name.
- Image Type - Default value is “ICON”. Confirm this value but do not change.
- Image Description - Enter a short description for the new icon.
- Save - Click Save
- New icon will appear at the bottom of the Icons group.
Adding Bars
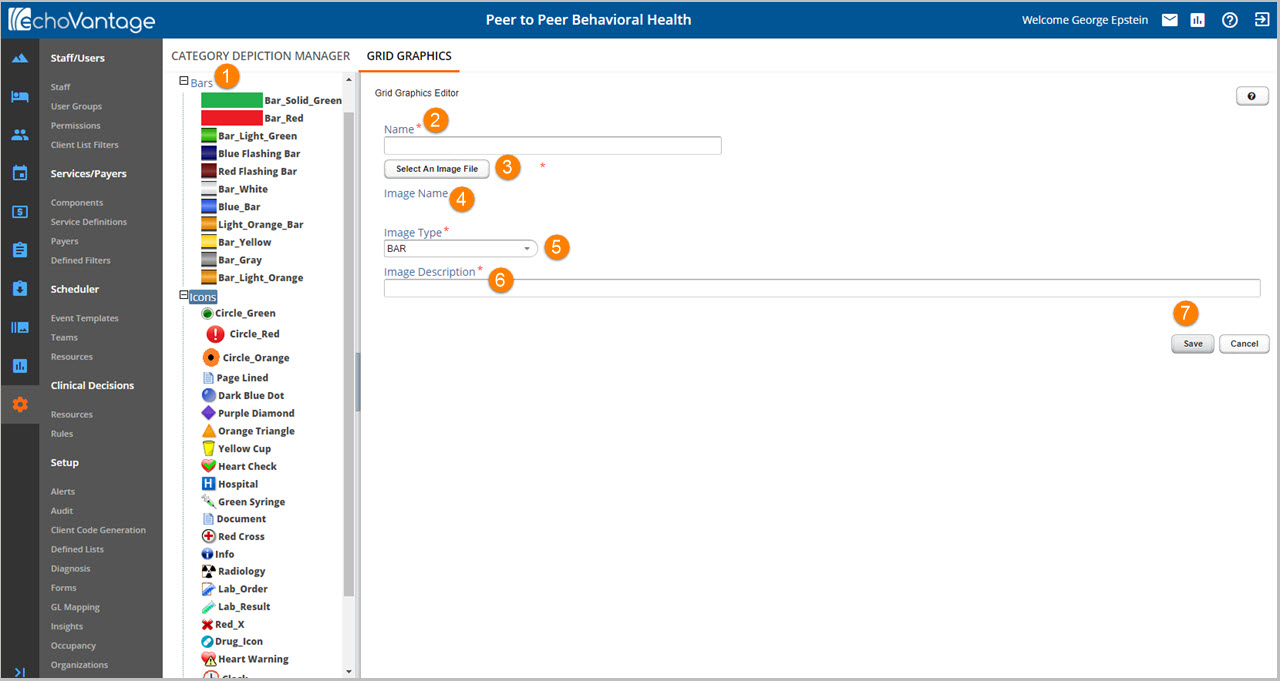
All fields are required and must be completed to save a new bar.
- Bars group header - Right-click and select “+ Add”.
- Name - Enter the new bar’s name.
- Select An Image File - Click to open a File Explorer window.
- Select the new bar image using this window.
- Image Name - will automatically populate with selected bar’s file name.
- Image Type - Default value is “BAR”. Confirm this value but do not change.
- Image Description - Enter a short description for the new bar.
- Save - Click Save.
- New bar will appear at the bottom of the Bars group.

