Configure VHR Timeline
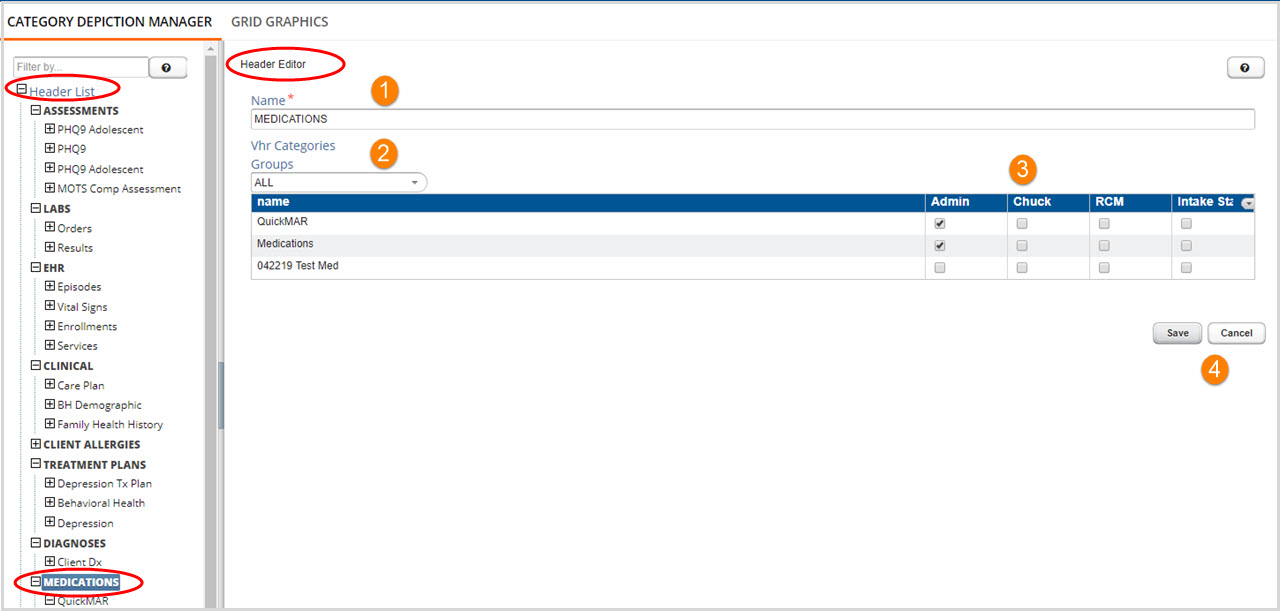
Once the QuickMAR Third Party Integration has been configured, the VHR Timeline needs to be setup to display the information requested. Navigate to Configurations>Setup>VHR Timeline. Locate or create the Header where QuickMAR will be displayed on the Timeline. Double click the Heading to display the Header Editor.
Header Editor

1. The Header editor allows a user to configure a single header for display the VHR timeline.
2. Vhr Categories
- To re-order how the categories are displayed on the Timeline for all groups, Select All in the Groups drop-down list. Then drag and drop the listed categories in the desired order.
- Re-order the categories for a single group by selecting that group in the Groups drop-down list. Then drag and drop the listed categories in the desired order.
- Remove a group specific category order by selecting that group in the Groups drop-down list and then clicking the 'Revert' button (to the right of the Groups list). A pop-up box confirming the change displays. Select Yes.
3. Grant or Revoke access to a category for a group using the check boxes.
4. Remember to Click SAVE after any changes or edits.
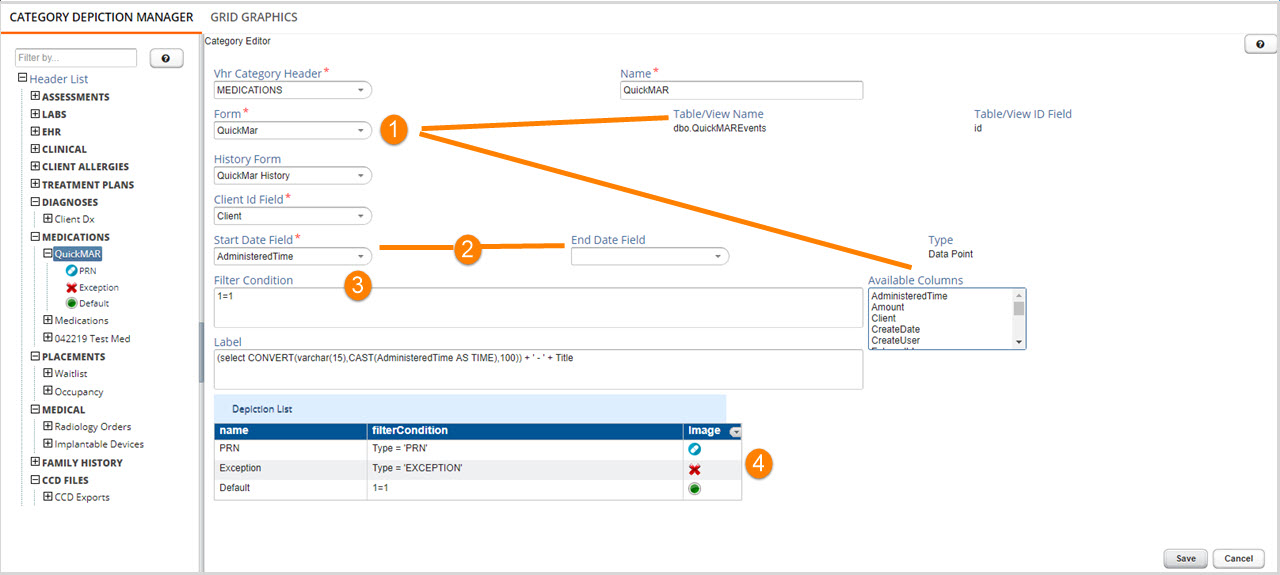
Category Editor
Double clicking on the QuickMAR category in the Header List will open the Category Editor. This allows a user to configure a single category for display in the VHR timeline.

1. Selecting a form will reset the table name and the associated column related fields, changing the table name and the associated column related fields.
2. Selecting an end date changes the depiction on the Timeline to a bar rather than a point. Specifcally for QuickMAR, the depiction should always be a point because the AdministeredTime field from the QuickMAREvents table is used to populate the Start Date Field.
3. The information in Filter Condition will be built into a SQL statement and needs to be formatted as such. For example: someTextfield='ABC' or someNumberField=12.
4. You can re-order the depictions by dragging and dropping them in the depiction list.
Click SAVE after any changes or edits.
