User Group members with the appropriate access can configure and manage USERS on the Occupancy tab in Placements where USERS are non-staff users such as foster care parents or a primary care provider. Authorized Representatives is the term used by EchoVantage for these non-staff users as they are often granted access to limited information for a single Client or group of Clients. The agency assigns the Authorized Representatives to a Placement space or spaces, and grants Authorized Representatives access to the Client Portal. Within the Portal, Authorized representatives see the space(s) to which they are assigned and can view the Client names and selected forms for the Clients assigned to that space.
Configuring the Feature
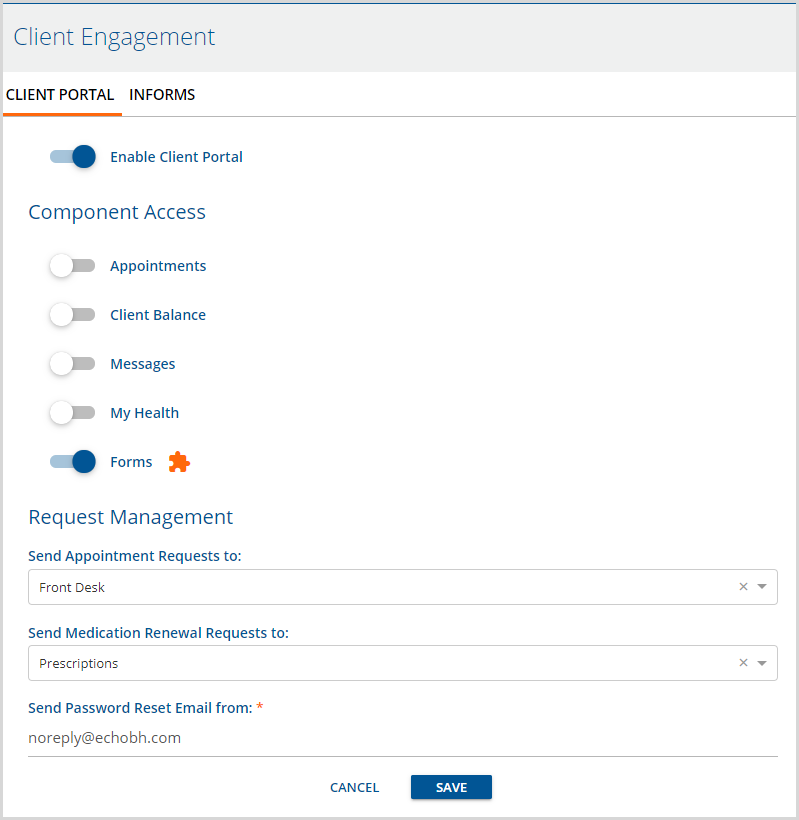
1. In Configuration > Setup > Client Portal, (Client Portal was renamed Client Engagement in the release of v3.21)
- Slide the toggle to enable the Client Portal feature
- Then slide the toggle to enable Forms in the Component Access section.
- Use the drop-down list to select the Password Reset email.
- Remember to click SAVE.
- If Client access is being granted to the Portal, other Component Access toggles may be enabled.
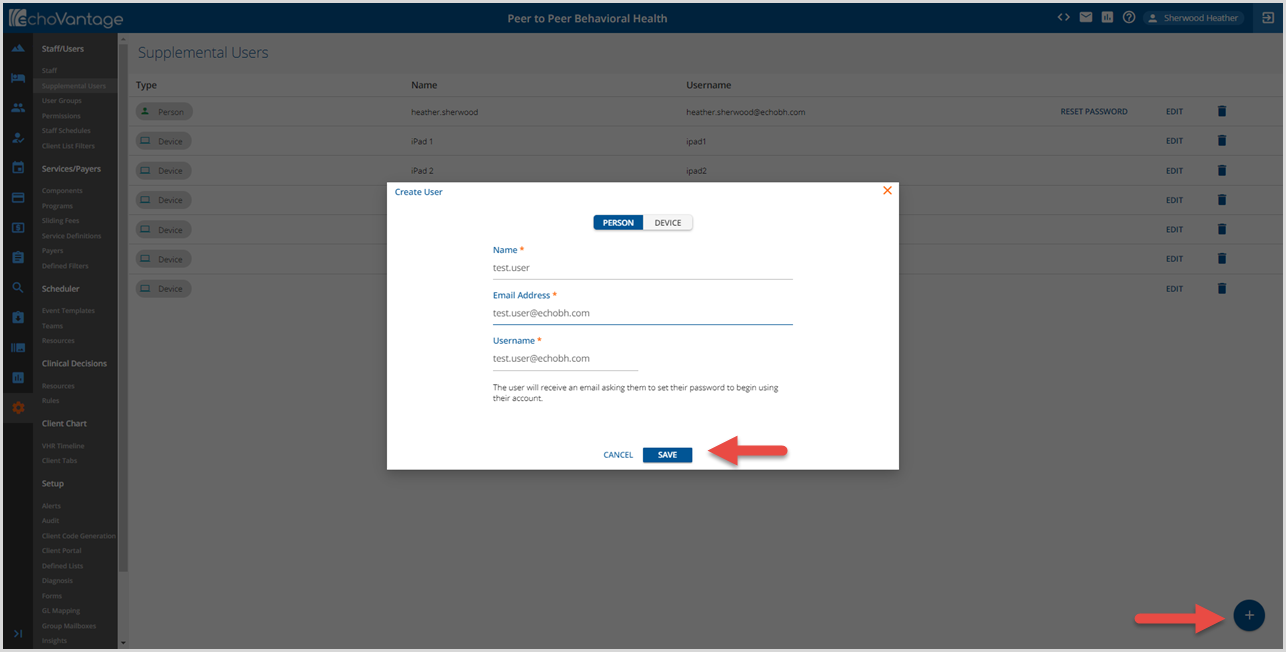
2. In Configuration > Staff/Users > Supplemental Users, click the blue plus to add an Authorized Representative.
- The Create User pop-up displays and defaults to PERSON.
- Complete the three required fields: Name, Email Address, and Username.
- The Username defaults to the entered Email Address but can be changed if desired.
- Remember to SAVE when the data entry is complete.
- When saved, a Password Reset email is sent to the email address entered. This link is valid for 48 hours.
3. If a new link is needed or a Password is lost, click on the blue RESET PASSWORD link. This link opens a confirmation box and displays the email address where the reset request will be sent.

Click HERE for more detailed information on adding and maintaining Supplemental Users.
4. In Configuration > Staff/Users > User Groups, review the Authorized Reps User Groups MENU OPTIONS. The default is no application menu access. If desired, Staff Users may also be added to the Authorized Representative User Group.
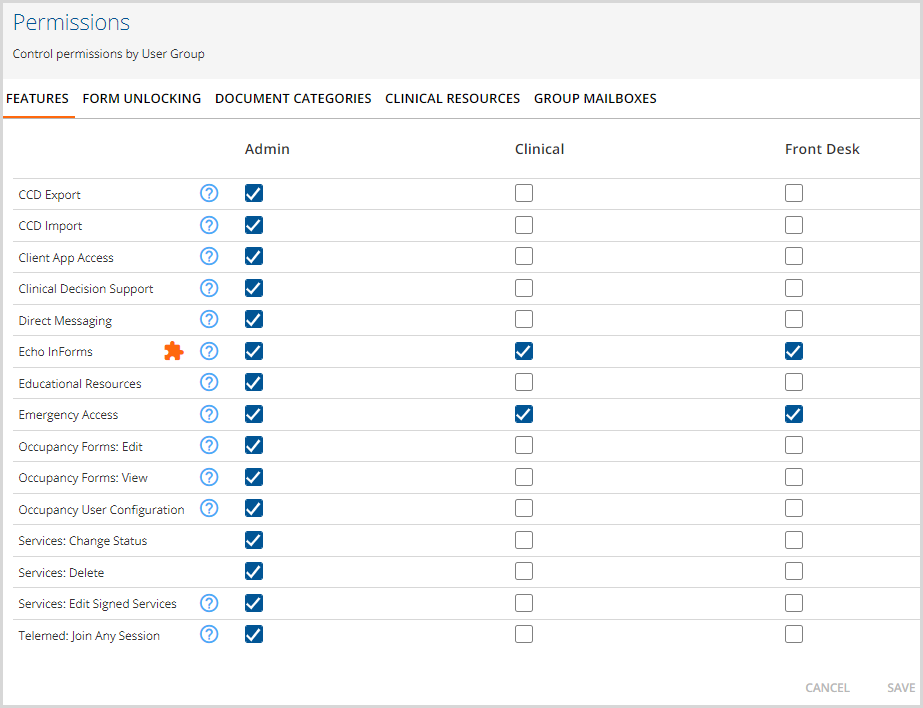
5. In Configuration > Staff/Users > Permissions > Features, enable the Occupancy User Configuration feature permission for the appropriate User Groups. A user must have this Feature Permission enabled to associate an authorized representative with a space.
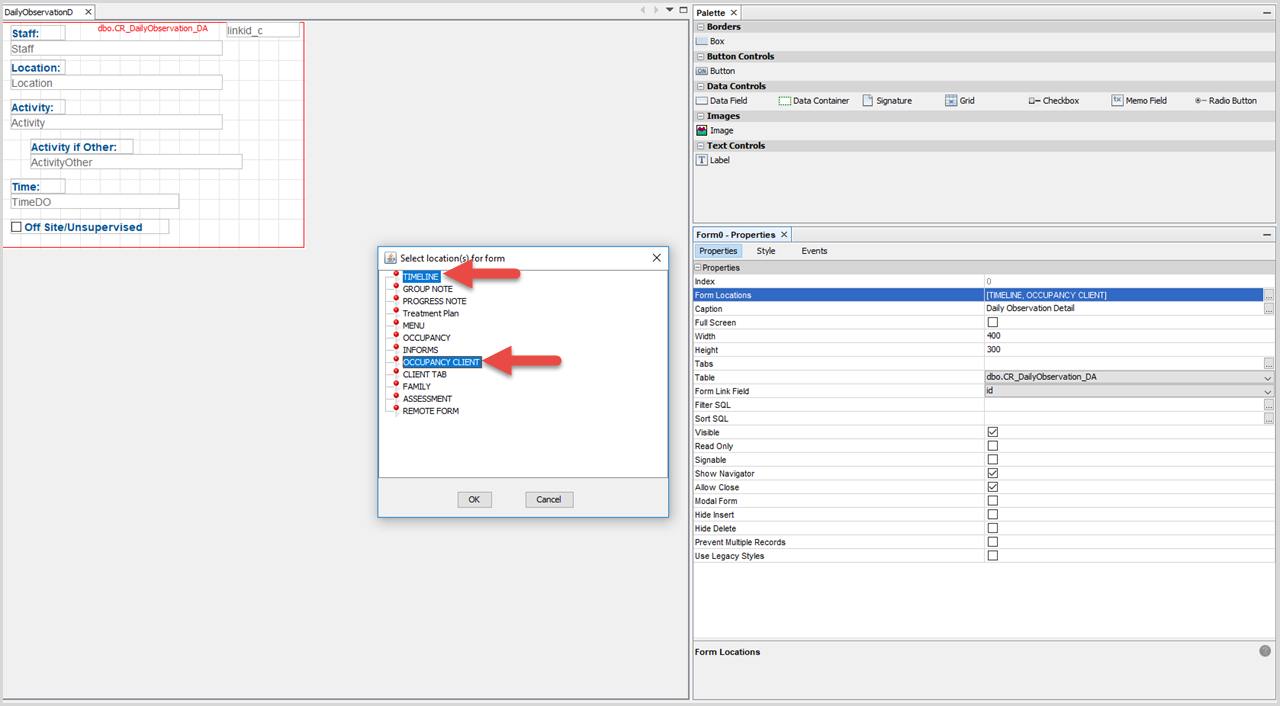
6. Determine the forms to be accessed from the Client Portal.
- These forms must be tagged with the location of OCCUPANCY_CLIENT in addition to Timeline in Form DesignEHR.
-
7. In Placements > Occupancy, assign Authorized Representatives to a Space by selecting the overflow menu (three vertical dots) and then USERS.

- A Configure Users modal displays.
- View and edit existing Users in this modal.
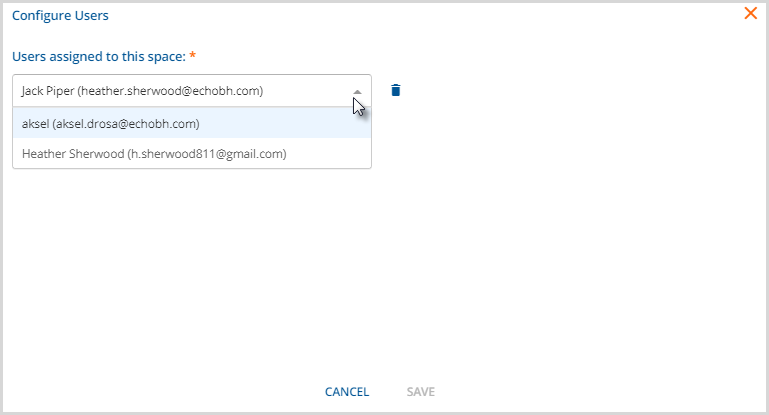
- Adding a User to a Parent space also grants access to all Child spaces of that Parent.
- To limit a user to a specific Child space or Child spaces, expand the Parent space and select the the overflow menu and then USERS for the desired Child space. Repeat for each desired Child Space.

Accessing and Navigating the Client Portal as an Authorized Representative
Navigate to https://<domain_name>/portal to access the Client Portal login screen.
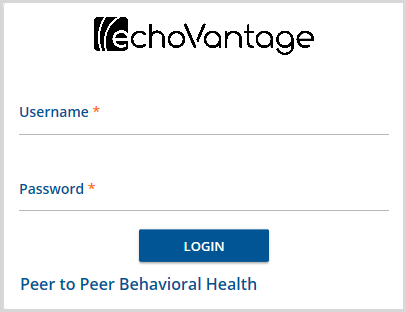
After logging in, Authorized Representative users see a Home link on the main navigation panel. If the user has access to a Space that has a Client or Clients assigned, a row displays for each Space with a card for each assigned Client in the associated row.
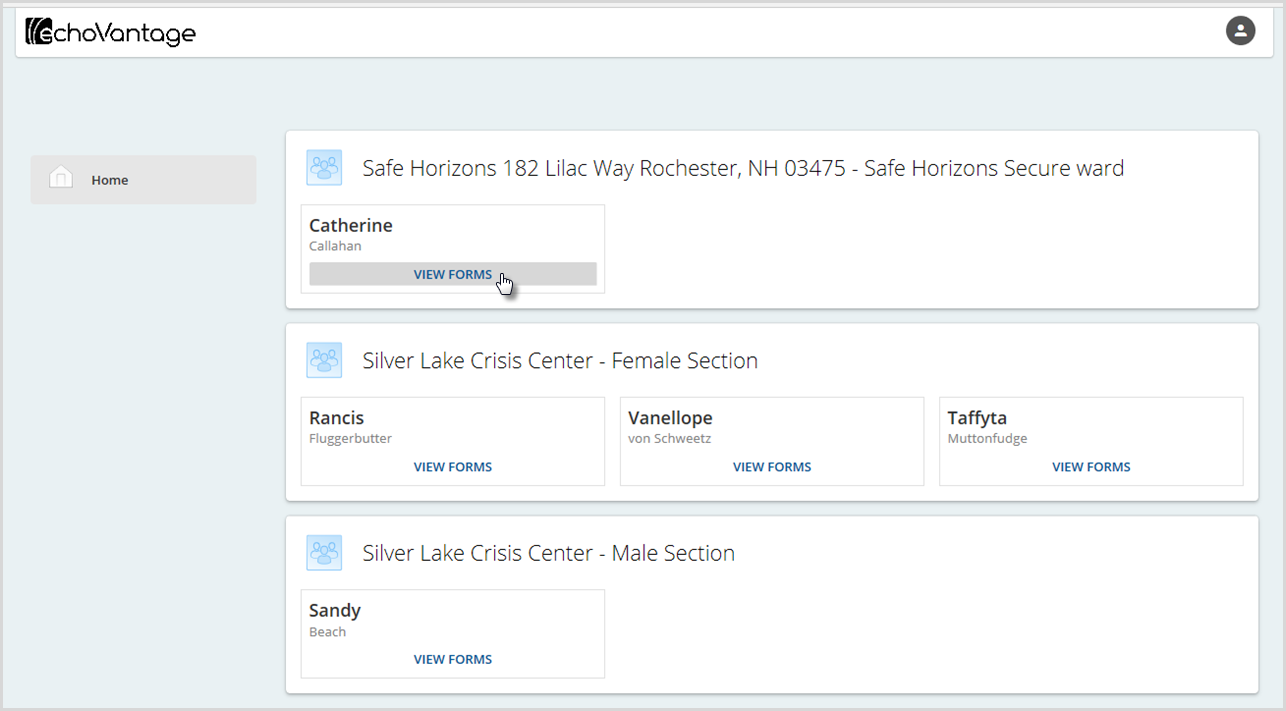
Click on the blue VIEW FORMS to access the forms for the selected Client.
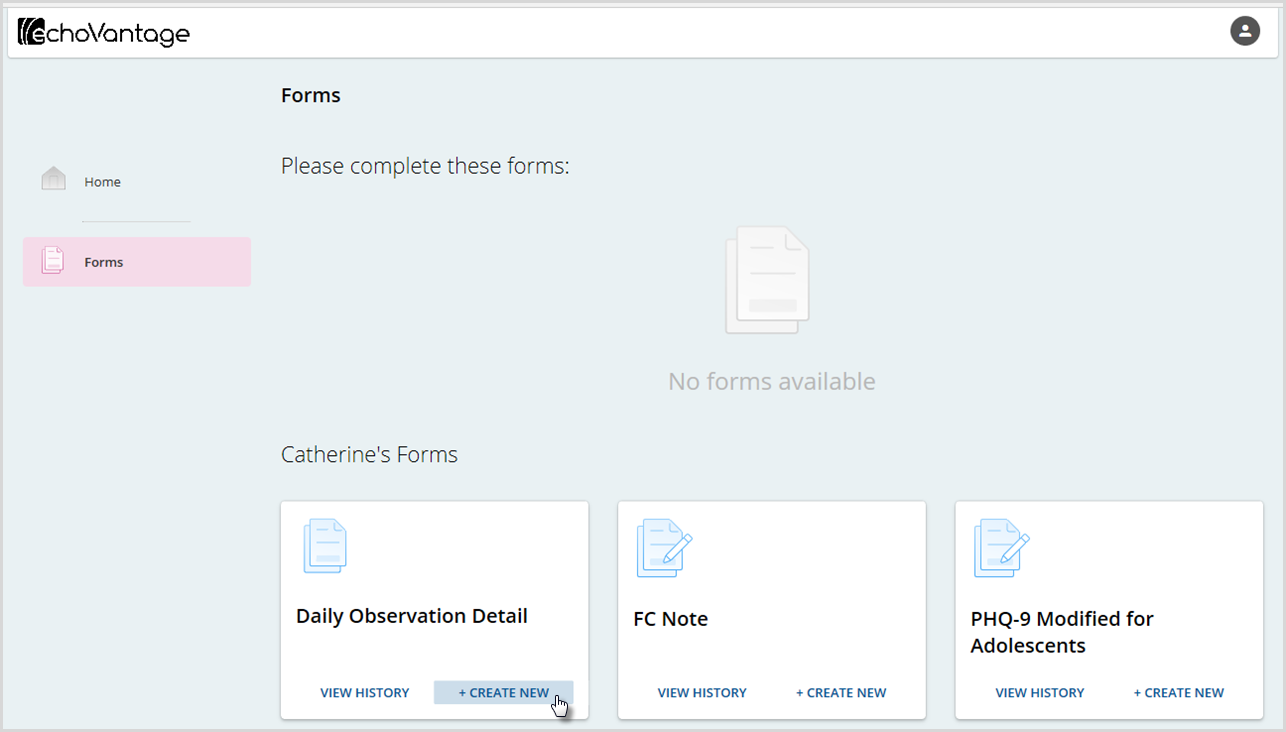
Create a new form by selecting the blue + CREATE NEW button of the desired form. View previously completed forms by selecting the blue VIEW HISTORY button of the desired form. Once a form is SAVED, it is pinned to that space.

An Authorized Representative User can end the session and logout by selecting the person icon in the upper right-hand corner and selecting Logout.
