The Payers tab stores information on the party or parties responsible for payment of a client's claims. Payer information specific to the client is managed on this tab, including but not limited to Policy Number, Group Number, Priority, Copays. This tab stores information for multiple payers.
For help with screen navigation and data entry, click HERE and view the Card screen information.
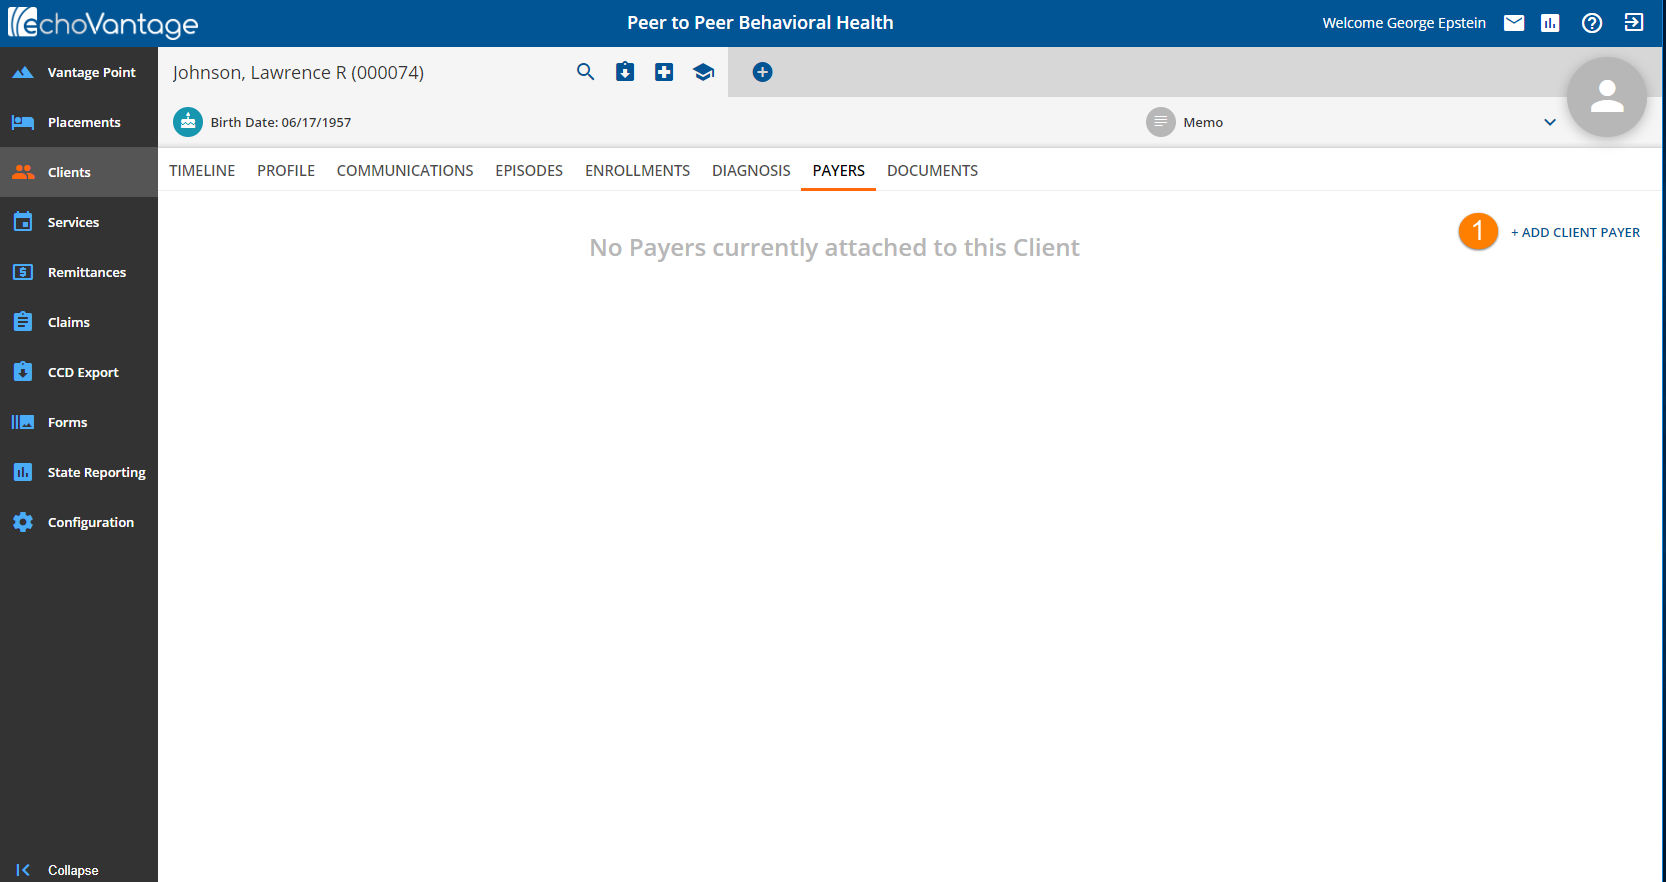
1. Click the blue (+) to add a client payer.
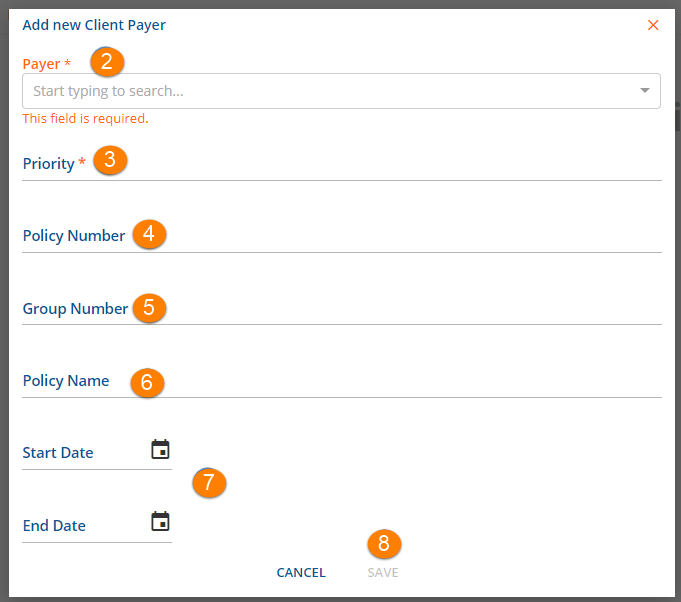
2. Payer* - Select the Payer to be added from the drop-down list. This list is populated by the Payers defined in Configurations>Services/Payers>Payers. To avoid duplication, only Client Payers not already attached to the Client's record are available for selection. *This is a required field.
3. Priority* - This numerical assignment determines the order an original charge moves through the Client Payer list. The lowest "ascending" priority always bills first. It is recommended to leave numerical space between each payer to accommodate future additional Client Payers. The Priority value may be changed however the same value may not be assigned to more than one Payer at a time unless the effective date ranges do not overlap. *This is a required field.
4. Policy Number - This is a free text field up to a maximum of 30 characters.
5. Group Number - This is a free text field up to a maximum of 30 characters.
6. Policy Name - This is a free text field up to a maximum of 50 characters.
7. Start Date/End Date - Enter the Start and End Date of the client's policy. Entry of both the Start and End Date determines the term the insurance is valid = Payers Effective date. The Payer is not active for services received beyond the End Date entered.
8. When the minimum required entries of Payer and Priority are completed, the Save button will be enabled. Click Save to add the Payer.
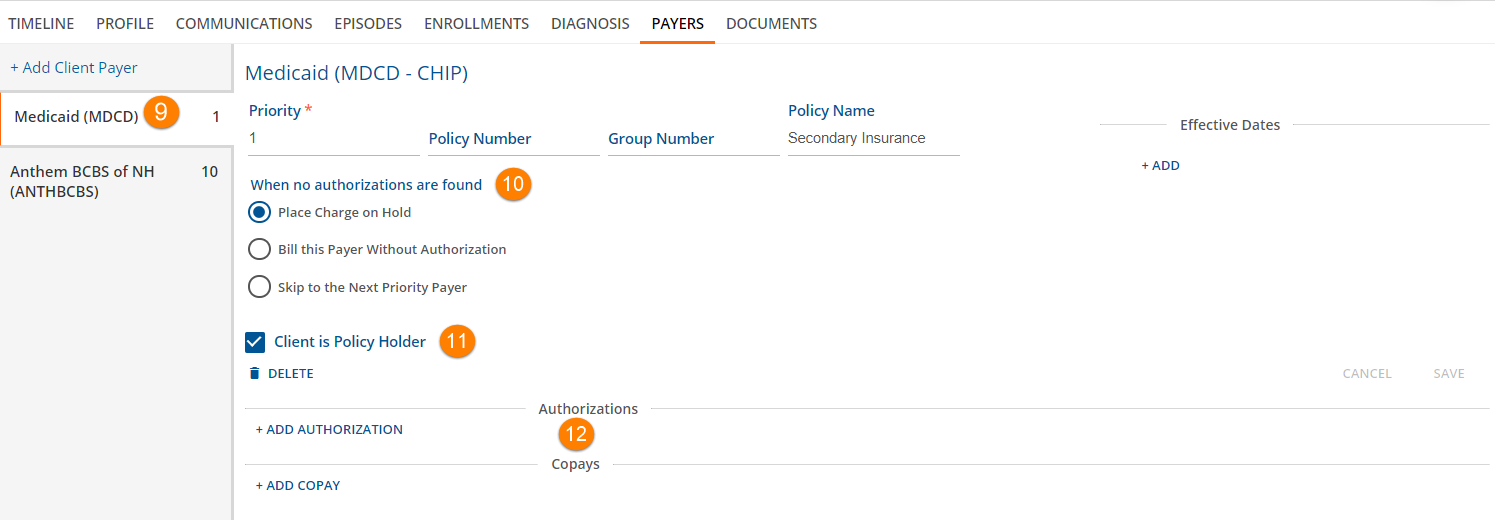
9. To access additional Payer information and/or edit information, click on an existing Payer card. Notice that 2 through 6 above display in a slightly different format.
10. When no authorizations are found - select the appropriate radio button to indicate what should happen to a charge when no authorizations are found. Selecting the Place Charge on Hold will prevent the service from processing until an authorization is entered.
11. Client is Policy Holder - Check box if Client is the policy holder.
12. Click the + Add Authorization or +Add COPAY links to open related cards.
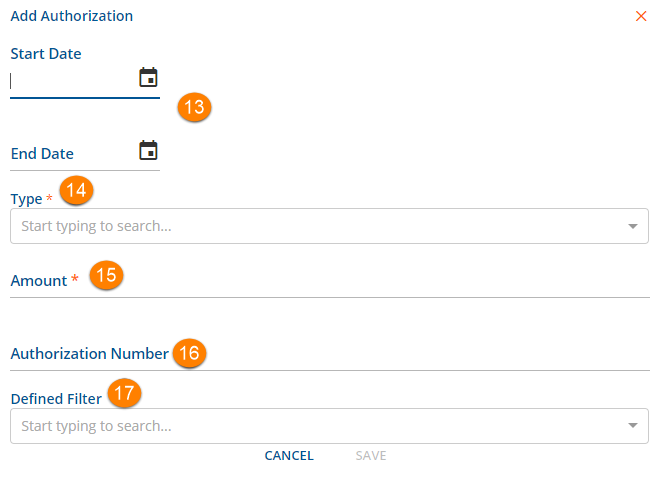
13. Start Date/End Date - This defines the effective period of the authorization. Services received before the start date or after the end date will not have a valid authorization.
14. Type - Enter the Type of Authorization being entered from the drop-down list. The Type selections available are Units, Visits and Dollars.
15. Amount - Amount will be a number or value base on the Type. Visits and Units are numbers. Dollars are an amount.
16. Authorization Number - Enter the authorization number for this client provided by this payer.
17. Defined Filter - Select an option that applies to this authorization. This is not a required field. Defined Filters are setup in Configuration>Services/Payers>Defined Filters. Remember to click SAVE when entry/edits are complete.
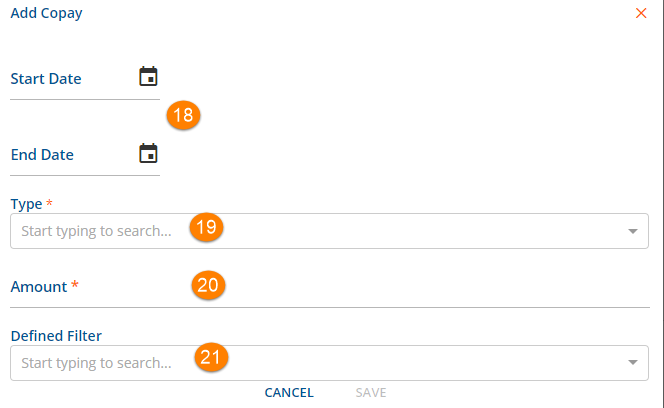
COPAYS - A Client Copay is a convenient way to make collecting a Client balance up-front but whether to enter a Copay amount or not should be given careful consideration. If no deductible will be applied for the services provided for the Client then the use of a Copay is recommended. This Client balance becomes active as soon as the commercial Payer is processed. No further processing affects the Client's balance for that claim. If there is potential for a Client to owe a deductible, or if this is unknown, it is not recommended to set up a Copay but rather accept the Patient Responsibility amount when importing the 835. Without a Copay, the Patient Responsibility amount is exactly what the Client owes for that claim.
18. Start Date/End Date - This defines the effective period of the copay.
19. Type - Select an option that applies to this Copay. This is a required field when a Copay is to be added.
- A Copay applies to the primary or parent service and is not billed for an add-on service.
- Copay Types include:
- Flat
- Percent of Base
- Percent of Expected
- Percent of Remaining Balance
20. Amount - Enter the amount for this copy.
- This is a required field.
- The entry is treated as a value or a number based on the Type selected.
21 Defined Filter - Select an option that applies to this copay.
- This is not a required field.
- Defined Filters are setup in Configuration>Services/Payers>Defined Filters.
- Remember to click SAVE when entry/edits are complete.
