Event Templates
The Event Templates menu function allows users to view, create, and/or edit the templates used when scheduling a Template Event. Templates streamline the group scheduling process by pre-defining the participants and the PLAAR components for the services provided. Navigate to Configuration>Scheduler>Event Templates to view the Event Templates home screen.
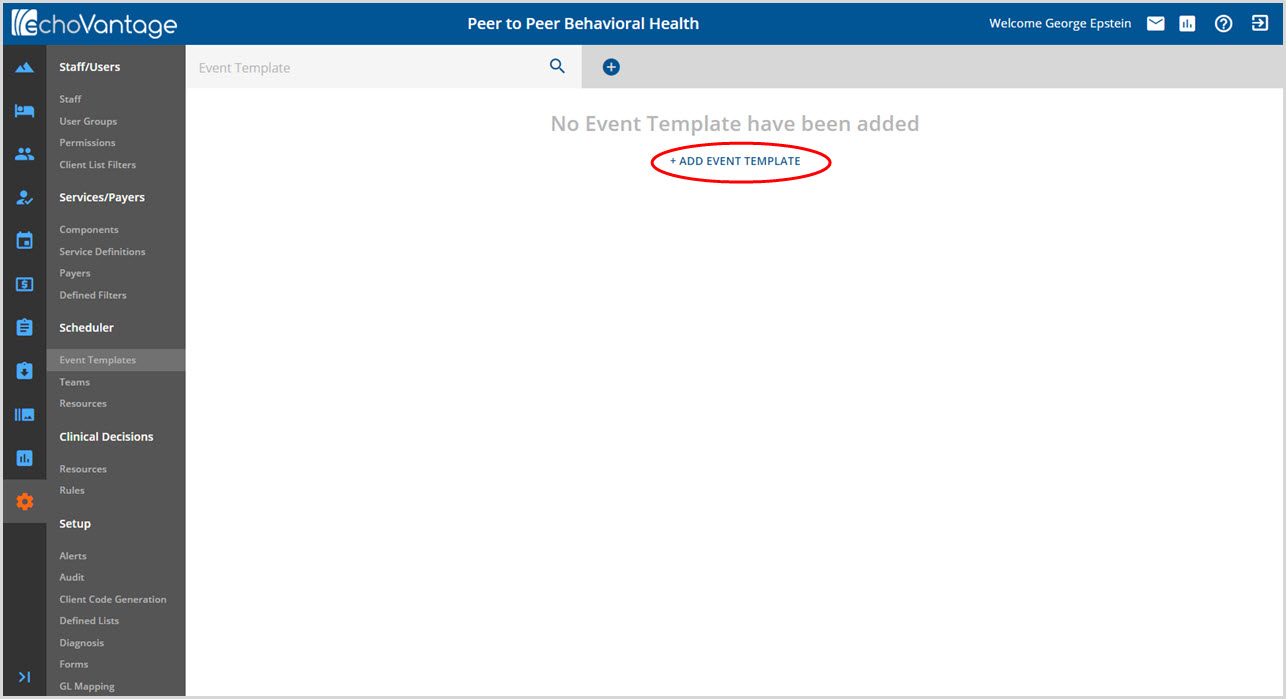
A new install, like the example above, does not have any Event Templates created. To get started, click on the blue + ADD EVENT TEMPLATE.

A pop-up box displays requiring entry of the Event Template Name. Click the blue SAVE to record and to display the following Edit Details screen.
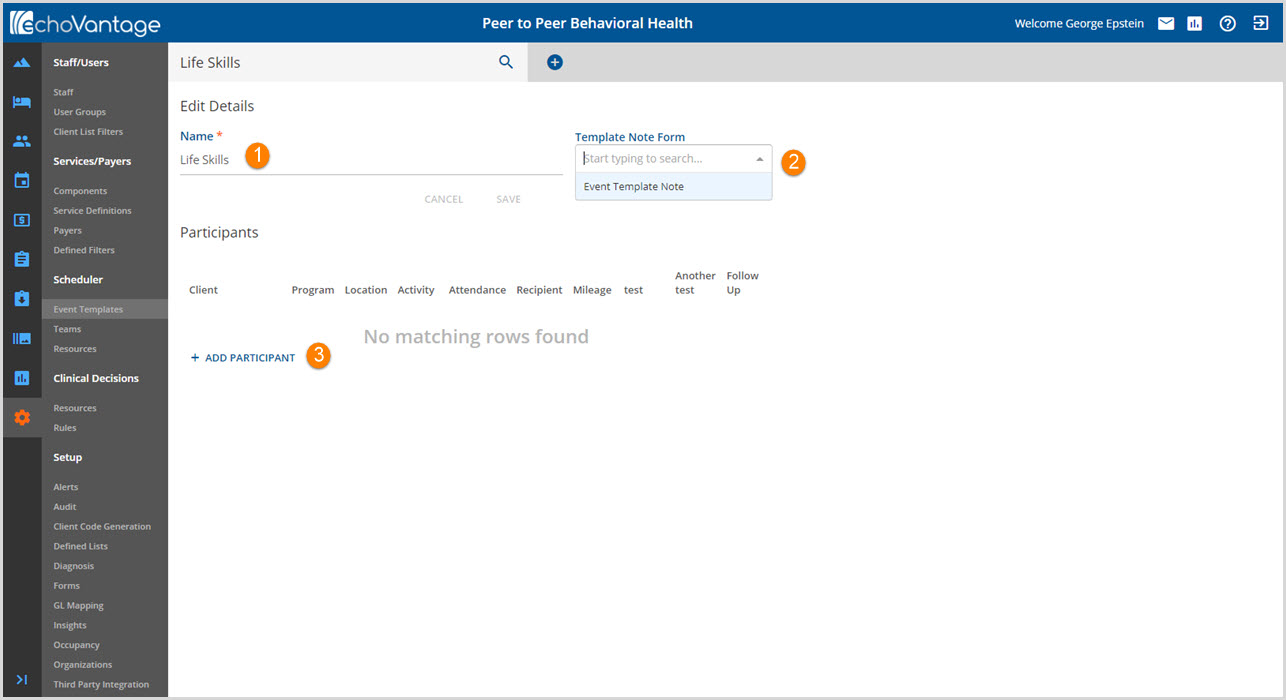
1. Name - The name entered when first adding the template is here. This name is displayed in the Search Bar at the top of the page. All or any portion of the name may be entered to search for an Event Template or scroll through to search once the list is populated.
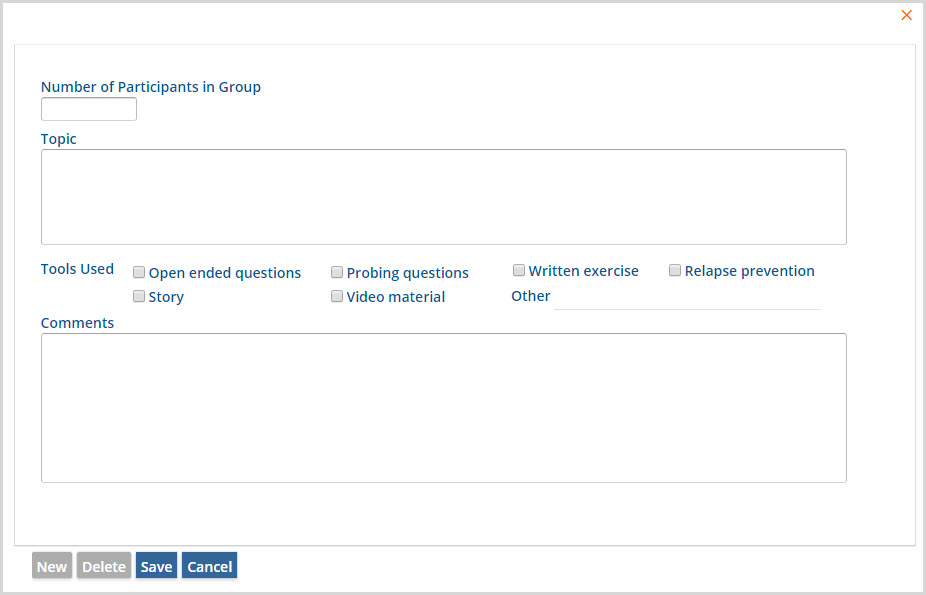
2. Template Note Form - Use the drop-down list to select the Template Note Form to be used. This is similar to a Progress Note used in individual services but provides information and observations on the group as a whole. An example is below. If a template note form created in Form Designer is not showing, check to make sure it is setup as a Template Note.
3.+ ADD PARTICIPANT - Click on + ADD PARTICIPANT to open the Add a Participant screen.
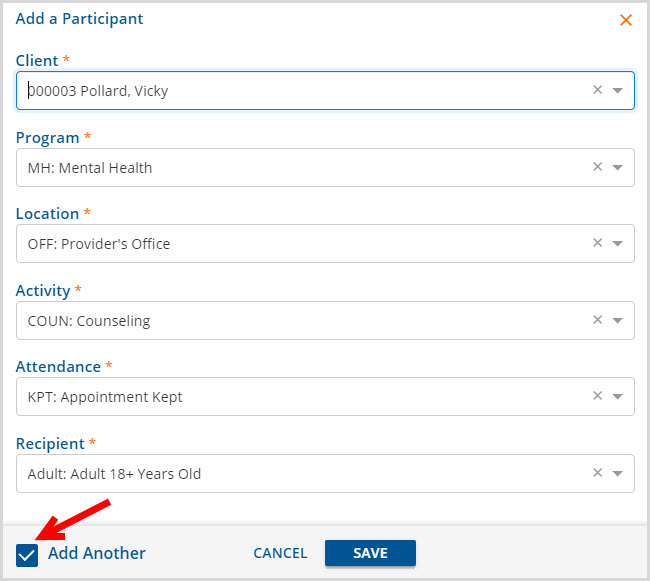
- All fields in the Add a Participant box are required.
- If a required field is skipped, an on-screen warning displays in orange.
- The fields consist of the Client name and the five PLAAR components.
- Use the drop-down list or type in the search bar for full or partial matches.
- Select the Add Another checkbox if an additional Client needs to be added to the template.
- When all required fields are complete, the SAVE button is enabled.
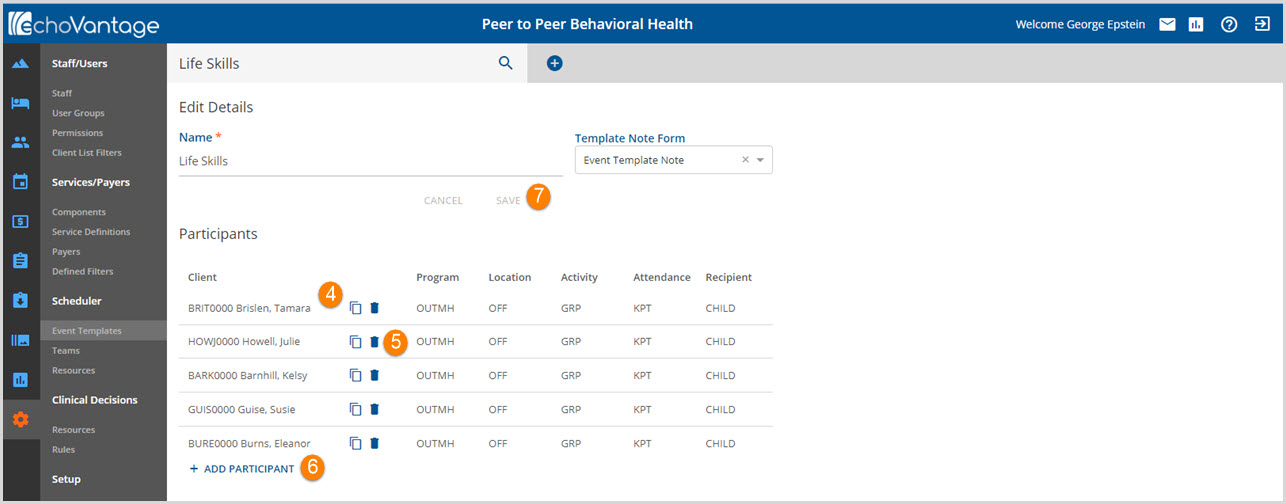
The completed Event Template displays as above when selected in the Search bar or drop-down list. Edits such as the addition or deletion of template participants may be done on this page.
4. COPY - Click on the Copy icon (two papers) to display an Add a Participant box with the same PLAAR information as the currently selected client. Select the name of the Participant to Add and click SAVE.
5. DELETE - Click on the trash can icon to remove a participant from the Event Template.
6. + ADD PARTICIPANT - Click on + ADD PARTICIPANT to add another client whose PLAAR information is different than any of the current participants.
7. SAVE - The blue SAVE is enabled after any changes are made. If a required field is deleted in error, the SAVE will be disabled until the required information is repopulated.
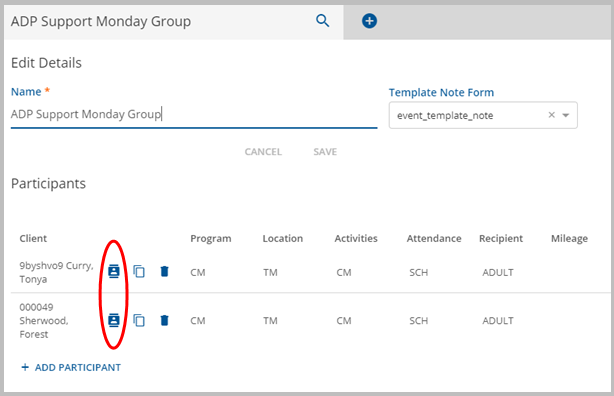
With the release of version 3.10-SP1, an icon was added to provide quick access to a client’s Contact Info tab. This can be used to update the client or client contact of existing template clients before a group session is scheduled. This allows a user to easily correct or update required configuration information if a group Telemed session is being created. An updated image of the Event Template screen is shown below with the new icon circled in red.
