Configuration for the Client Portal takes place within EchoVantage for all required components. The following sections assume that the user is a member of a User Group with the necessary menu access granted.
Group Mailboxes
In Configuration > Setup > Group Mailboxes, set up at least two group mailboxes, one for Appointment Requests and one for Medication Renewal Requests. The group mailboxes are required set up in the Request Management section of the Client Portal configuration page even if the Appointments and My Health components are not enabled.
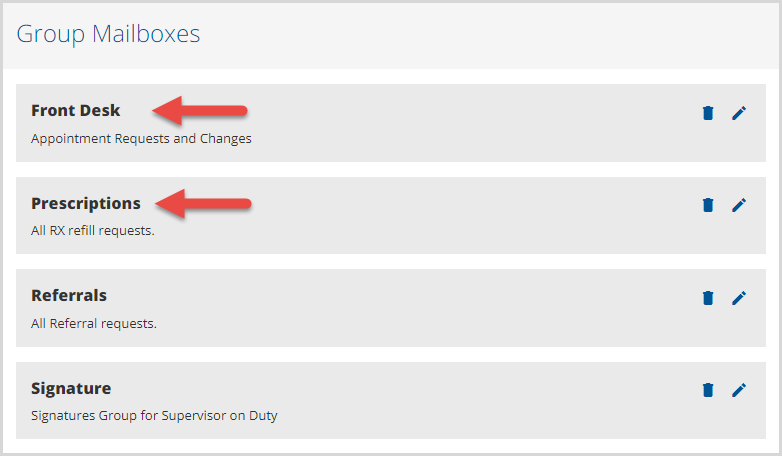
The Front Desk and Prescriptions mailboxes indicated above are used in the next configuration section.
Configuring the Core Client Portal
To configure the core Client Portal, navigate to Configuration > Setup > Client Portal. In version 3.21+ the path is Configuration > Setup > Client Engagement.
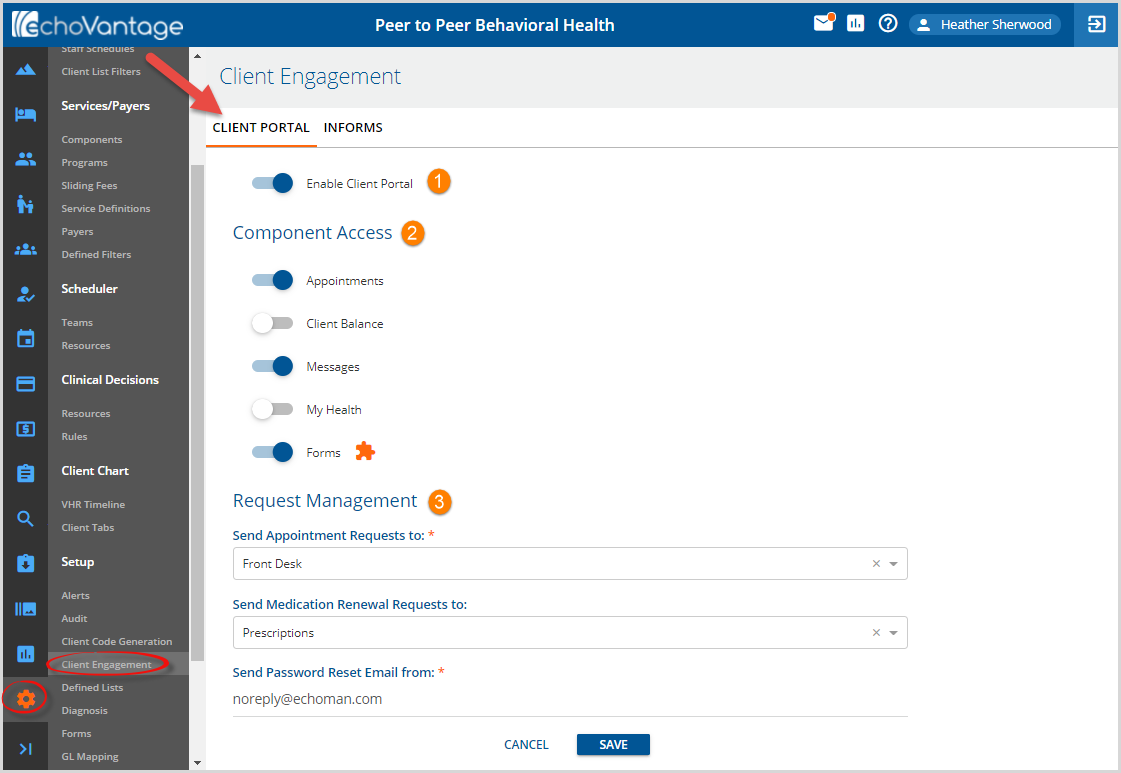
1. Enable the feature by sliding the toggle at the top of the page to the right. Enable or disable each Component Access based on agency needs and select the appropriate group mailboxes in the Request Management section.
2. Enable or disable each Component Access based on agency needs.
3. In the Request Management section, use the drop-down listings to select the group mailboxes to use for Appointment Requests and Medication Renewal Requests. Enter the email address for sending password reset emails.
- If the Appointments Component is not enabled, the Send Appointment Requests to: group mailbox value is not required.
- If the My Health Component is not enabled, the Send Medication Renewal Requests to: group mailbox value is not required.
Click HERE for more detailed Client Portal configuration information.
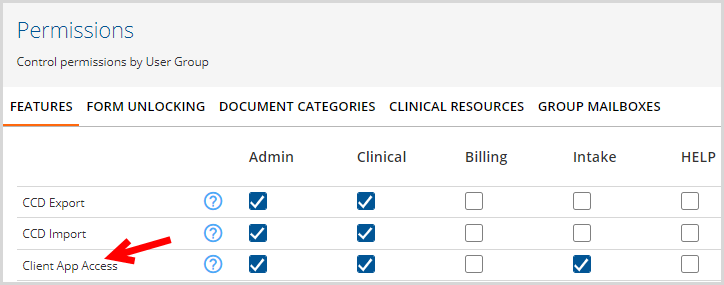
3. Navigate to Configuration > Staff/Users > Permissions and set Permissions for the Client App Access feature and Group Mailboxes.
- The Client App Access permission allows users to:
- Enable the Client Portal Access for clients
- Configure client username
- Reset client password
- Group Mailboxes permissions determine which User Groups have View and Send access to the Appointment Requests and Medication Renewal Requests Group Mailboxes. This step may be skipped if the Appointments and My Health portal components are not enabled.
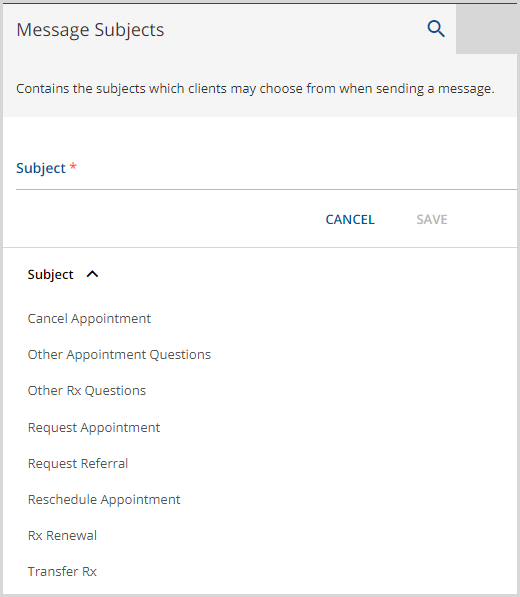
4. In Configuration > Setup > Defined Lists, the Message Subjects defined list must be populated if the Appointments and My Health portal components are enabled. This list contains the agency created subjects that Clients may choose from when sending a message from within the portal.
Enabling Client Access
Client Portal access is enabled on a per-client basis. Staff must be a member of a User Group with the Client App Access permission to perform these steps.
1. Navigate to the desired client.
2. Select the Contact Info page to verify that the client has an Email address listed. The email address listing in the Portal Account Setup screen pulls from the Client’s Contact Info.
3. Select the blue Configure Client App Access icon (computer monitor) in the Client header.
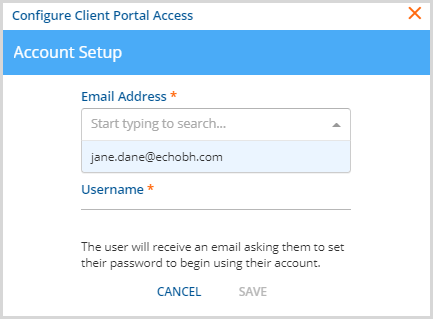
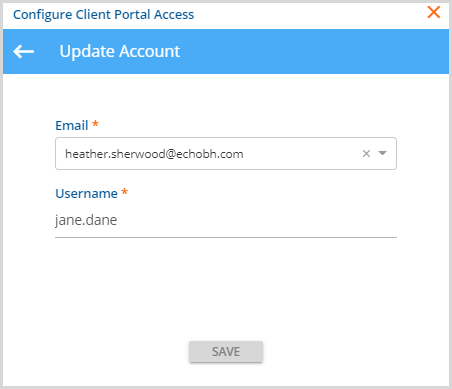
4. Select the Client’s Email Address from the drop-down listing.
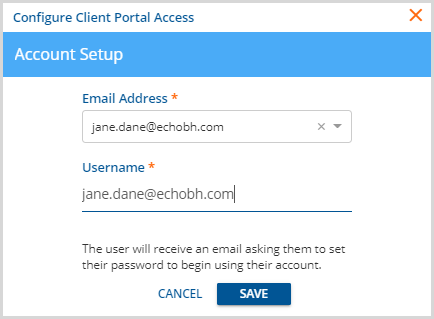
5. The Username defaults to the Email Address but can be changed if desired.
- Using the email address for the Username is recommended because it is often unique and is easy to remember.
- If the Username entered is not unique, a Violation of UNIQUE KEY constraint error displays. A different, unique name must be entered for the SAVE to be successful.
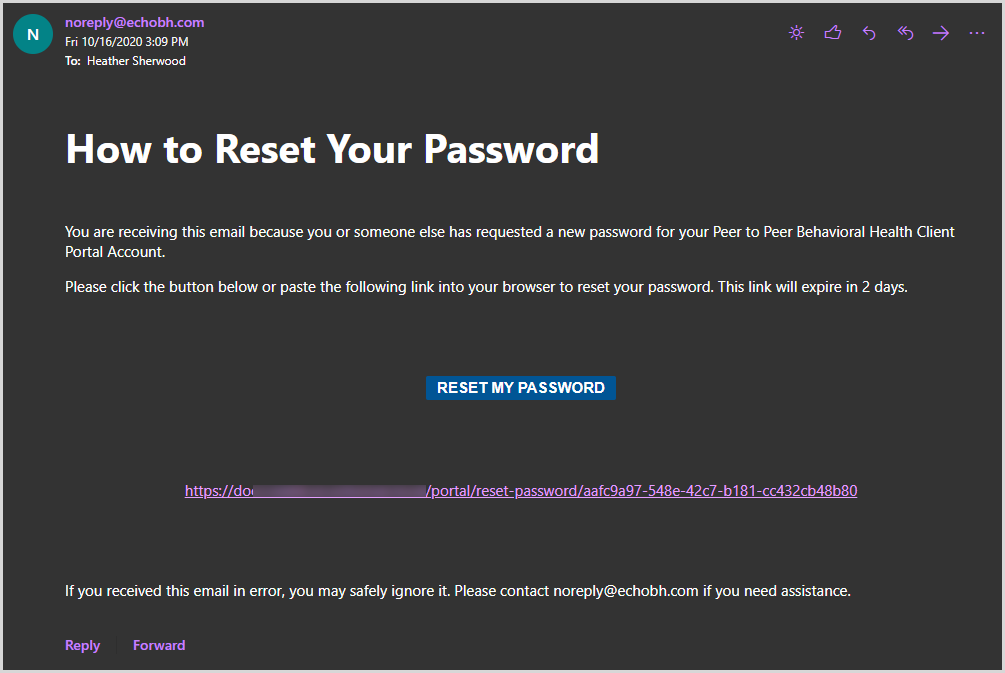
6. Clicking SAVE sends a password reset email to the client, similar to the example above.
Managing Client Access
To manage Client access to the portal, select the computer monitor icon in the Client Header again to display the Configure Client Portal Access screen. (Shown Below.)
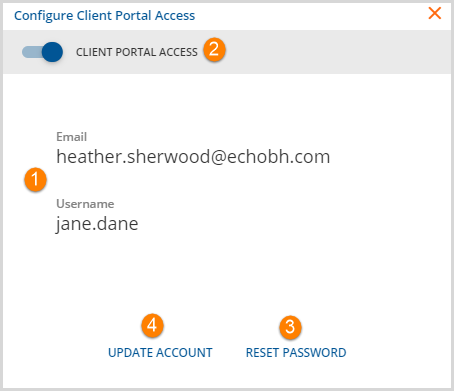
- The client’s Email Address and Username currently configured for the Portal are displayed.
- The Client Portal Access switch can be toggled to disable the client’s access.
- The Username and Password are preserved.
- Slide the toggle to the right to grant access again.
- Click on the blue RESET PASSWORD to send a password reset link to the displayed email address. The password cannot be entered manually or otherwise specified for a Client.
- The client password reset emails contain a link to the password reset page in the portal.
- When the password is reset, the client is redirected to the Portal Login screen.
- The client may want to bookmark the login page for easy future access.
- Click on the blue UPDATE ACCOUNT to make changes to the active email address or username.
- Changes to either of these do NOT require a password reset but the new Username must be provided to the Client.
- The screen is very similar to the initial configuration screen.
-
