Client Tabs is available with the release of version 3.12. This feature allows an agency to:
- Create custom client tabs
- Add custom forms to custom tabs
- Add custom forms to the following core tabs:
- Profile
- Episodes
- Enrollments
- Change the display order of any client tab
Before creating Custom Client tabs and forms, the Custom Form Standards for Client Tabs guide and the EchoVantage Database Standards guide should be reviewed in detail. These guides cover the necessary form locations, primary key recommendations, required columns, and how to create custom versions of core forms. Please click on the following links to view these documents:
Creating Custom Tabs
Permissions to the Client Tabs menu option is managed in Configuration>User Groups>Menu Options. The user must be a member of a User Group that has permission to the Client Tabs menu option. To get started, navigate to Configuration>Client Chart>Client Tabs. The following screen displays.
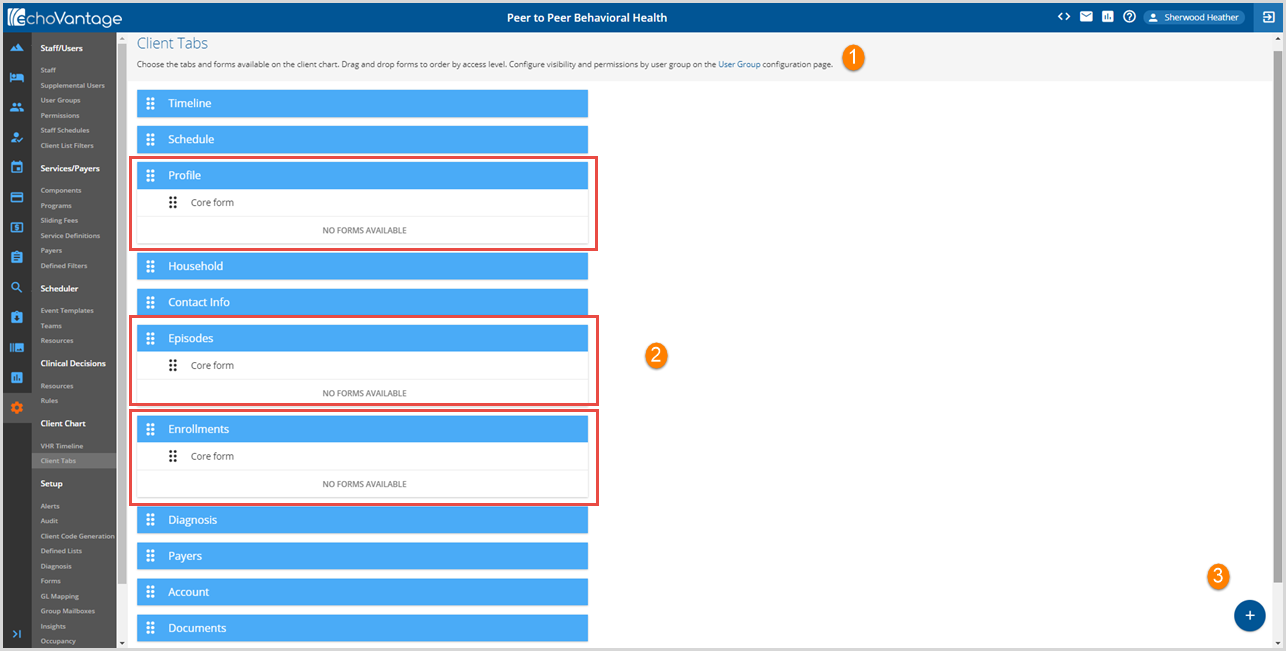
1. Help text is available at the top of the screen with a convenient link to the User Groups configuration menu to view and edit tab and form Permissions.
2. The Profile, Episodes, and Enrollments tabs (circled in Red) are the three core tabs that may be edited.
- Each Core tab has a Core form.
- Core forms should not be edited or repurposed.
- The standards guide recommends a copy of the core form be used to create a custom version.
- Core forms may not be dragged and dropped to a new tab location.
3. Click on the blue plus "+" to add a new custom tab. All current tabs will be temporarily disabled and the cursor will be placed in the label area of the new tab.
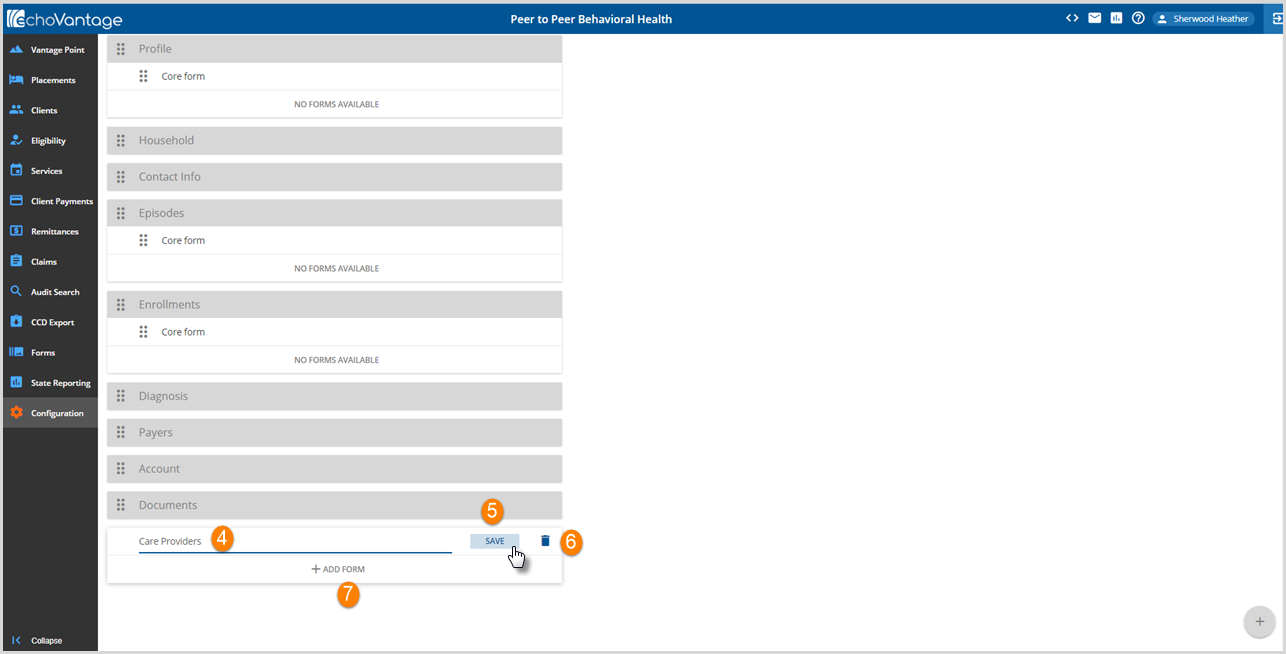
4. Enter the name of the custom tab. This free text label field is required and can be up to 30 characters.
5.Click the blue SAVE to add the custom tab.
6. The Delete icon, blue trash can, can be used to remove a custom tab no longer needed.
7. + ADD FORM is available once the tab is created AND custom forms have been tagged with the location of CLIENT TAB.
Adding Forms to Tabs
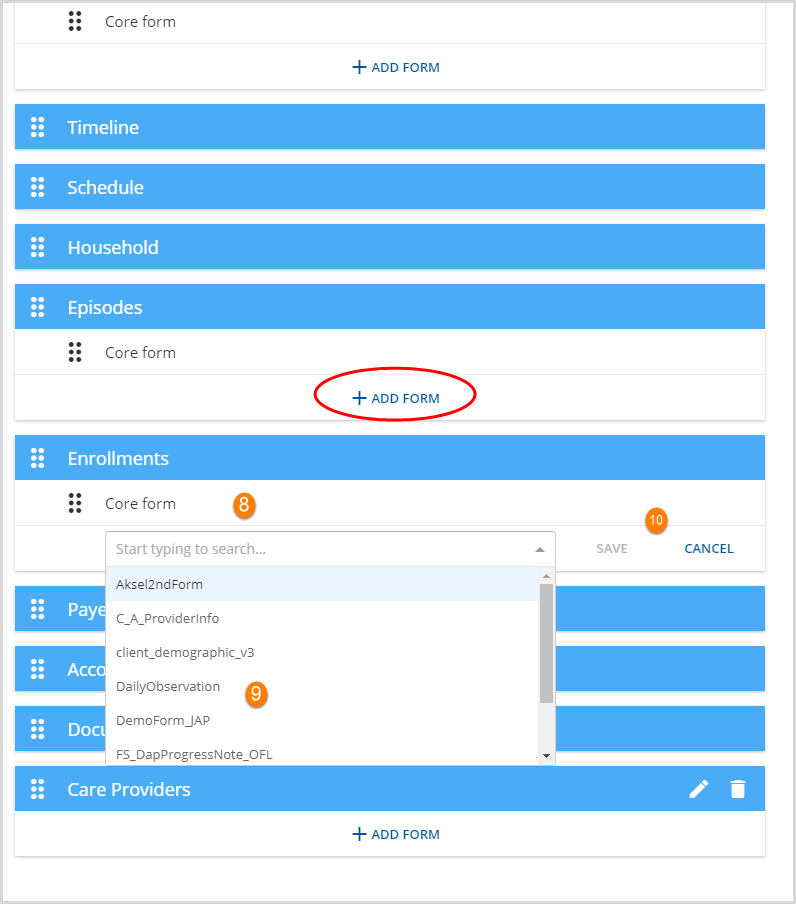
8. Clicking on the blue + ADD FORM button (circled in red) opens a drop-down listing of Form DesignEHR forms tagged with the CLIENT TAB location.
9. Click to select the form to add to the tab.
10. Then select SAVE to add the form to the tab. Select CANCEL to exit without saving changes.
Reordering Tabs and Forms
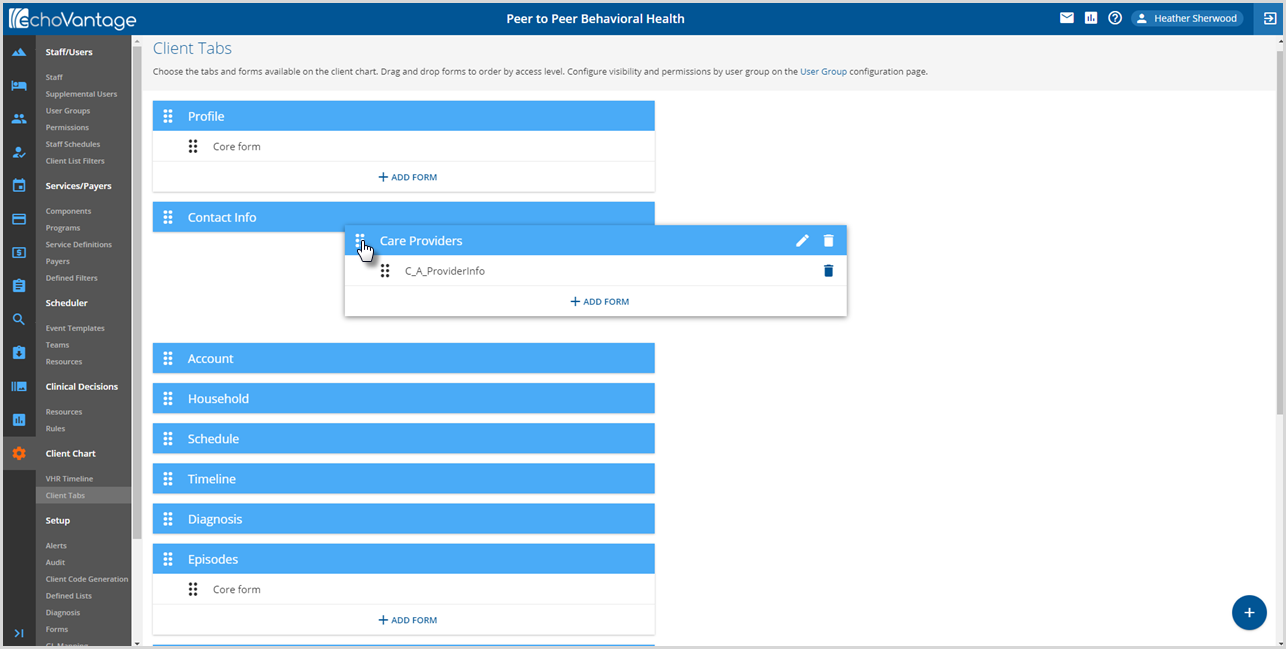
Tabs and custom forms can be reordered by dragging and dropping the tab header or the custom form header. Simply click on the double ellipsis (6 white dots to move a tab OR 6 black dots to move a form) and drag the tab or form to the new location. Note that only custom forms can be relocated to a different tab; core forms may not be moved.
Form Access Levels and Permissions
Custom forms added to a tab are displayed in access level order. Forms can be dragged and dropped to reorder a form's access level. Access level is used to determine which form a user has access to when they are a member of more than one User Group AND these User Groups have permissions to different forms on the same tab. The user will have permission to access the form with the highest access level. Click HERE for detailed information on configuring User Group Menu Option Permissions.
A client Profile tab with custom versions of the demographic form is shown below:
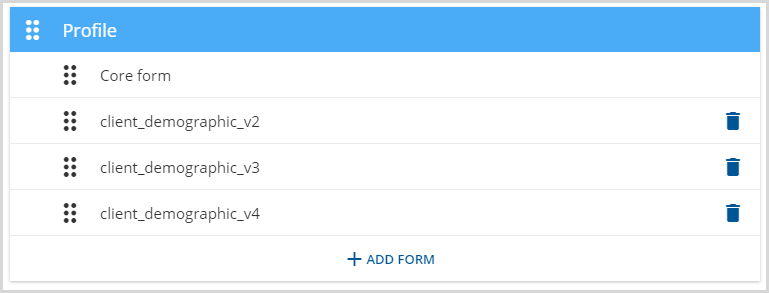
- The Core form is in the highest access level position.
- The client_demographic_v4 is in the lowest access level position.
If a user is a member of:
- User Group A with Edit permission to client_demographic_v3 in Menu Options AND
- User Group B with Edit permission to client_demographic_v2 in Menu Options
Then the user can view and edit the client_demographic_v2 on the Profile tab because it is the form with the highest access level.
If the client_demographic_v2 is deleted from the Profile tab, then the user can view and edit the client_demographic_v3 because it is now the highest access level form (and now only form) the user has permission to view and edit.
If the client_demographic_v3 form is deleted from the Profile tab, then the user will no longer have access to the Profile tab because permission to a form on the Profile tab is no longer explicitly defined in Configuration>Staff/Users>User Groups>Menu Options. A user can not have permission to a Client tab without permission to a form on the tab also being assigned.
Editing and Deleting Tabs and Forms
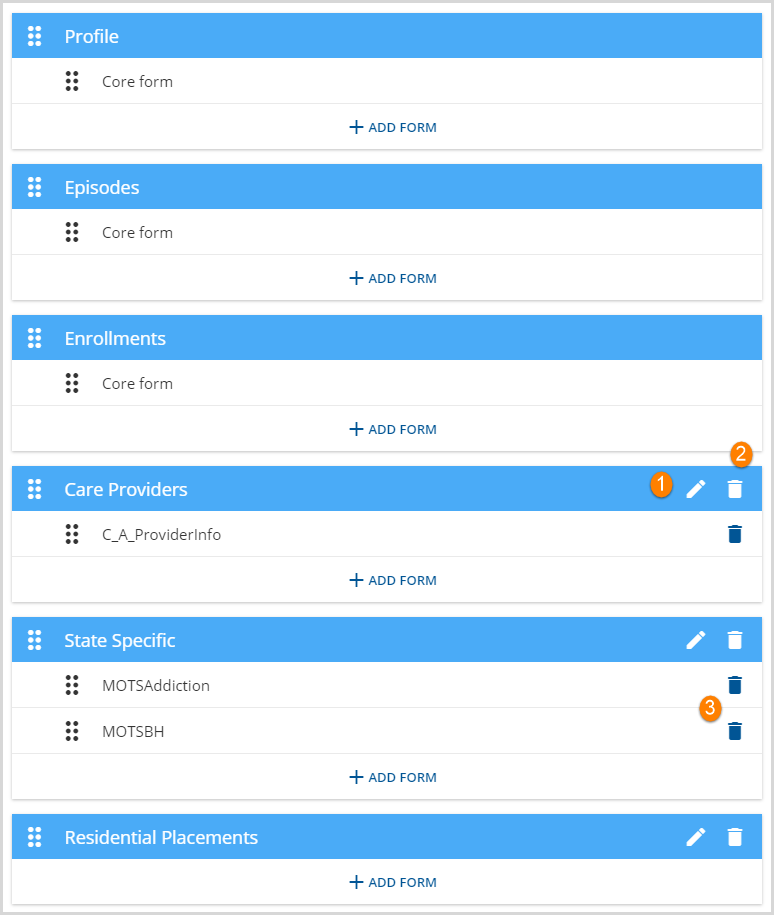
1. A custom tab name may be changed or updated by clicking on the edit icon, white pencil.
- The selected header line changes to edit mode, shown below, with the options to SAVE or CANCEL.
-

2. A custom tab may be deleted by clicking on the delete icon, white trash can.
- This removes the tab and any forms currently associated with that tab.
- Existing form data is still stored in the database.
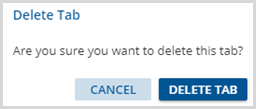
- A Delete Tab confirmation box displays when delete is selected.
-
3. A custom form may be deleted from a tab by clicking on the delete icon, blue trash can.
- This removes the form from the tab.
- Existing data is still store din the database.
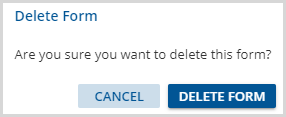
- A Delete Form confirmation box displays when delete is selected
-
Custom forms can be reordered within a tab and between tabs. Edits to the form content itself are made using Form DesignEHR.
