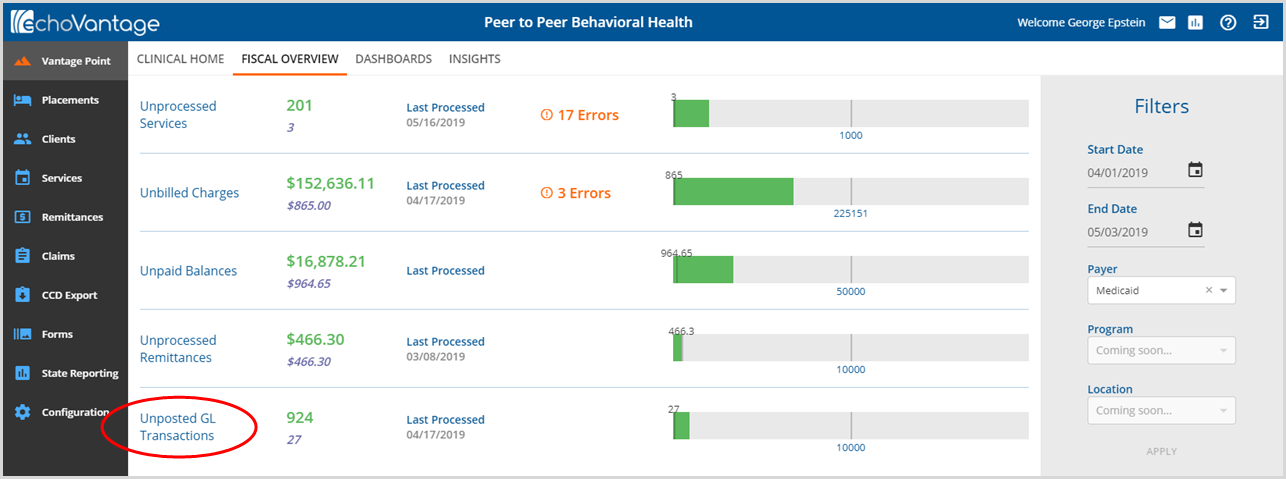
The number of Charges, Payments, Adjustments, and everything else not posted to the GL is displayed as a number count in the Unposted GL Transactions function in the Fiscal Overview. EchoVantage does not offer a General Ledger module but allows the capability to export the billing and remittance information, as well as the resulting balance adjustments and write offs, based on the mapping entered in Configuration>Setup>GL Mapping.
CREATE
Selecting Unposted GL Transactions defaults to the Create page.
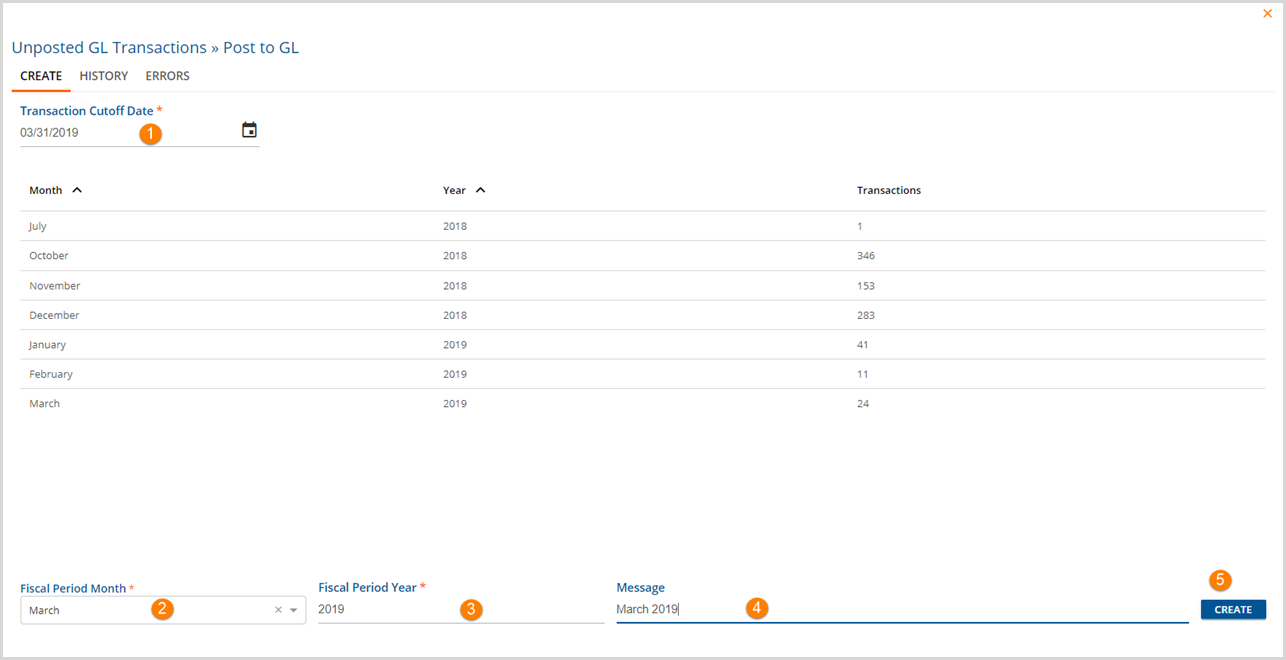
1. Transaction Cutoff Date - Enter the Transaction Cutoff day and press enter to display a list of transactions to post by month, year and number of transactions.
2. Fiscal Period Month - Enter the month of the Fiscal Period that is to be posted. This month must be within the Transaction Cutoff Date. An error box will display if you choose a month that does not fall within this parameter.
3. Fiscal Period Year - Enter the correct year that corresponds to the Fiscal Month that is to be posted.
4. Message - Enter a unique and descriptive message for the posting job being created. (Recommended)
5. CREATE - Once tasks 1 through 4 have been completed, the blue CREATE button is enabled. Click to create the posting job.
*Note - more than one GL Posting Job may be created for a period but only one Job may be in process at a time. A job needs to be either Finalized or Reversed on the History screen before a new job can be Created.*
HISTORY

1.The History tab lists all of the jobs Created for GL posting. History is the open tab as indicated by the orange horizontal line.
2. Filters are available to narrow the list down by:
- Start or End Date
- User
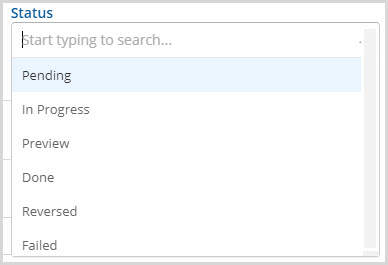
- Status
3. Selecting the Date column will sort the rows below in ascending or descending order. This is the create date of the GL Posting job.
4. Status indicates where in the posting process the job is currently in.
- Pending - Job has been created and is waiting to be picked up by billing processing service (OAK).
- In Progress - Job is being processed.
- Preview - Job processing is complete. Options to Finalize, Reverse, or Retry are available.
- Done - Job has been Finalized.
- Reversed - Job has been reversed. These transactions are returned to the GL Create screen as if they had never been selected.
- Failed - Processing was not completed, the job was not able to Finalize.
5. Transactions and Errors columns give job detail information.
- When job has Preview status, a blue icon exists to choose Finalize (if no errors), Retry (reprocesses after Errors have been corrected), or Reverse (to return transactions to GL Create screen).
- To view Errors, the job must be selected on the Errors tab.
6. All Done and Preview Status jobs have a Report icon and a CSV download icon.
- The Report is a user friendly view of a GL Audit Report.*
- The CSV download is used to import the Transactions into the organization's General Ledger application.
* In the release of EchoVantage version 3.09, the GL Audit Report was redesigned to include the Client Name and Service Date to help troubleshoot posting errors. This provides enough information to identify the component codes related to the error(s) to help determine what may be missing in the GL Mapping. An example of the updated report that has a missing Account is shown below.

A sort by filter is available to run this report by:
- Account then Payer (default)
- Payer then Account
ERRORS
The Errors tab allows users to select job and view Errors and all other Messages (Info and Warning) if desired.
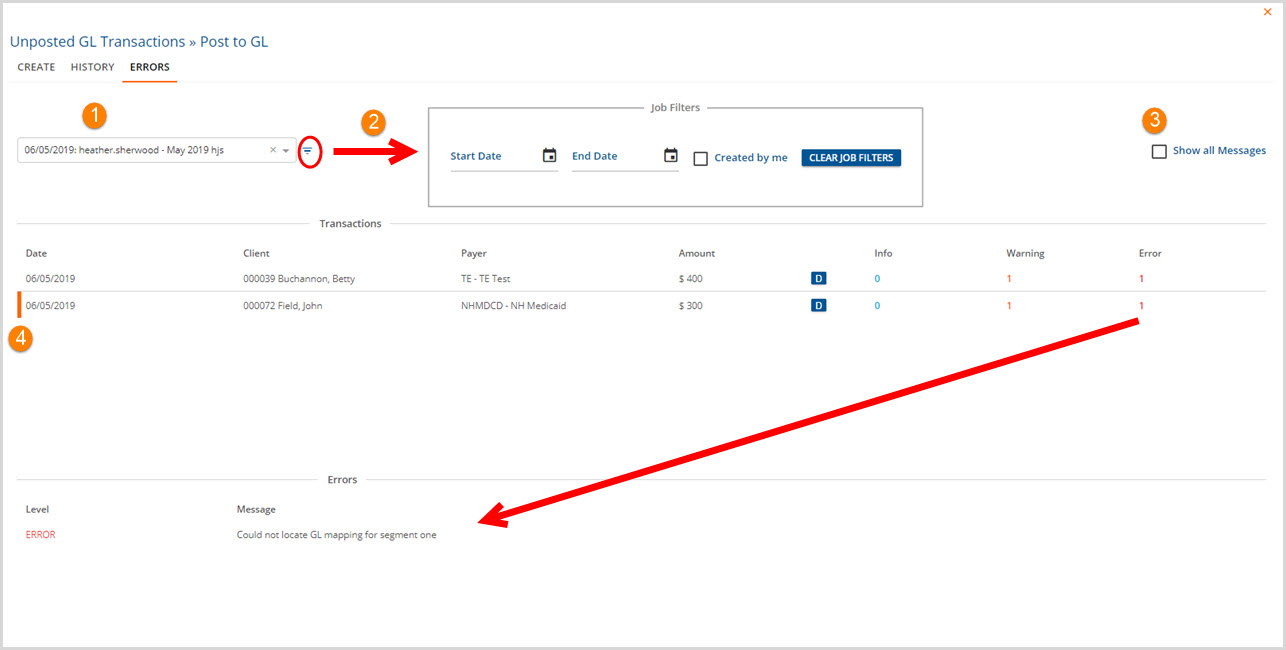
1. Select a Post to GL job from the drop-down list.
2. Select the Filter icon to open the Job Filters list to narrow the job search by date and current user.
3. Select the Show all Messages check box to view all Messages in the job including Info and Warning messages.
- For the example above, selecting the checkbox changes the screen display to the following
-
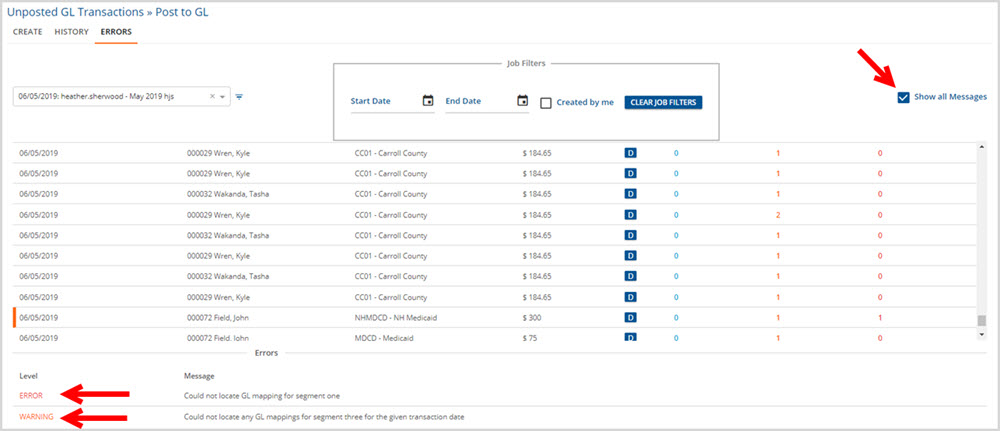
4. The vertical orange indicates the currently selected row.
- Select a row to view Error detail.
- Detail for the currently selected row is displayed at the bottom of the screen.
