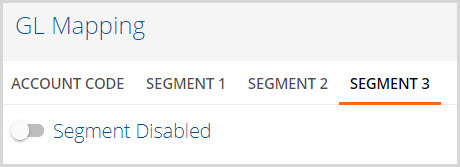
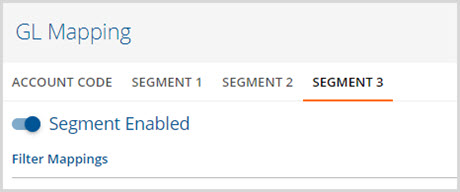
General Ledger Mapping allows organization specific GL account information to be assigned to the Transaction Types that the Post to GL function, found in Vantage Point>Fiscal Overview>Unposted GL Transactions, processes. At minimum a Default GL Mapping setup is required for the Account Code and Segments 1 and 2 to avoid Errors in posting. Completion of Segment 3 is optional. Payer specific GL Mapping may also be configured. A fourth Segment was added in release version 3.0, additional information may be found at the end of this page.
ACCOUNT CODE
**Note** With the release of version 3.12, a Use Balance Sheet Reporting check box is added that reports '000' for Segments 1-4 for all balance sheet accounts. More detail is provided at the end of this section.
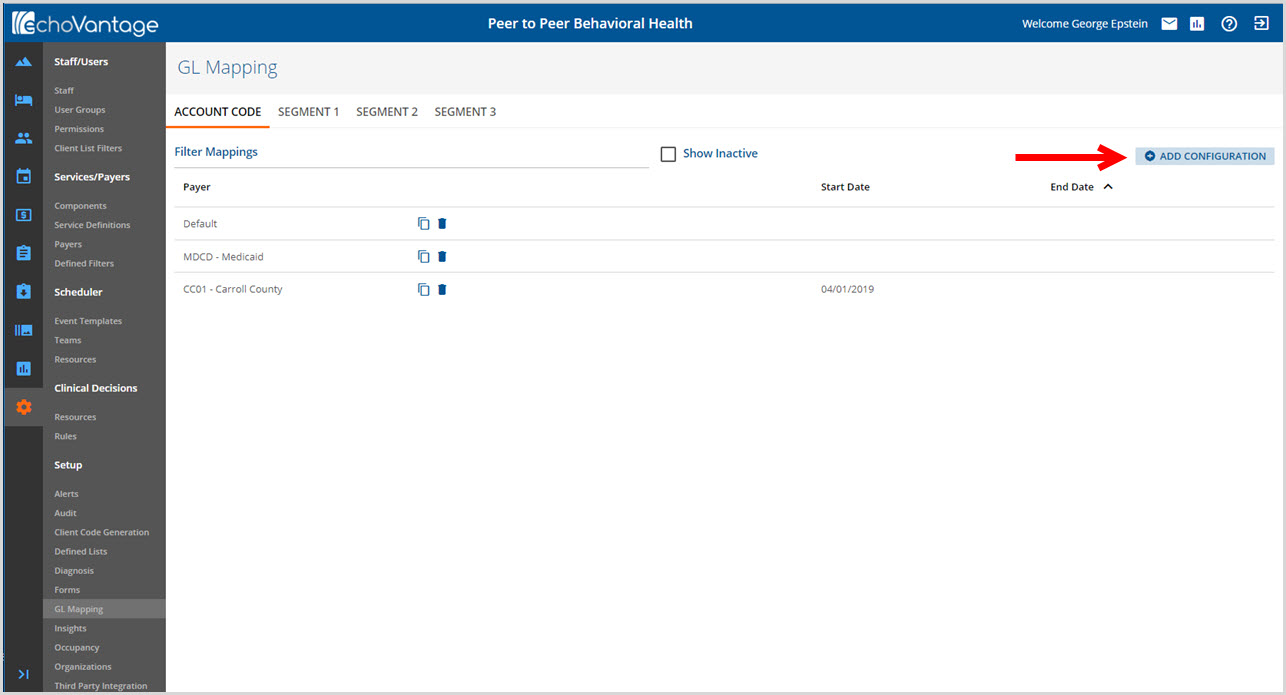
Start by clicking on the blue + ADD CONFIGURATION in the upper right hand corner to open the Add Configuration screen for Account Code.
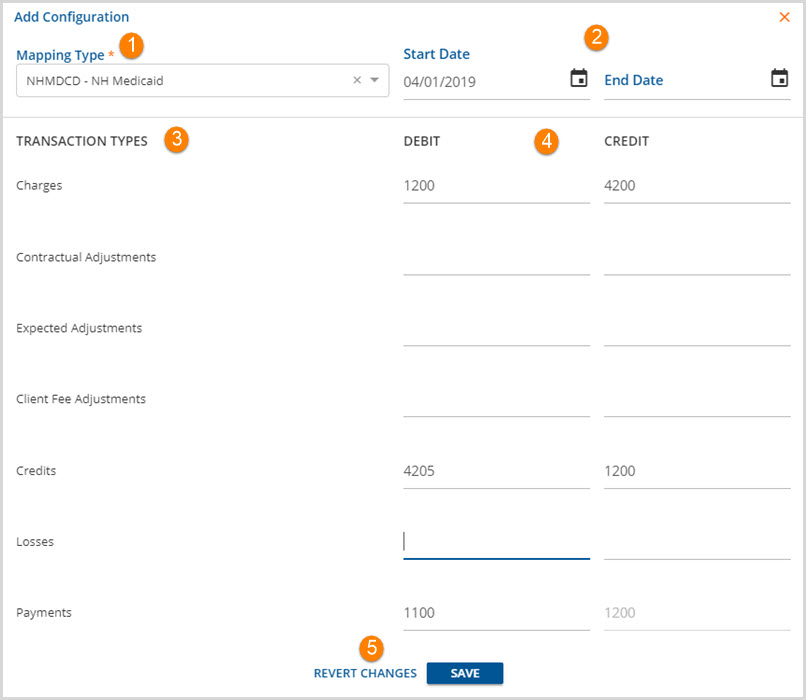
1. Mapping Type - Use the drop-down list to select the Mapping Type. This will be the default or a specific Payer.
2. Start Date and End Date - Use the Start Date and End Date to specify the date range that the GL Mapping configuration is valid in the application.
3. TRANSACTION TYPES - Each Transaction Type can be mapped to GL account numbers. At a minimum the Charges and Payments must be mapped. Mapping the others Transaction Types is recommended to avoid errors/warnings when posting.
4. DEBIT/CREDIT - Account codes are required for both the Debit and Credit entry of each Transaction Type mapped. EchoVantage will automatically populate the Payments Credit account code with the Charges Debit account code or vice versa.
5. REVERT CHANGES - This works the same as CANCEL. All changes are reverted or cancelled and the user may exit without recording edits or entries.
When all desired entries are completed, click SAVE to record Configuration.
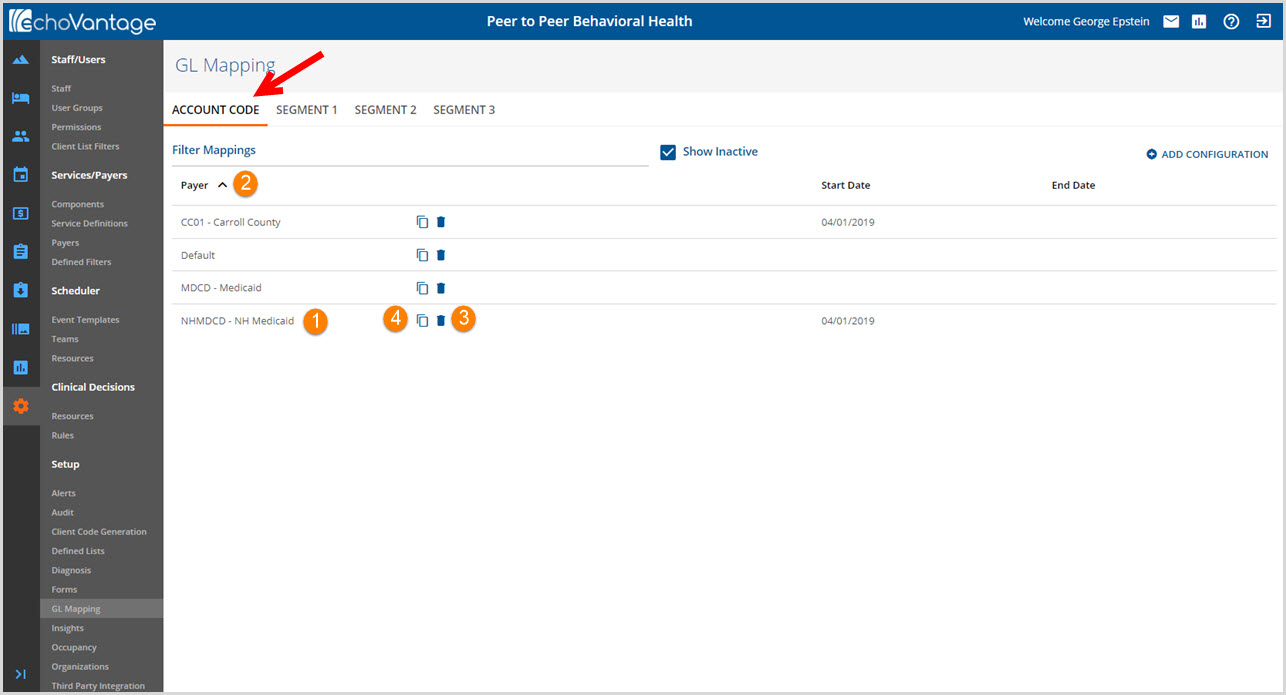
1. After saving, the ACCOUNT CODE Configuration for NH Medicaid displays in the Payer list.
2. As the list of mapped Payers grows, the Payer column can be sorted alphabetically in ascending or descending order by clicking on the filter icons.
3. Click on the trash can icon to delete a Payer's defined GL Map.
4. Click on the copy icon (two pieces of paper) to make a copy of an existing GL Map.
- The Add Configuration screen pops-up with all of the information of the Payer copied.
- Select a new Payer from the drop-down list.
- Click SAVE to record the new Payer configuration.
Use Balance Sheet Reporting

When the Use Balance Sheet Reporting checkbox is selected, Balance Sheet accounts will report '000' for segments 1-4 or for the number of segments that have been enabled. When not selected, the mapping for each segment is used for both Balance Sheet and Operating Statement accounts. Below are the GL Audit Reports for the same transaction set. The report on the left is run with the Use Balance Sheet Reporting checkbox selected; note that Segments 1-4 are populated with ‘000’. The report on the right is run without the Use Balance Sheet Reporting checkbox selected; note that Segments 1-4 are populated with the mapping account numbers.
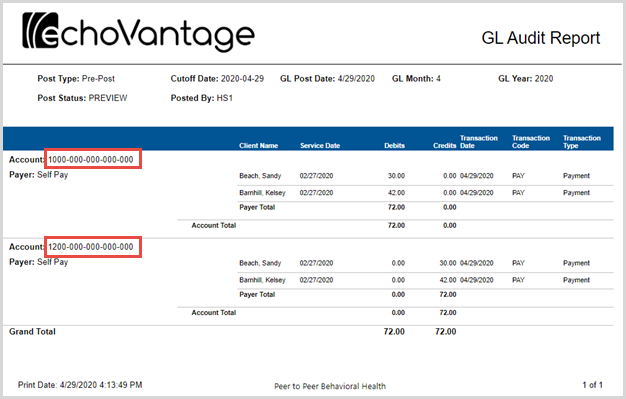
|
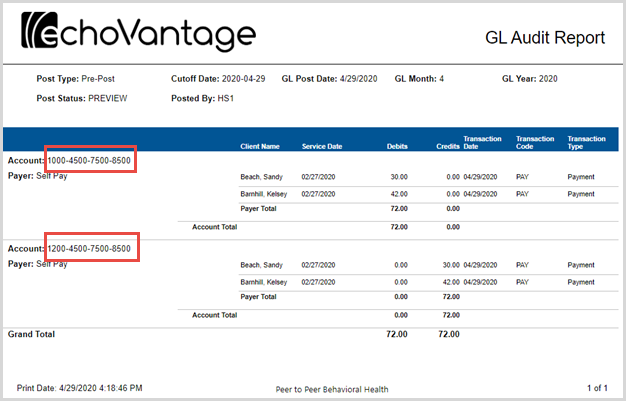
|
SEGMENT Mapping
Select SEGMENT 1, SEGMENT 2, or SEGMENT 3 to view the list of mapped segments or to "+" Add Mapping. Service Components are assigned to GL accounts to define the Segment. For example, an organization may use Segment 1 to differentiate between in-patient and out-patient service revenue. This can be done by mapping the appropriate service components to two different accounts, one for in-patient and another for out-patient.
Segment mappings can be designed to work together. For example, Segment 1 could be mapped by program or groups of programs. Segment 2 could be mapped by location or groups of locations. And Segment 3 could be mapped by service or groups of services. Doing so would allow an organization to capture Alcohol Program, in-patient, group therapy revenue vs Drug Program, in-patient, therapy revenue vs Mental Health Program, in-patient, therapy revenue. Organizational goals and reporting requirements will define the mapping needs.
The process of mapping a Segment is the same for each.

1. + ADD MAPPING - Click on the blue + ADD MAPPING to open the Add Configuration screen for a Segment.
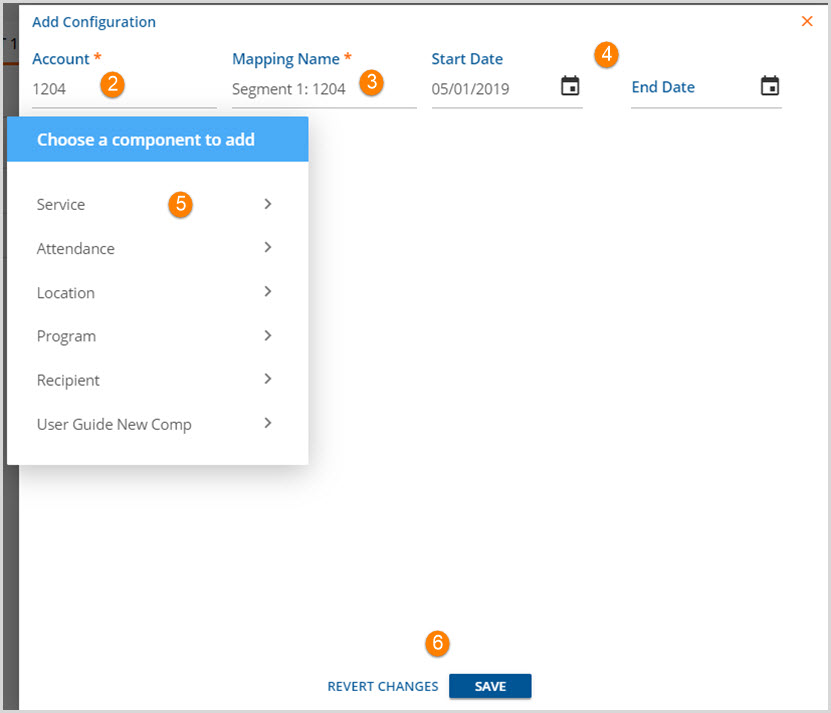
2. Account - Enter the GL Account number that is being mapped.
3. Mapping Name - A mapping name may be entered if desired. The default is "Segment #: Account #".
4. Start Date and End Date - Use the Start and End dates to indicate when the mapping is valid in the system. It is recommended to End date Segment Records in order to maintain a historical record.
5. Component - Select the Component(s) that will be used to define the Segment. After selections are complete, the Component and Type are listed.
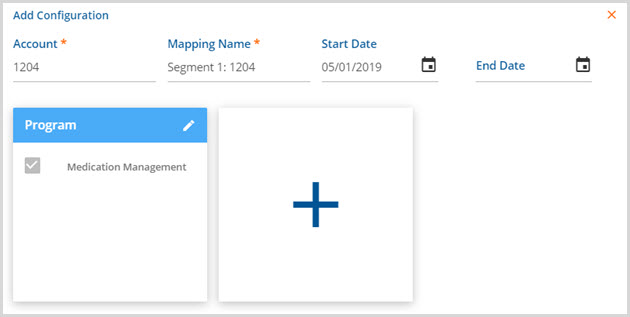
6. REVERT CHANGES and SAVE - Use Revert Changes to cancel Configuration or edits. Use SAVE to record changes or edits.
After saving the newly created Mapping is displayed in the list.

1. Components - In order to view the components assigned to an account number click on the blue "COMPONENTS". Click anywhere on the row to open the Edit Configuration screen to make changes and to add or delete components.
2. Trash Can Icon - Click the Trash Can Icon to delete a Segment Mapping.
3. Copy Icon - Click on the Copy Icon (two papers) to replicate the currently selected row's mapping. This will open the Add Configuration screen where changes to Account, Mapping Name, Dates, and Components may be made. Save will not be enabled for the copied Segment until an edit is made.
4. As the list of mapped Accounts grows, the Account column can be sorted in ascending or descending numerical order by clicking on the filter icons.
SEGMENT 3
Because Segment 3 is optional, it can be Toggled On or Off from the mapping screen.
SEGMENT 4
An additional fourth Segment is allowed in GL Mapping starting in EchoVantage release version 3.0 and higher. This fourth Segment is optional and Segments 1-3 must be used before Segment 4 may be enabled. A reminder to map Segment 3 appears on the Segment 4 page if it is not already mapped.
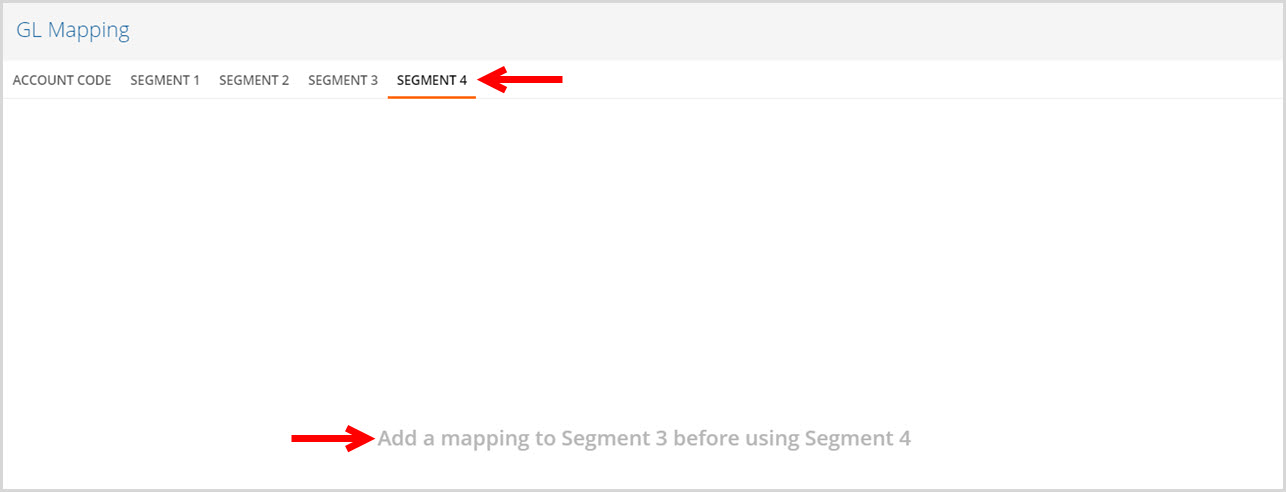
Once Segment 3 has been mapped, Segment 4 may be enabled.

1. Slide the toggle to the left to disable; to the right to enable.
2. Select the + ADD MAPPING button to configure the GL accounts for Segment 4.


