EchoVantage software uses two basic types of screens to enter, display, and manage data: Card and Form DesignEHR screens.
Card
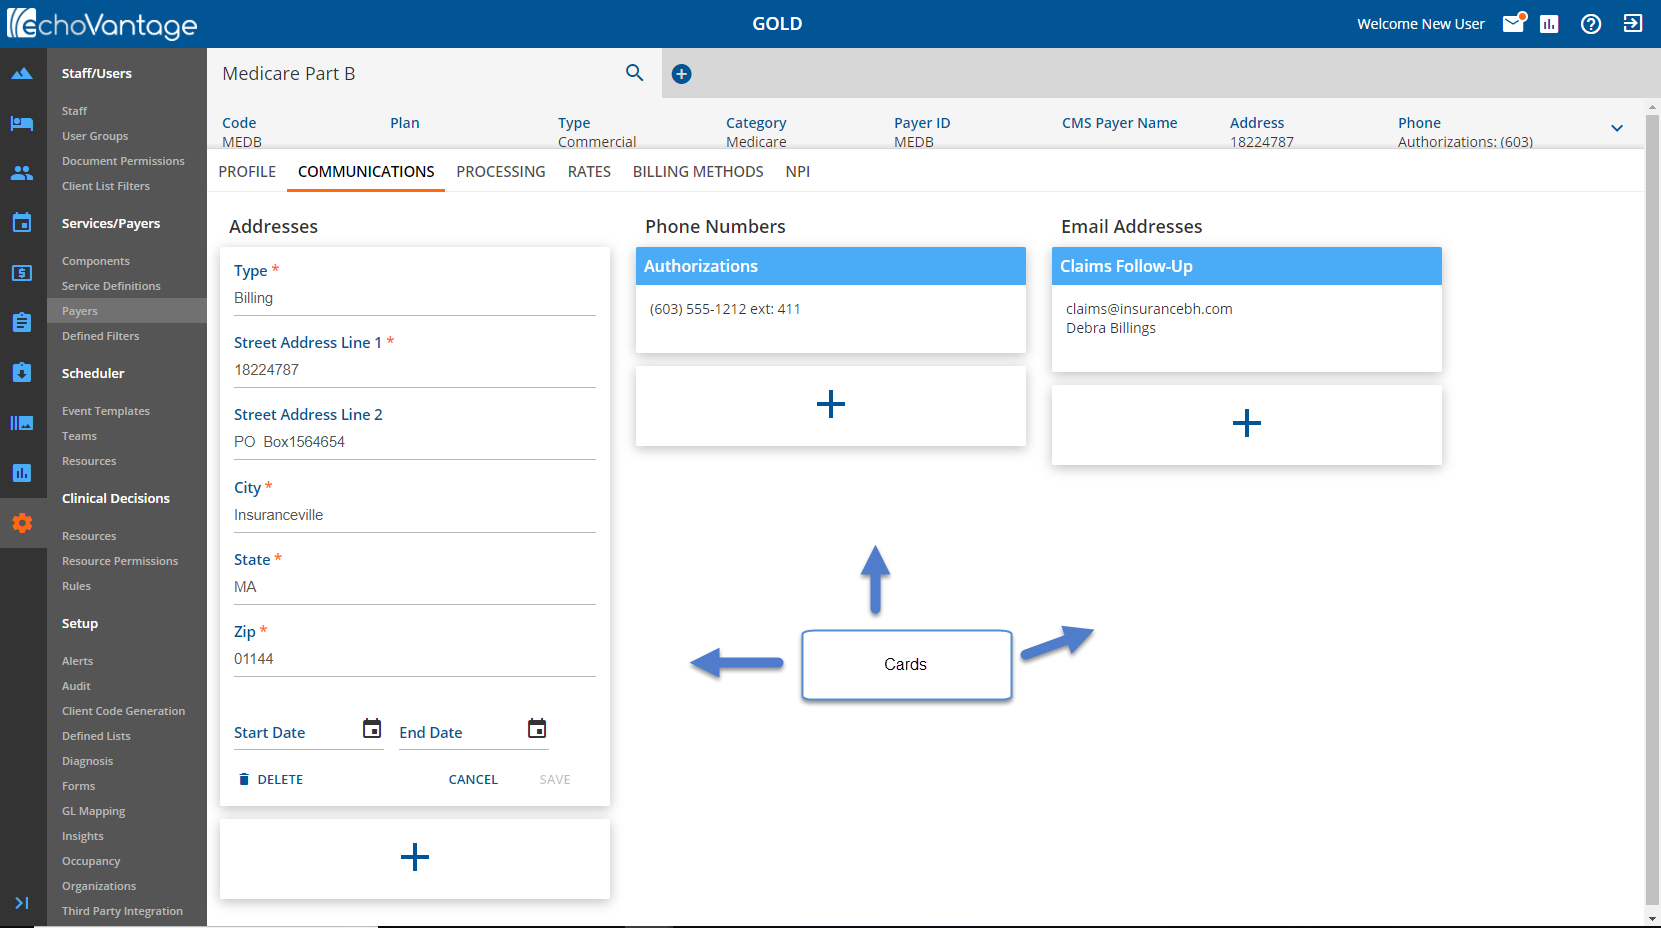
Imagine the screen card as a piece of paper with unique related data that serves as an entry point to more detailed information. For example, a card could contain a photo, text, and a link about a single subject. In the example below, a card under Addresses has been opened to show the fields used in an Address card. A single, unexpanded card is nested beneath Phone Numbers and Email Addresses.

Click the blue (+) to create a new card entry. Navigate the card fields by using the keyboard Tab button or click into the next field with the mouse.
Click on a card topic, blue background, to open more content within the card without the need to scroll. Click CANCEL to collapse the card without saving.
Click on a card to expand and make edits or changes. Click SAVE at the bottom to record changes.
Refer to the Screen Navigation and Data Entry Index for information on common screens, icons and data entry.
Form DesignEHR™
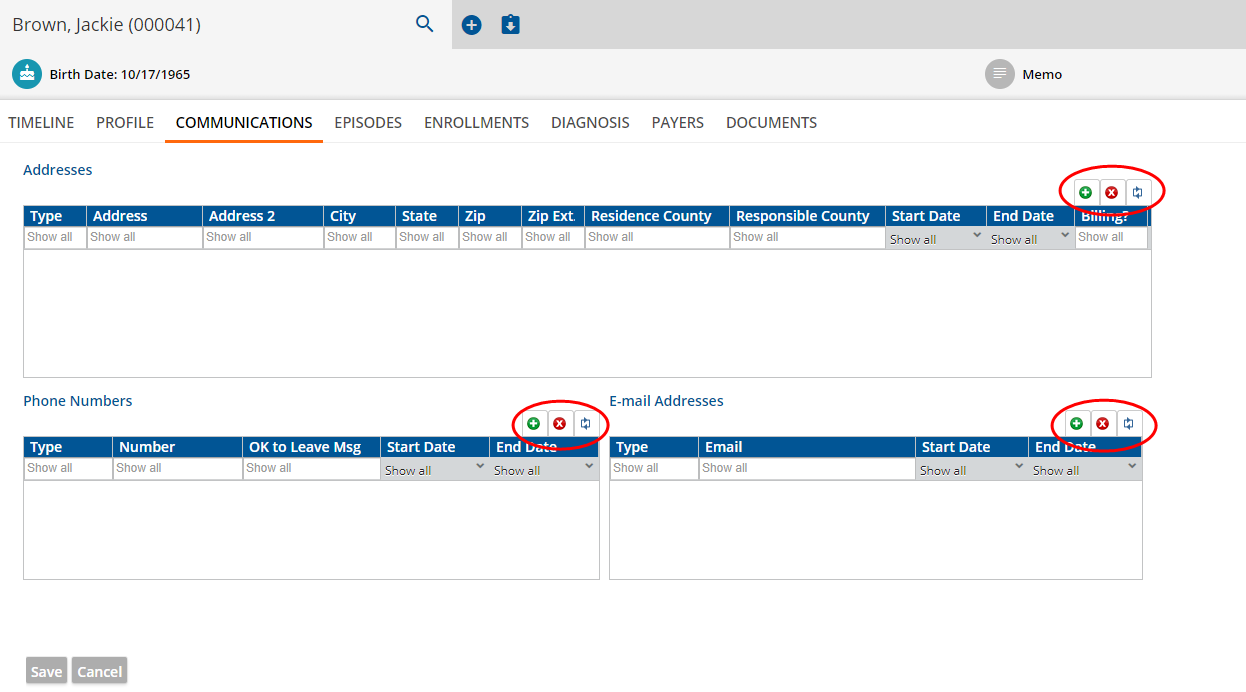
Single or multiple grids may apply to a menu item, topic, or tab. These types of screens are found in the Client menu on the Profile, Communications, Episodes and Enrollments tabs and in several screens within the Configuration menu such as Staff. **It is important to use the tabs, circled in red, when working with these grids.**

Click the green (+) to add a new entry to the grid. The first row in the grid will be active and ready for data entry.

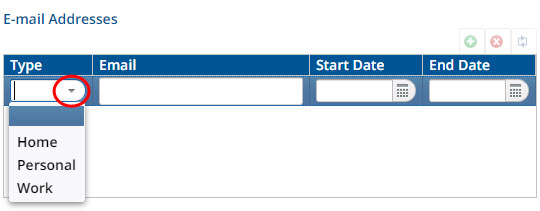
With the row active, it is possible to use the down-arrow to display the drop-down list or to Select the Date Picker/Calendar. Use the keyboard Tab button or click to move to the next field. When the required row entries are complete, the blue Save button on the bottom left of the screen will be enabled. Click to Save the information just entered.
Adding additional rows of data within the same grid or moving between grids and adding information without using the blue Save button is not recommended and may result in errors.
To edit an existing row of information in the grid, double click on the desired row. This will make the row active and editable. Make required edits and click the blue Save button to record changes.
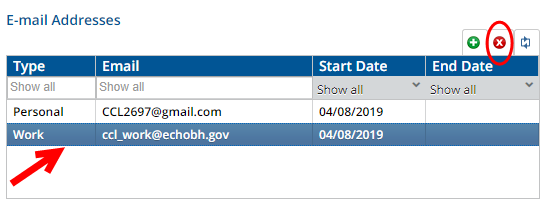
To delete an existing row of information in the grid, click the desired row to highlight and then click the red (x) per the example below.

