Predefined Content is a library for standard treatment plan elements that can be used to create consistent Client Treatment Plans faster, with more efficiency and greater content accuracy. Agencies can create their own custom content for staff to view and to select from to add to a Client's Treatment Plan. In addition, agencies that elect to use the WILEY evidence-based practice Treatment Plan Libraries will have additional Predefined Content fully integrated and available to use. The Predefined Content Tab is made up of three main sections: 1) Classification Setup, 2) Content and 3) Sets & Linkages. Each tab is covered in detail below.
Classification Setup
Classification Setup or Classifications are categories of Predefined Content. These categories are linked to Plan Items via Sets & Linkages so that content available to select during the Treatment Plan creation process is specific to that Treatment Plan. For illustration purposes, the following Classifications will be created for easy mapping to the Attachment Disorder Treatment Plan Items.
- Problem
- Goals
- Objectives
- Interventions
Adding Classifications in Classification Setup
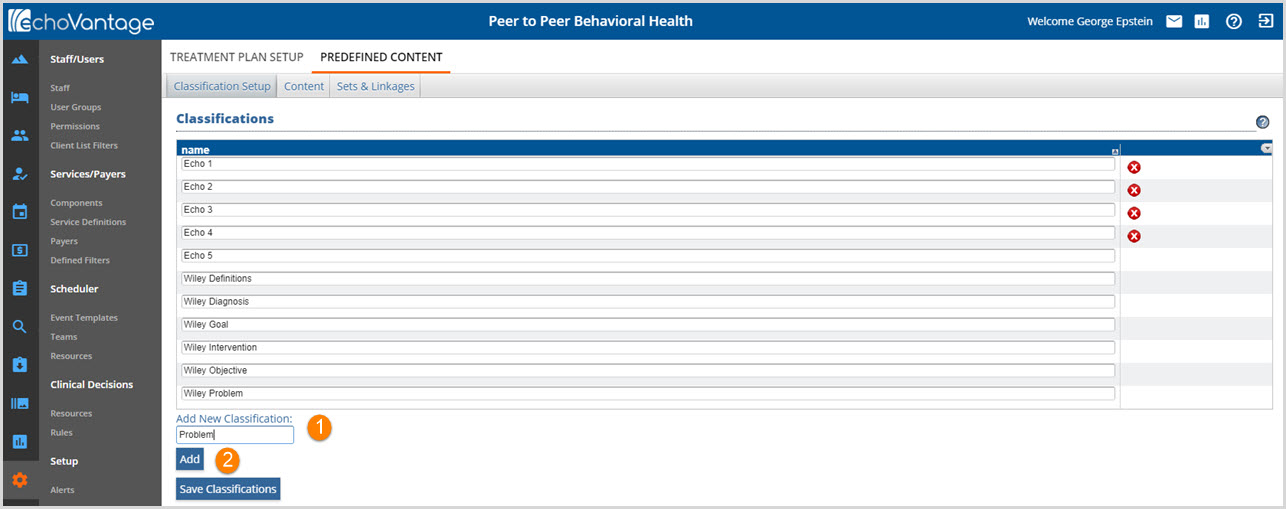
1. Add New Classification - Add a new classification by typing the classification name in the data input box.
**NOTE** The example above shows the Wiley Predefined Content Library classifications. All Wiley integrated library content is prefixed with the word WILEY for easy identification.
2. Add - Click on the Add button to add the classification to the list.
- Repeat until all needed classification has been entered.
- This only adds the classification to the screen view. It has not been saved to the list yet.
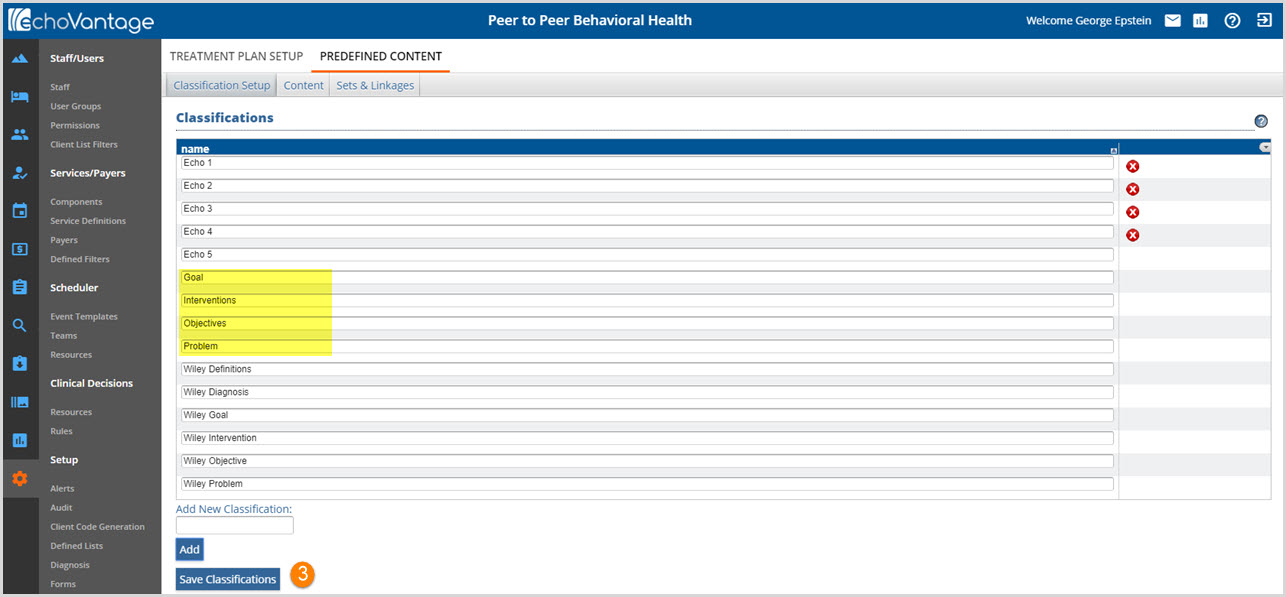
3. Save Classifications - Select the Save Classifications button to record changes made to the list.
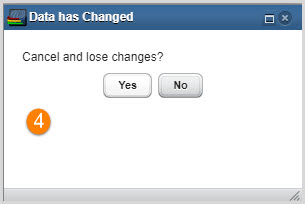
4. A warning prompt will display if you try to navigate away without first Saving Classifications. Click No and then Save Classifications to record changes.
Adding Content
The Content tab displays all of the Classifications in tabs horizontally just below the three main tabs. Selecting a Classification Tab displays all of the Predefined Content associated with it.
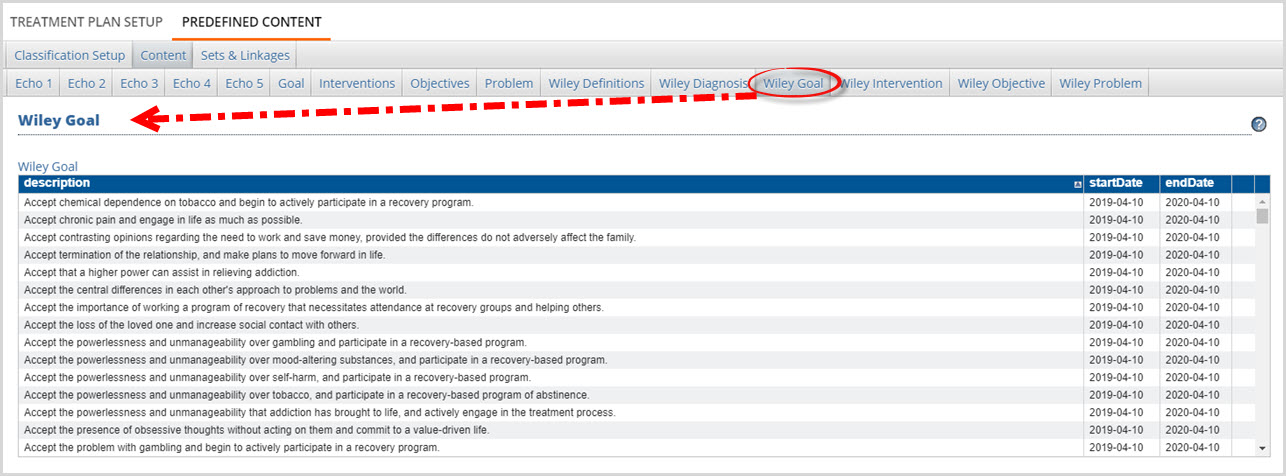
The image above shows an example of the Wiley Goal Classification Predefined Content.
An agency added Classification tab requires agency added Content.
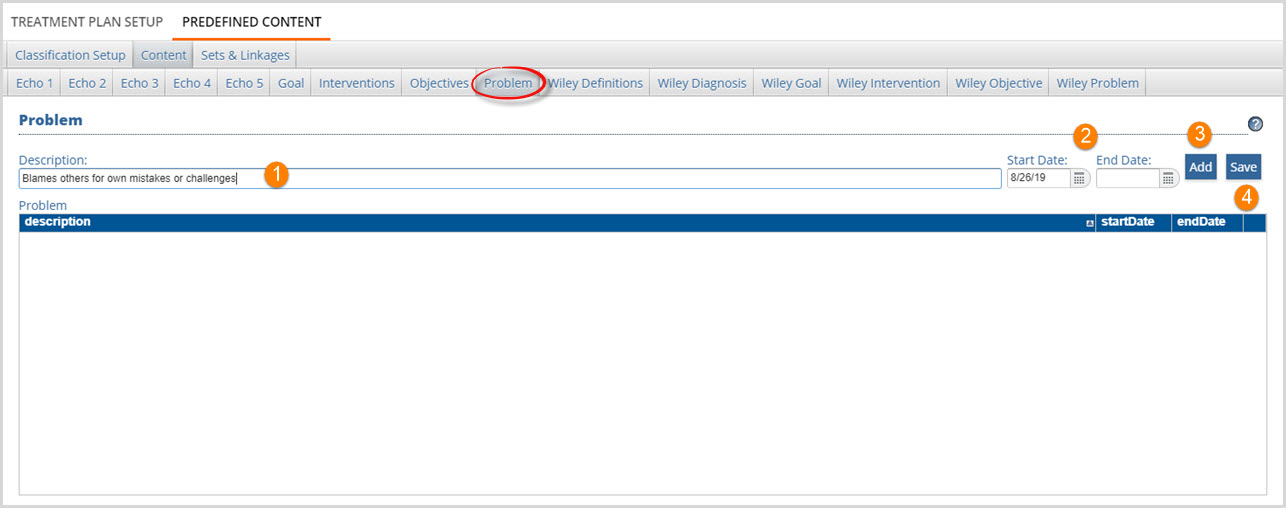
1. Description - Enter the content in the Description: box.
2. Start Date and End Date - Enter a Start Date for when this Content is valid to use.
- An End Date is available to make Content inactive.
- Since Content is likely to be used in a Client Treatment Plan, deleting it is not recommended.
- Changes or updates to content can be managed through end-dating.
3. Add - Select Add to add the newly entered description information to the Problem Content list. This adds the Content to the ListView it does not save it to the Classification tab.
Steps 1 through 3 need to be repeated until all Classification Content has been entered.
4. Save - Select Save to permanently record the additions and or edits to the Problem Content List.
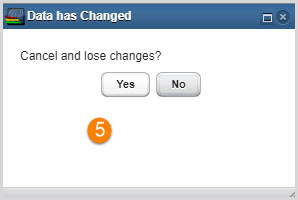
5. A warning will display if the user navigates away from the Classification tab without saving the added or edited Content.
Steps 1 through 4 need to be repeated until each Classification that requires Content has been updated.
Creating Sets & Linkages
Sets provide groupings of Classifications and Linkages define the relationships between those Classifications. Only Classifications that have content will be available to add to a Set and an individual Classification can only be used once per set.
Creating a Set and Adding Classifications

1. To create a new Set, right-click the word "Sets" at the top of the Outline Pane and choose "Add Set". The Set Editor will display in the Editor Pane.

2. Enter a Set Name and select the blue Create New Set button. The Set Name that was just entered is now visible in the Sets Outline Pane.
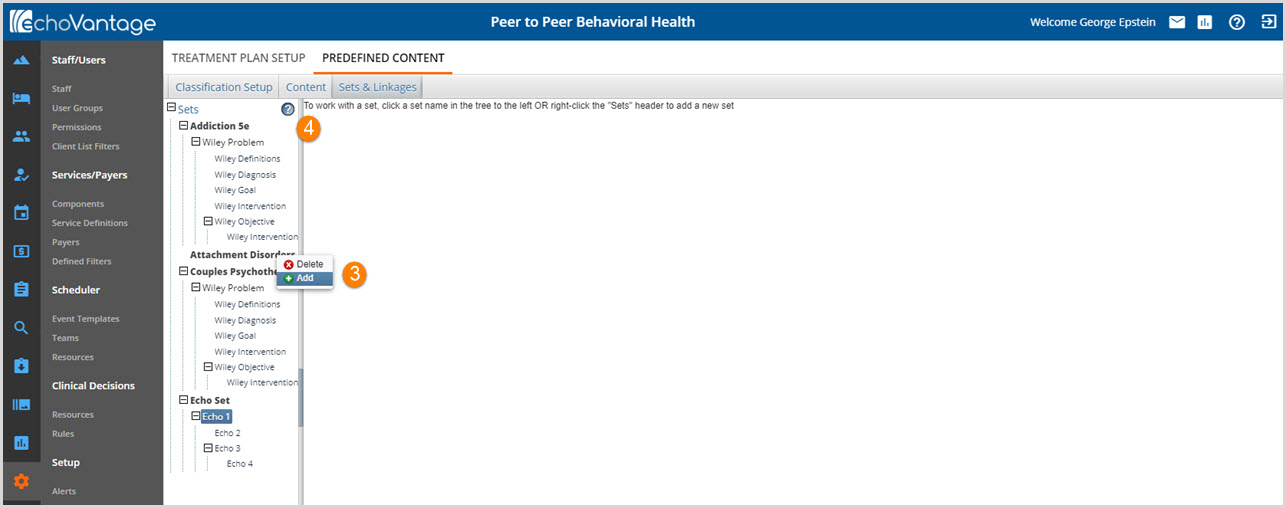
3. Add a Classification to the newly created Set by right-clicking the Set name and Selecting + Add.
4. On-screen Hints help navigate the workflow. Additional Hints may be accessed by clicking on the question mark icon.
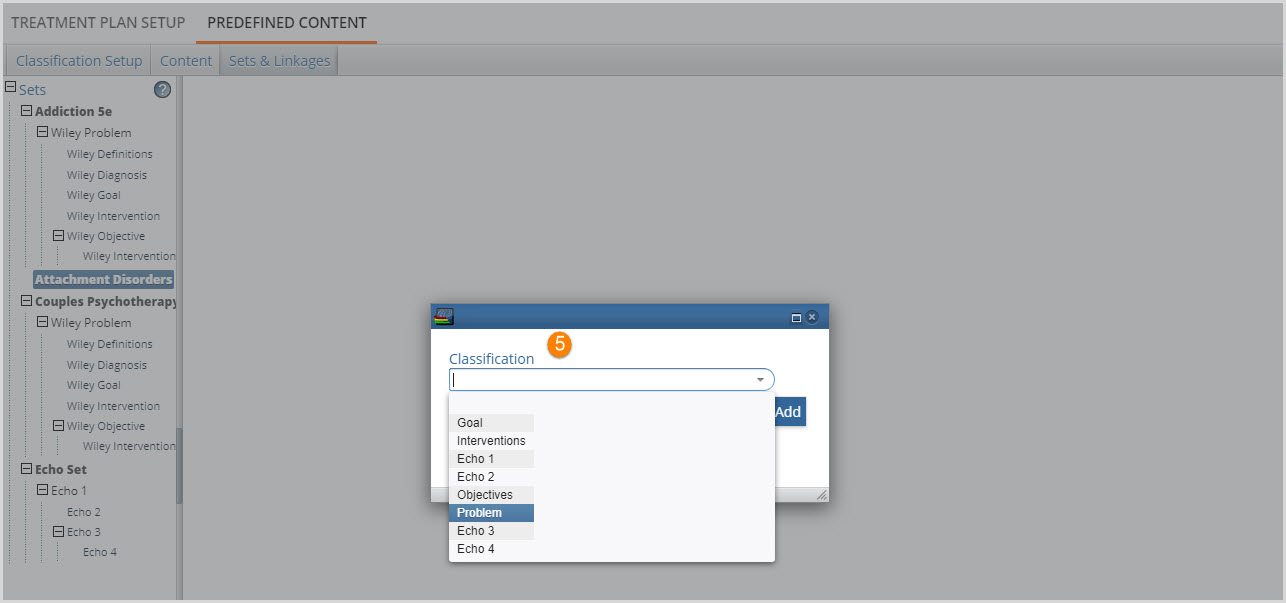
5. A Classification entry screen displays with a drop-down list to select from.
- Only Classifications that have Content are available to add.
- Highlight Classification to add and click to select.
- Verify the correct name is in the Classification drop-down box and then click the blue Add button to add the Classification to the Set.
**There can only be one top-level Classification in a set. In this example, Problem is the top-level Classification.
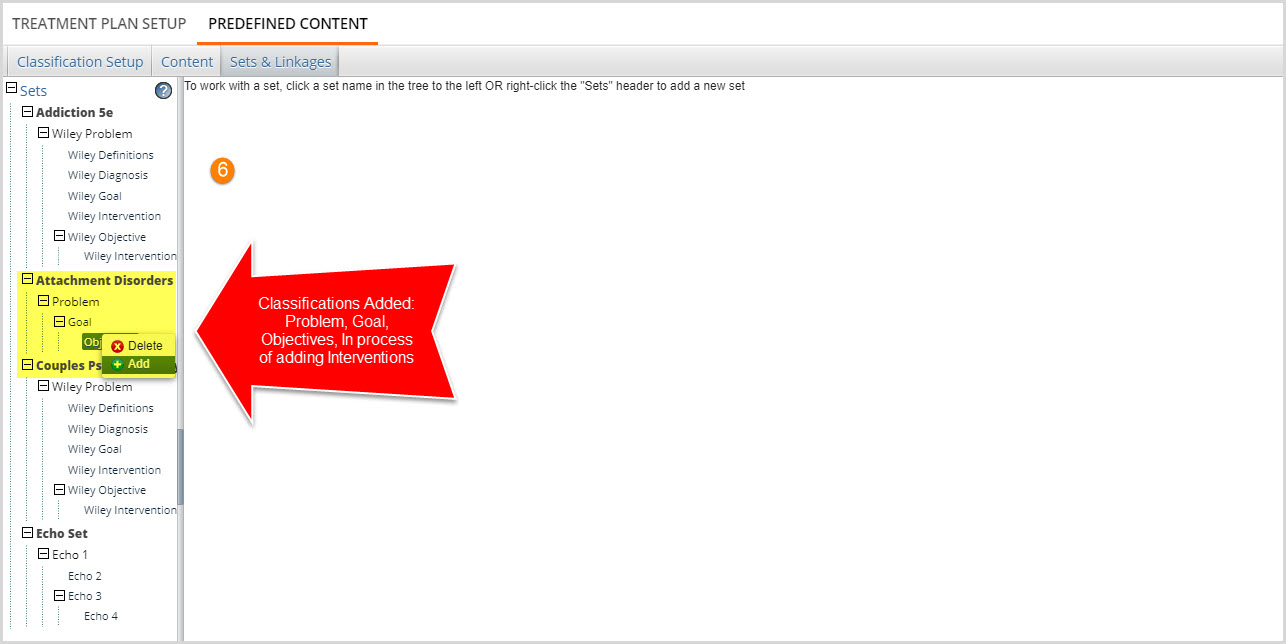
6. Continue adding Classifications by right-clicking an item to add a Classification beneath that item.
- If a mistake is made adding a Classification, right-click and select x Delete.
- Items and Sets currently used in Treatment Plans cannot be deleted.
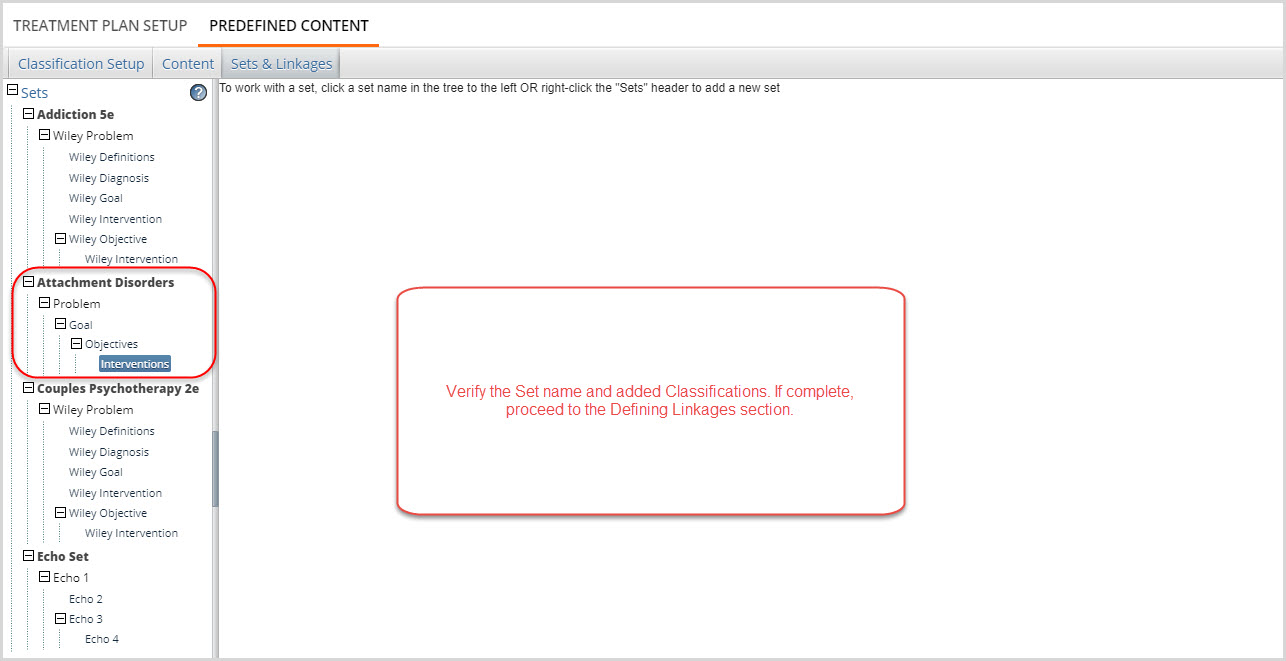
Defining the Linkages
Once the Set and associated Classifications have been added, the Linkages can be defined. To open the Linkage Editor, left-click on the Set Name, for this example, Attachment Disorders. The following screen will display.
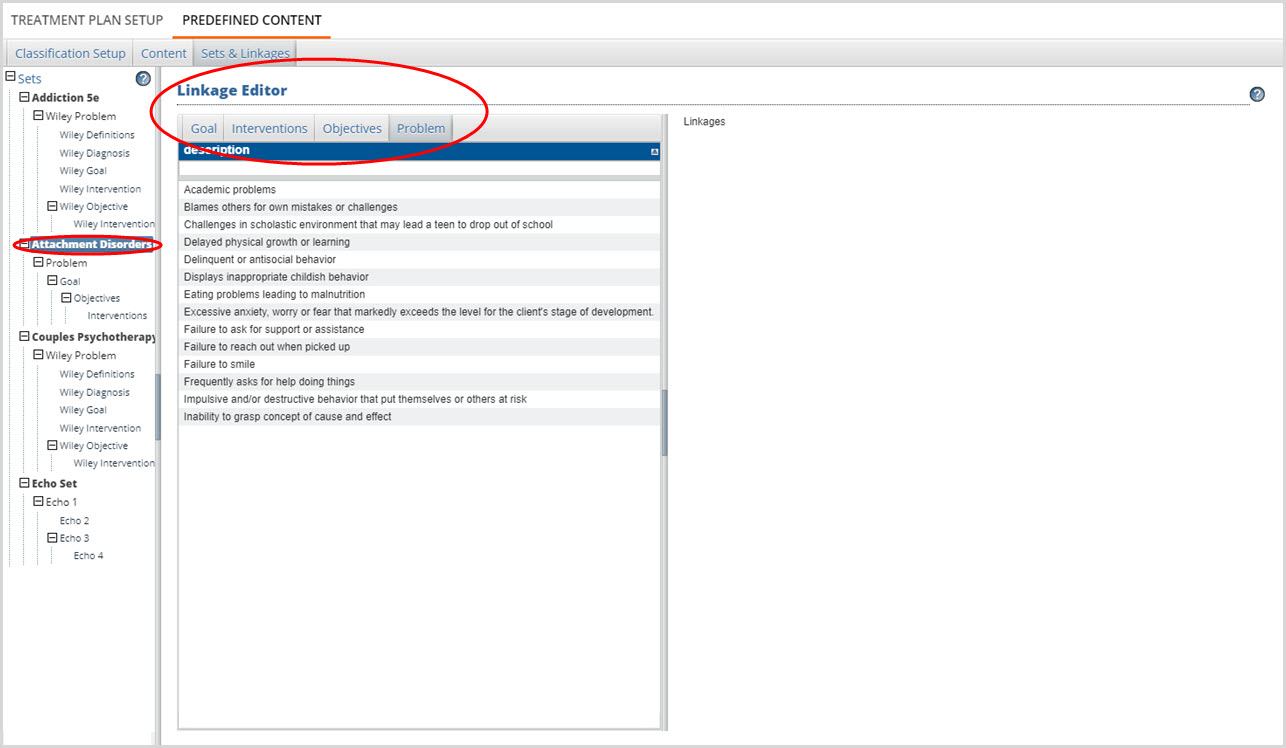
The Linkage Editor displays all of the Classifications added to the Set (Attachment Disorders) in tabs across the top. Clicking on a tab shows all available content within that Classification. The Linkage Editor allows the agency to define how much of this Content will be available to select from while a Clinician is completing the Treatment Plan. All or just some of the Content can be Linked to the set by dragging and dropping the Content onto the right-hand Linkages Pane.
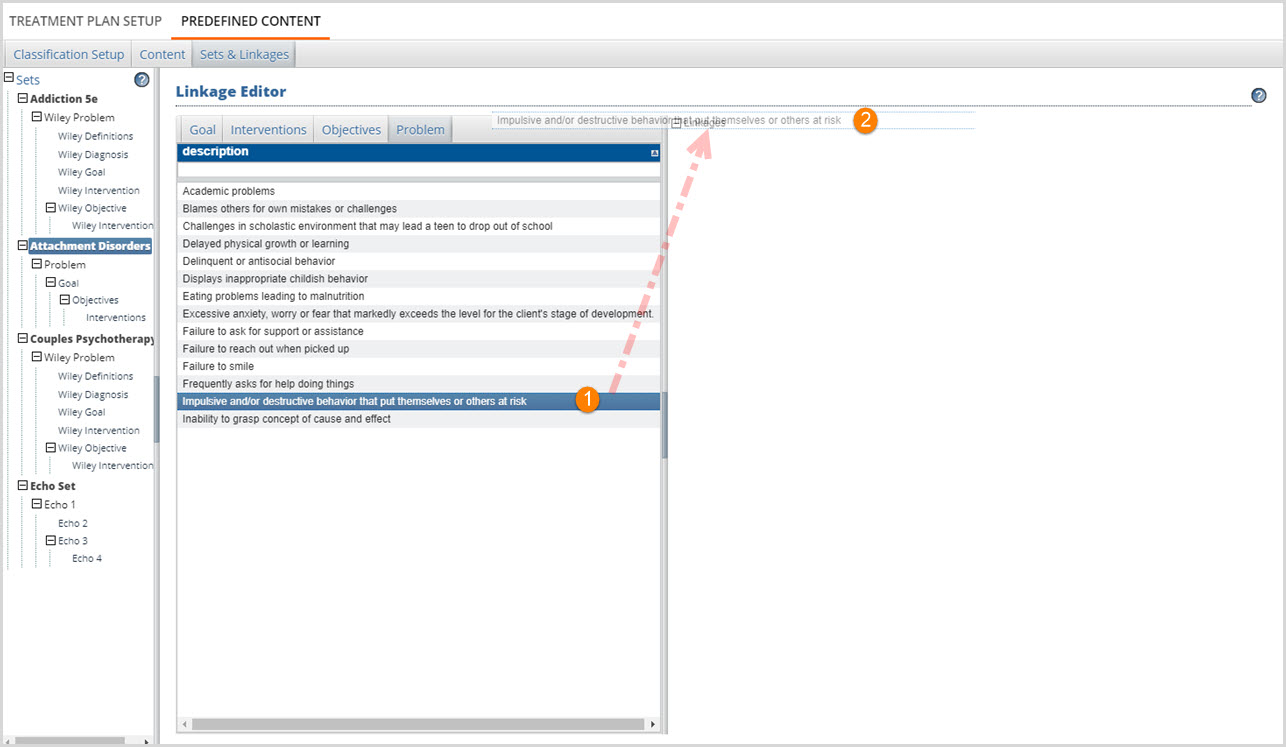
1. Highlight and select the Content item to link by left-clicking.
2. Left-click again and hold to drag the Content to the word Linkages.
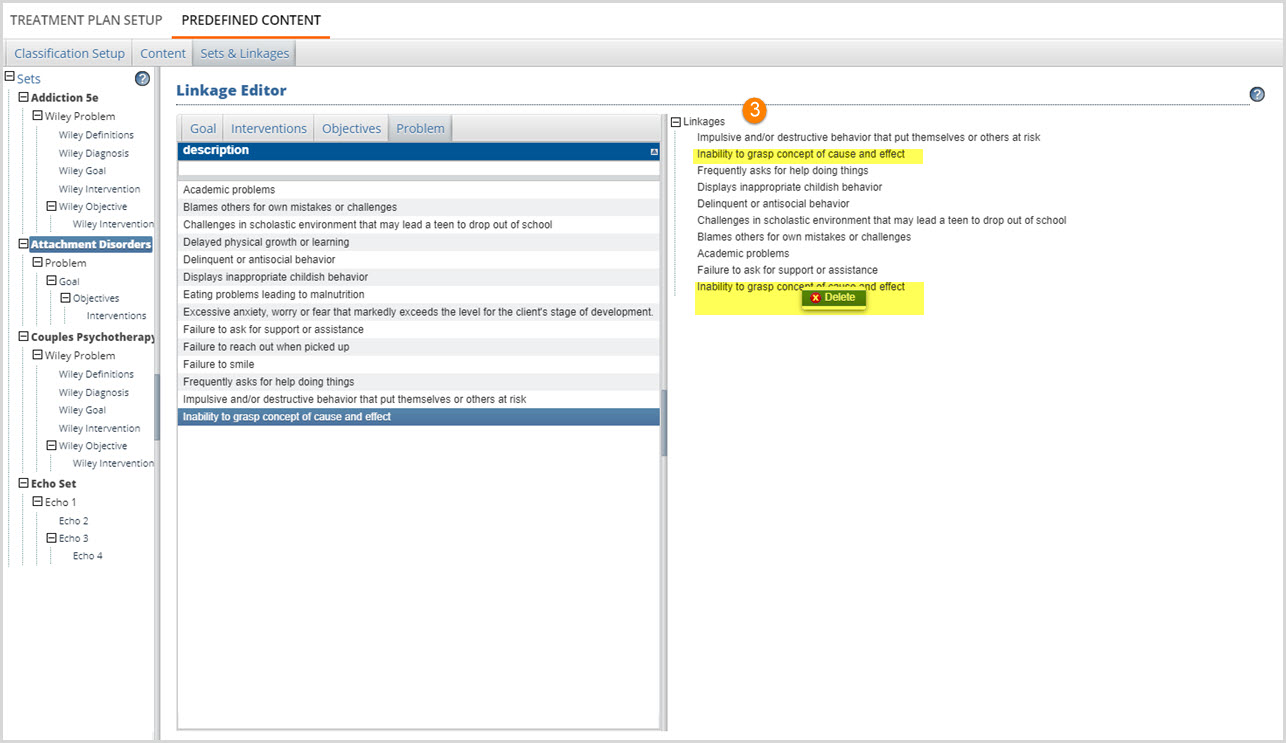
3. Release the mouse button to drop the Content on the word Linkages.
- A successful drag & drop will populate the list.
- Repeat until all desired Content is Linked.
- If a Content Item was linked more than once in error, right-click on the duplicate and select x Delete to remove it.
Steps 1 through 3 need to be completed for each Classification in the Set. However, the Content must be dragged and dropped onto the appropriate level.
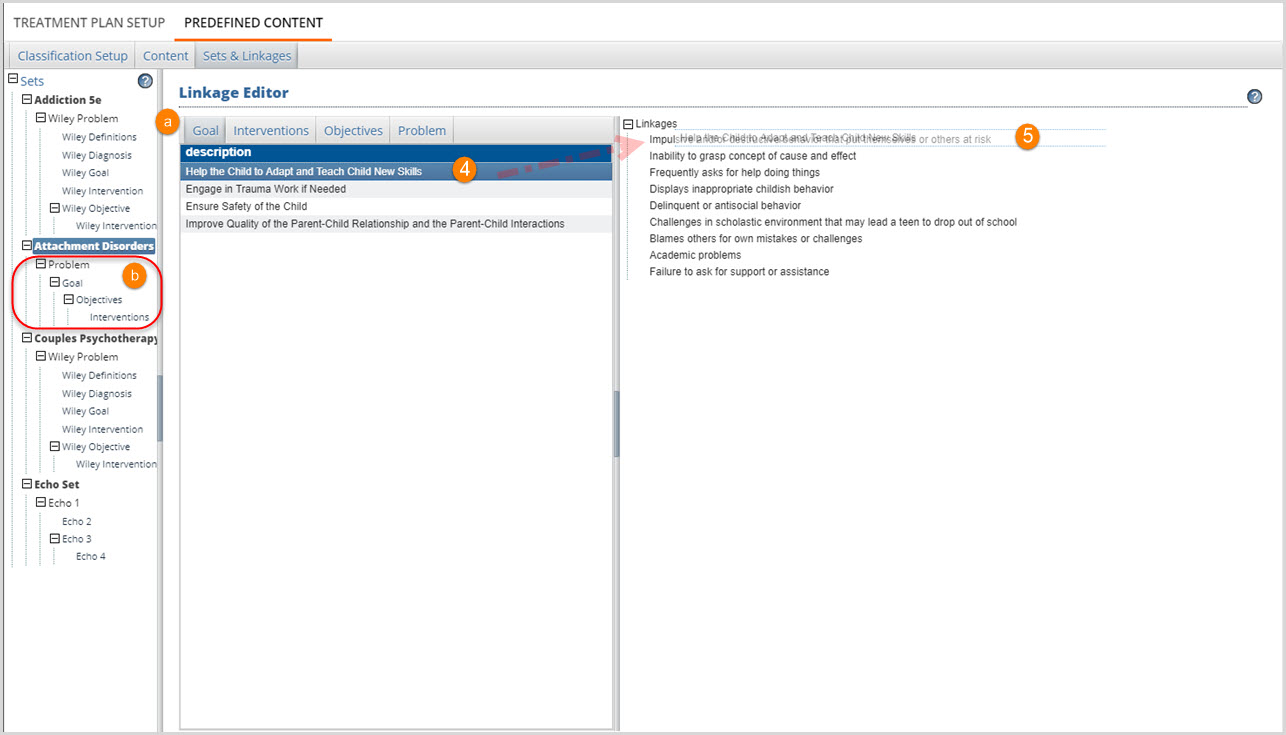
4. Highlight the desired Goal then click and hold to drag.
- (a) The Goal Classification is now selected.
- (b) Because Goal is the next Classification Level down from Problem in the Set, any Goal Content must be dropped onto Problem Content.
- Objectives Content would be dropped onto Goal Content
- Interventions Content would be dropped onto Objectives Content
- Another Set could define these same Content Classifications in a different order.
5. Drop onto the desired Problem by releasing the mouse button.
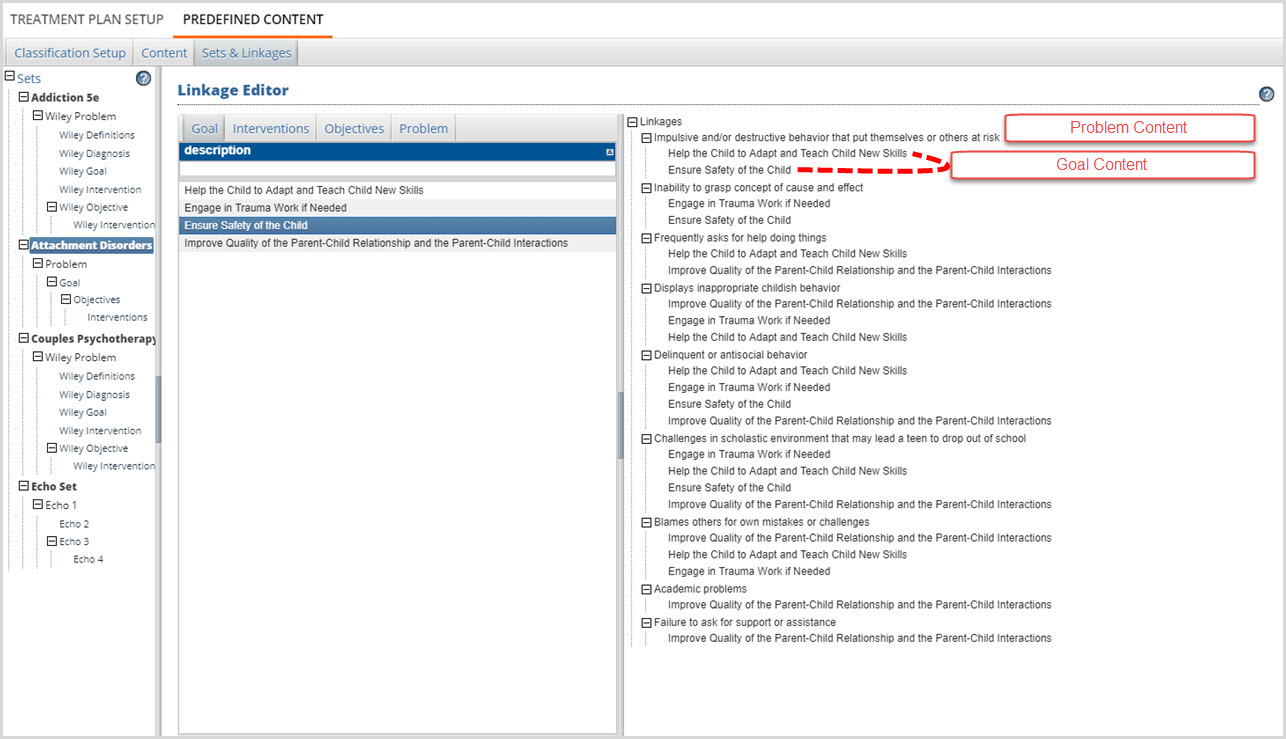
As the Linkages Pane is populated, the structure of the Set outline is apparent.
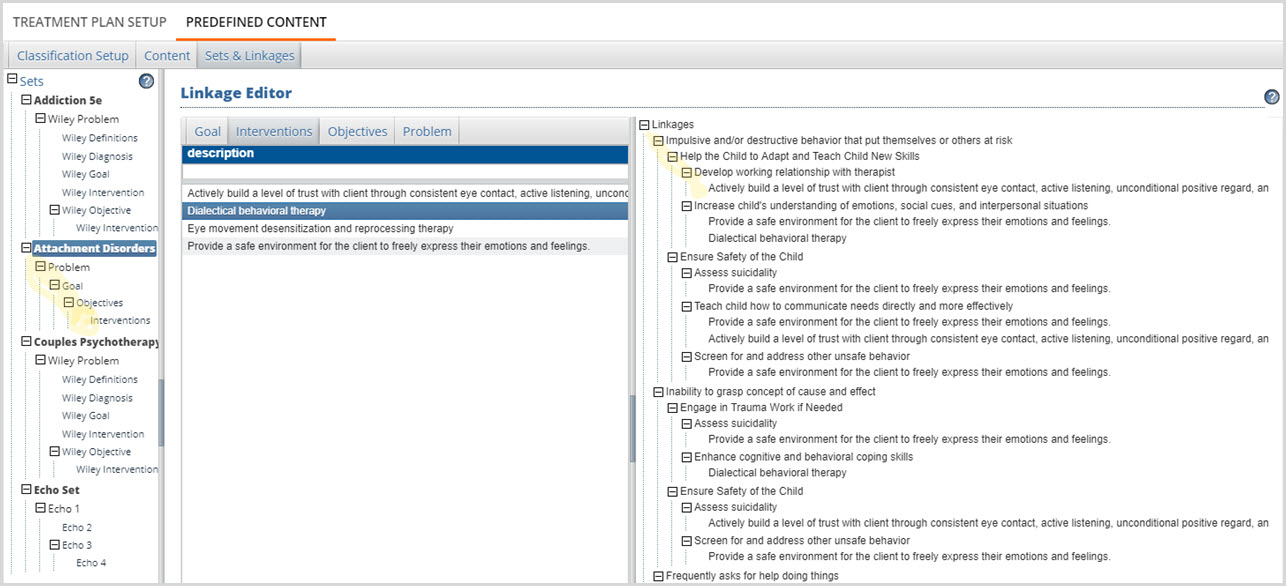
When all of the desired Content is Linked, the Set is available for use by a Treatment Plan.
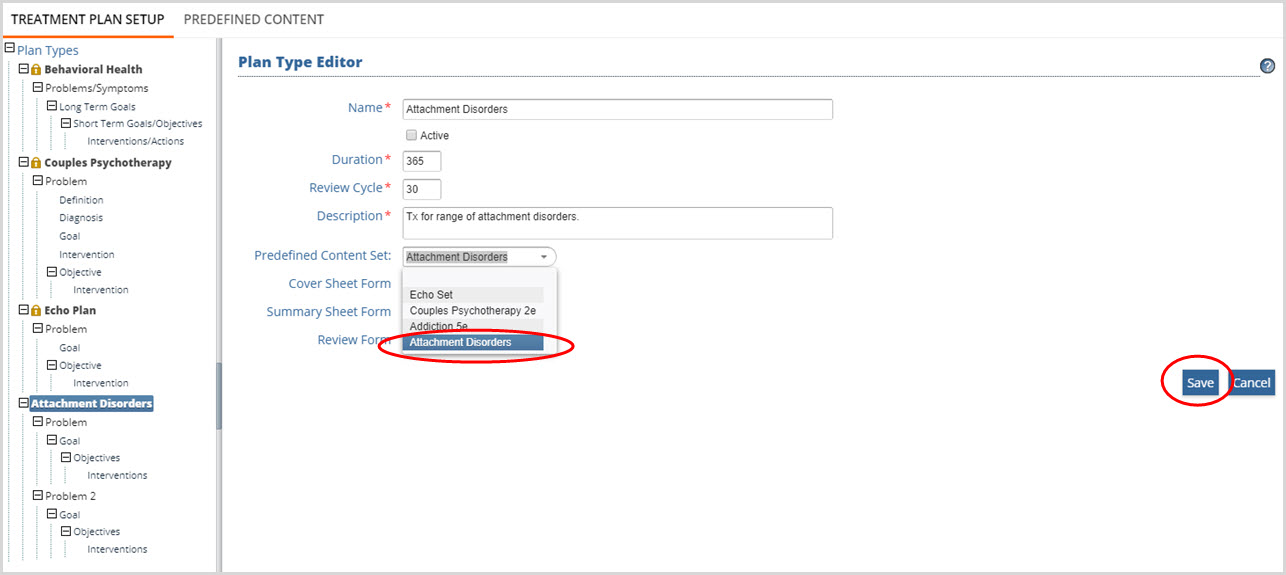
To revisit the Treatment Plan Setup Example, the newly created Predefined Content Set (named Attachment Disorders) is available to select and Save for use in the Attachment Disorders Treatment Plan. Click HERE, for detailed instructions on accessing (this) Treatment Plan(s) from the Client VHR Timeline.
