The Treatment Plan Setup screen contains two panes: the Outline pane and the Editor pane. The Outline Pane is an outline view of each Treatment Plan Type. The structure of these may be expanded or collapsed by clicking on the "+" or "-" signs. As Plan Types are added, they display beneath the Plan Types Header.
The Editor Pane display changes based on the action taken in the Outline Pane. The default Editor screen is the Type List/Permissions Editor as shown in the image below. This list allows an administrator to control who has access to add a new or edit an existing, unlocked Treatment Plan outline. Permission for staff to access Treatment Plans from a Client's Timeline is handled through the VHR Category Depiction Manager's Header Editor. Click HERE to access the VHR Timeline User Guide Information.

Adding a New Plan Type
A Treatment Plan outline only needs to be created one time like a template. It then can be accessed over and over by staff to guide the Treatment Plan creation process. Get started by selecting the words Plan Types in the Outline Pane and then pressing the right mouse button.
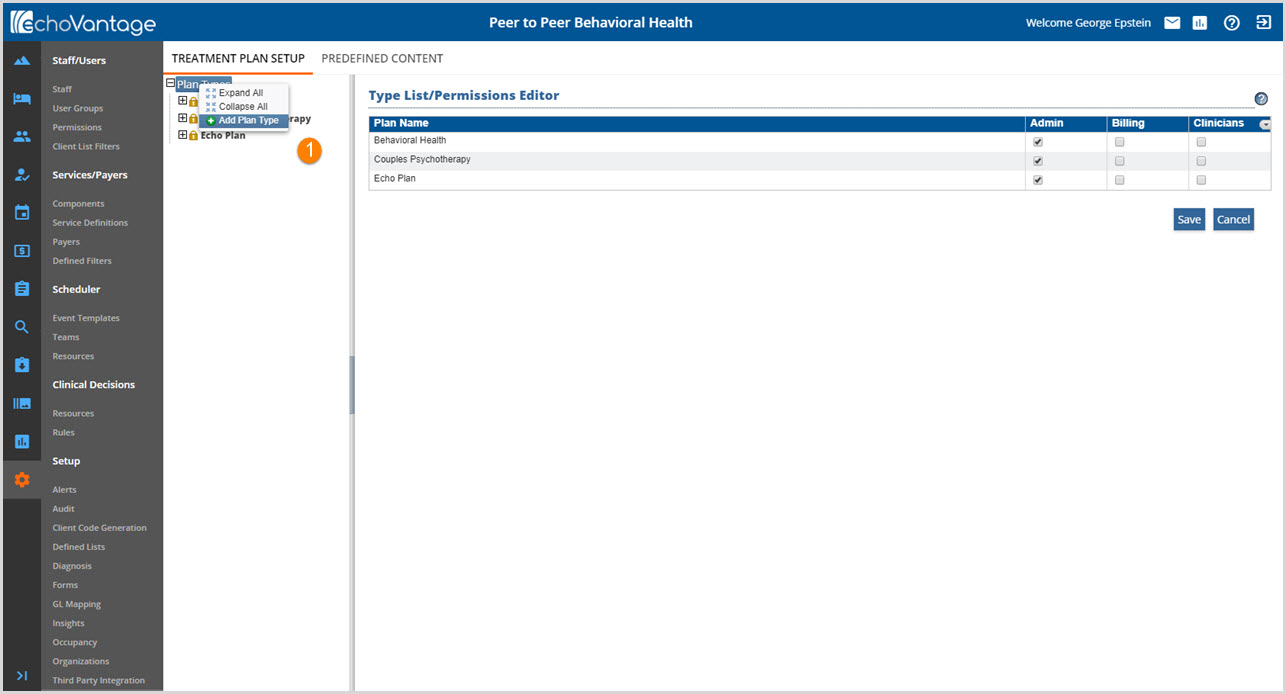
1. Then highlight and select +Add Plan Type. This will display the Plan Type Editor in the Editor Pane.
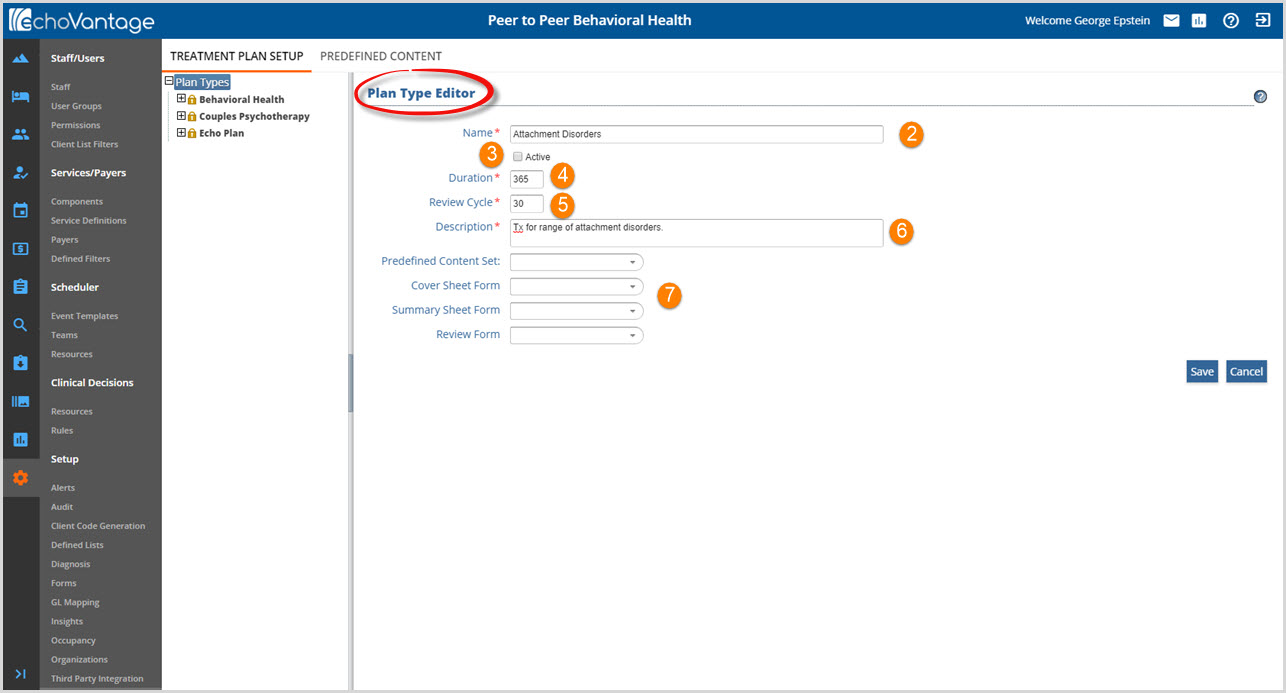
2. Name - Enter a name for the new Treatment Plan Type. This is the name that displays on the VHR Timeline. Required field.
3. Active - Select the Active checkbox to indicate that the Treatment plan is ready for use. By definition, a Treatment Plan available for use in the Client's VHR is considered Active. Required field.
- It is recommended that this box be left unchecked until the create process is completed.
- Treatment Plan Outlines that are in use for a Client are locked and may not be deleted.
- Making a Tx Plan inactive discontinues use when delete is not an option.
4. Duration - This is the length of time the Tx Plan covers. The default is 365 days or 1 year. Required field.
5. Review Cycle - This is the frequency the Tx Plan progress is reviewed. The default is 90 days. Required field.
6. Description - Description is viewable from the Treatment Plan Setup Editors only. This is a 500 character maximum free text field that allows additional Plan information to be entered.
7. Editor Options - these fields are optional to the Tx Plan Setup process.
- Predefined Content Set - Select a content "set" from the drop-down list that is to be applied to the Plan Type.
- These "sets" are defined by the Administrator, prior to the Treatment Plan Setup.
- Click HERE for more information on Predefined Content.
- Unlocked Plan Types can be edited to use a Predefined Content set after initial plan creation.
- If a predefined content set is not selected, staff will need to populate all required fields manually.
- The following forms are only available if they have been imported or created using the Echo FormDesignEHR
- Cover Sheet
- Summary Sheet
- Review
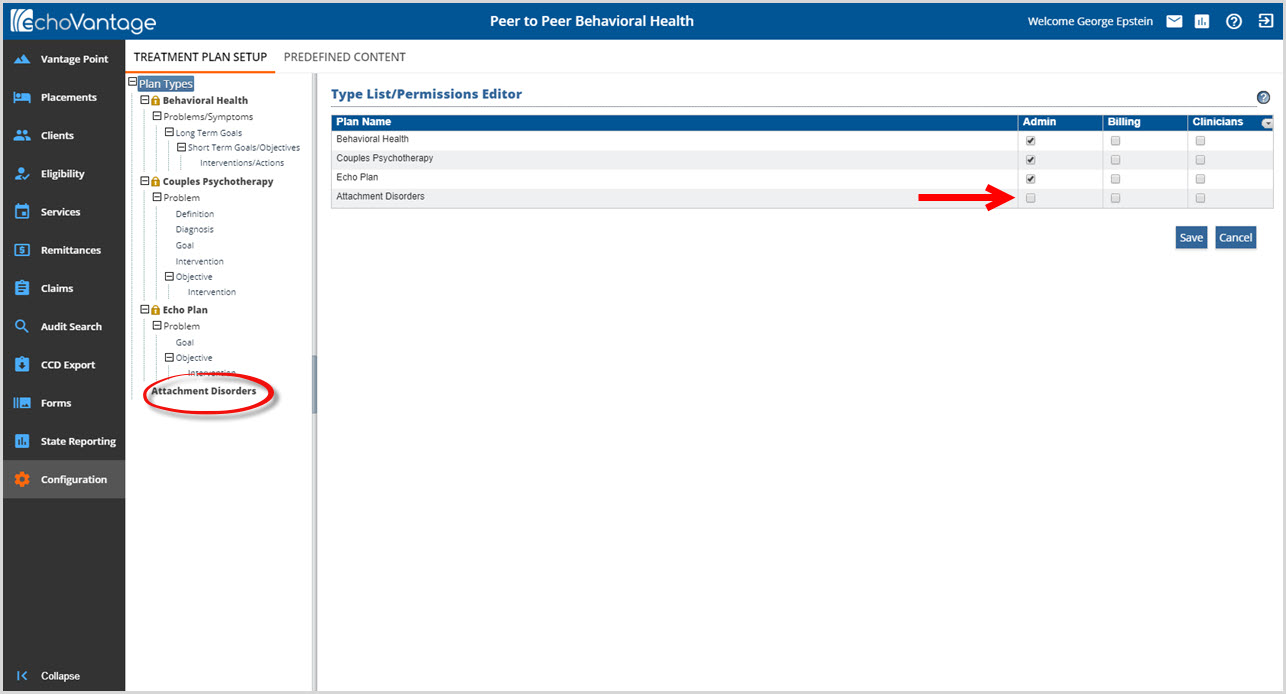
Clicking on SAVE records the changes and adds the new Plan Type to the Outline Pane and to the Type List/Permissions Editor. Edit access for this new type may be granted now or at a future date and then SAVED. Continue to the next section for adding plan items.
Adding Plan Items
Plan Items are the Treatment Plan outline details. These will vary from plan to plan, client to client, and from agency to agency. For illustrative purposes this guide will go through adding Plan Items in a Problem>Goals>Objectives>Interventions format. To get started adding Plan Items, right-click on the newly added Plan Type, Attachment Disorders in this example.
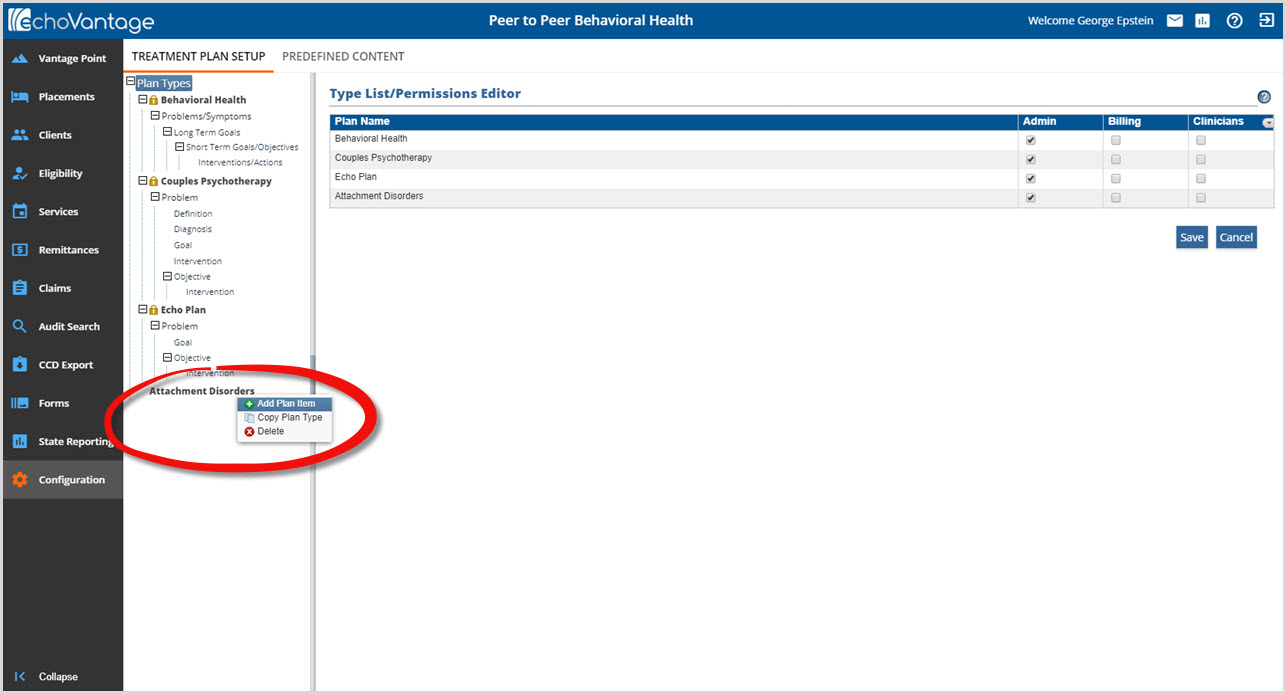
Highlight and select + Add Plan Item to add items to the currently selected Plan Type. There are two other options available when an unlocked Plan Type is right-clicked:
- Copy Plan Type - Any Plan Type may be copied.
- This is especially useful when multiple plans have a similar basic outline or template. One Plan Type can be created, copied, and then the details, or Plan Items, can be added, edited or deleted to suit the New Plan Type.
- Existing plans can be updated via a copy. The new version becomes active and the old version is made inactive.
- Delete - The delete option is available only when the Plan Type record is not locked.
**Note** A Plan Type is locked once it is used from a Client's Timeline. In the example above, Behavioral Health, Couples Psychotherapy, and Echo Plan are all locked Treatment Plans. Right-clicking on one of these only gives the Copy Plan Type option as locked plans may not be edited or deleted.
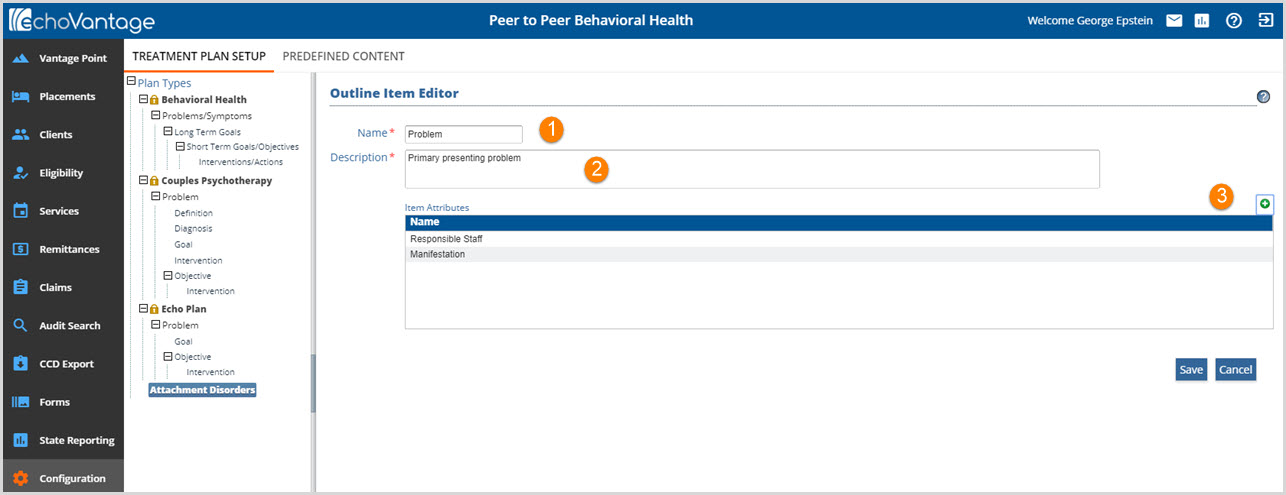
Selecting + Add Plan Item opens the Outline Item Editor pictured above.
1. Name - Enter the name of this first level Plan Item. This is a 36 character maximum length, required field.
2. Description - Enter a description for this Plan Item. This is a 500 character maximum length, required field.
3. Item Attributes - Item Attributes are optional additional information prompts for the item being added. For this example, Responsible Staff and Manifestation are selected.
- To add Item Attributes to the grid, start by clicking on the green "+" plus sign to open the Select Attributes screen
-
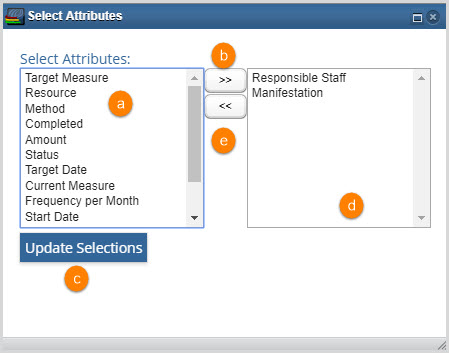
- (a) In the left pane, highlight the attribute to be added. Multiple attributes may be selected by pressing and holding down the Ctrl key while left-clicking.
- (b) Click on the right arrows to add them to the right pane. This is the Update Pane.
- (c) When selections are made, click on the blue Update Selections to add the attributes to the grid.
- (d) To remove attributes, highlight in the right-hand or Update Pane.
- (e) Click on the left arrows to remove the from the Update Pane.
- (c) Click on the blue Update Selections
- When finished with Attributes, click on the "x" in the upper right-hand corner
- **The Update Pane represents what the Plan Item Attributes will be when Update Selections is selected. It overwrites existing Item Attributes rather than appending to or subtracting from them.**
Click on the blue Save to record the Plan Item.
As long as the Plan is unlocked, the order of Item Attributes may be reordered by dragging and dropping the attribute name.

Item Attribute order of Responsible Staff - Manifestation...

is reordered to Manifestation -Responsible Staff by dragging and dropping.
On the Treatment Plan creation, or user side, the Item Attribute prompts looked like the following:
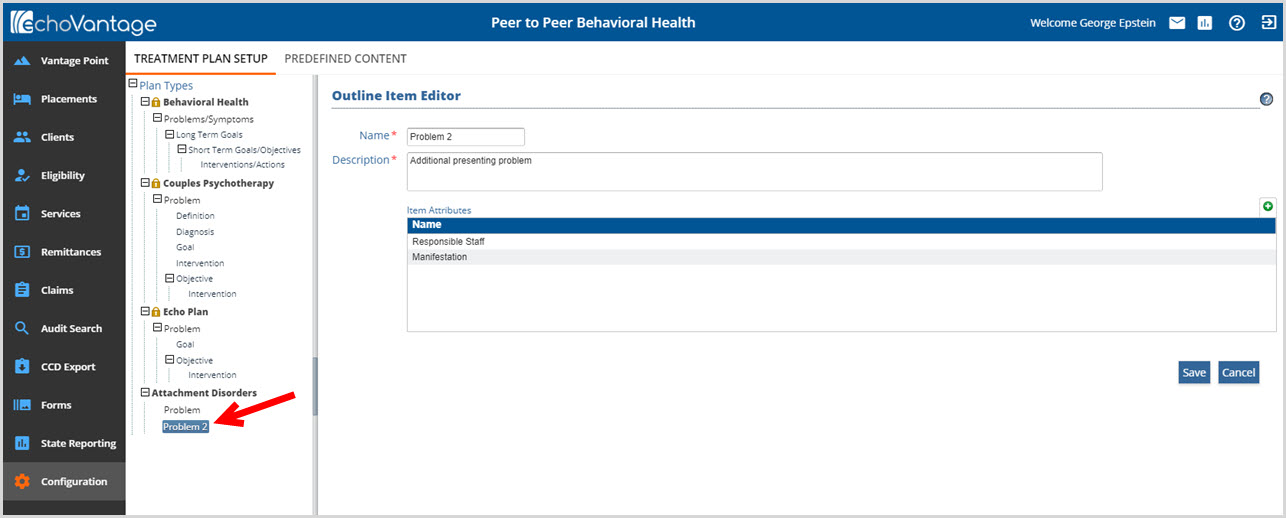
The process was repeated a second time. The image above shows two first level Plan Items named Problem and Problem 2. This process should be repeated until the desired number of first level Plan Items are created. To create a second level Plan Item right-click on a first level Plan Item, Problem or Problem 2 in this example.
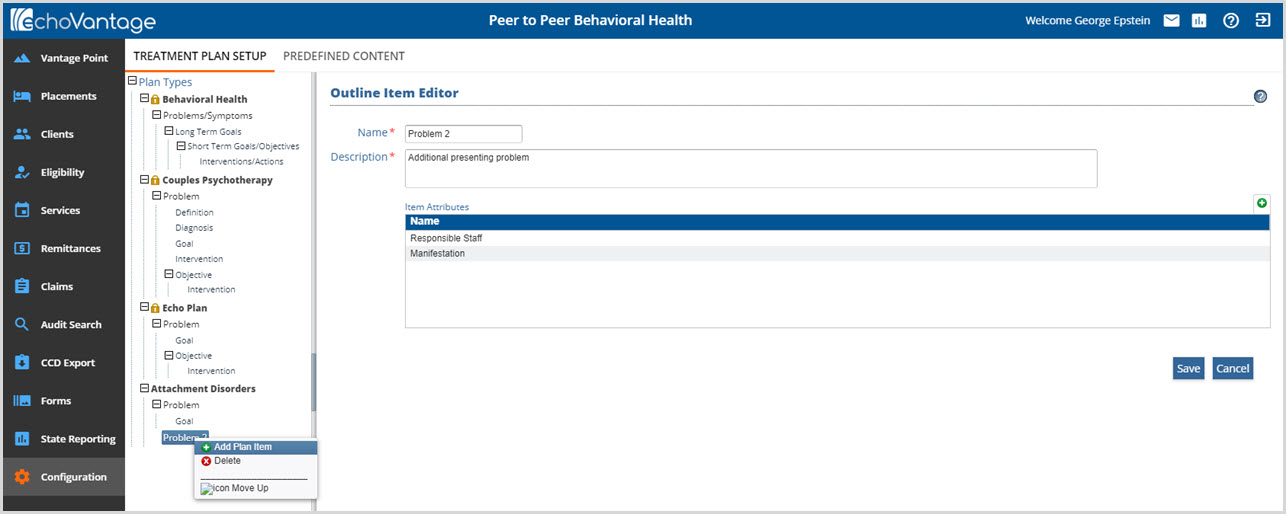
The process for adding the Plan Items is the same.
- Right-click on the desired "Parent" level
- Select + Add Plan Item
- Enter desired information in the Outline Item Editor
- Select Save to record additions or changes
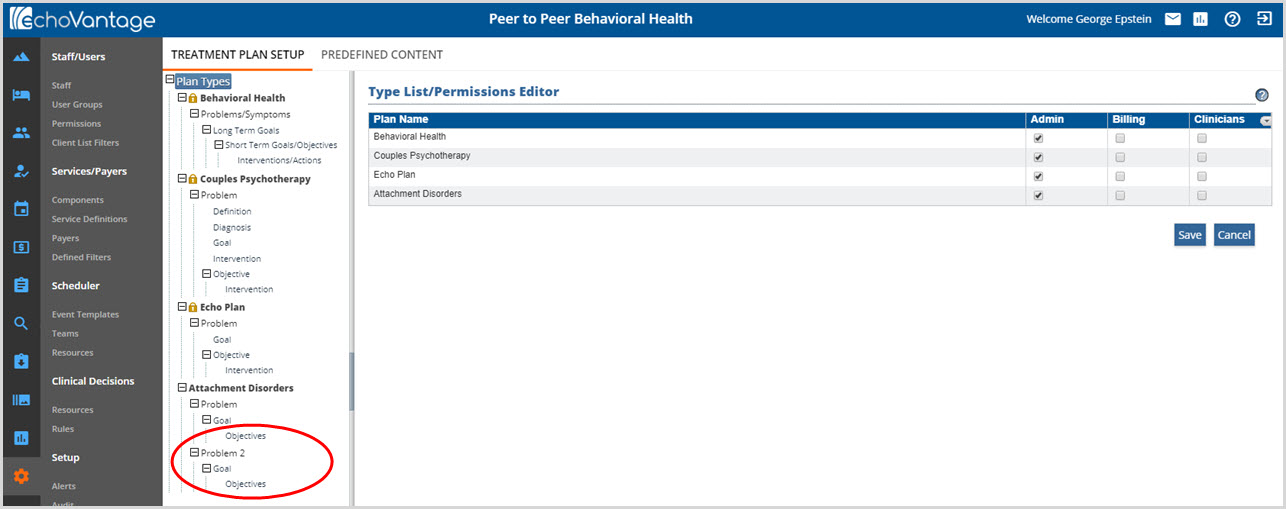
In the example above, there are two sets of three levels of nesting Plan Items in the Attachment Disorder Treatment Plan Outline.
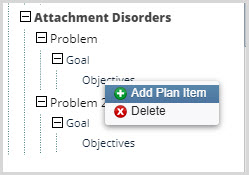
A final, fourth Plan Item level of Intervention is added by right-clicking on Objectives and selecting + Add Plan Item.
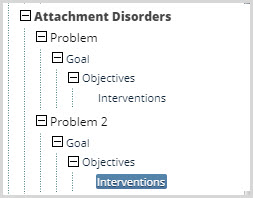
When more than one Plan Item exists on the same level, there is an option to move the Icon Up when right-clicking on the second (or third etc) Plan Item. In the example above, both Problem and Problem 2 are on the same level.
Selecting the Icon Move Up moves the Plan Item and all associate children up.
As long as the Treatment Plan Type remains unlocked, Plan Items may be added, edited, reordered, or deleted until the desired setup is achieved. For organizations that choose not to use Predefined content, the Treatment Plan is now ready to be active and accessed from the Client's Timeline. For information on Predefined Content, Click HERE.
