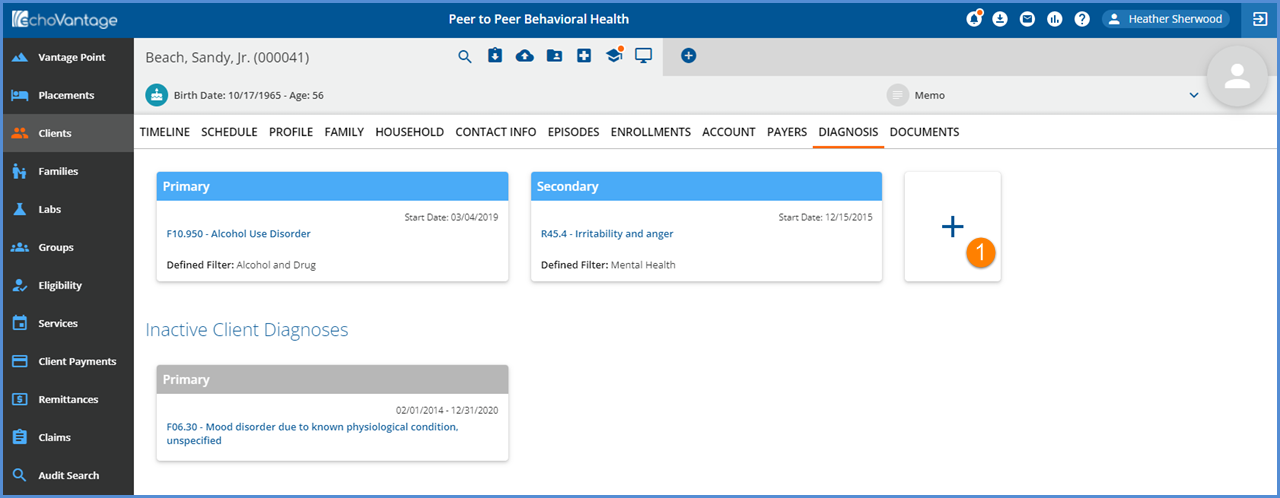
The Diagnosis tab stores information related to a client's individual diagnosis, and the client may have more than one open diagnosis at any given time. The cards are grouped by active diagnoses, the cards with the blue header at the top; while inactive diagnoses are the cards with the grey header grouped below Inactive Client Diagnoses section. Within these groupings, the cards are ordered by Type, Primary then Secondary, etc., and then by descending date order, most recent first. Summary information is displayed on each diagnosis card which includes:
-
Type (Primary, Secondary, etc.)
-
Start Date
-
End Date if inactive
-
Diagnosis code and description
-
Program or Defined Filter
-
The field available is based on the Diagnosis Matching on Service Entry section of Configuration > Setup > Diagnosis
-
And the available field must be populated on the Add/Edit Diagnosis screen
-

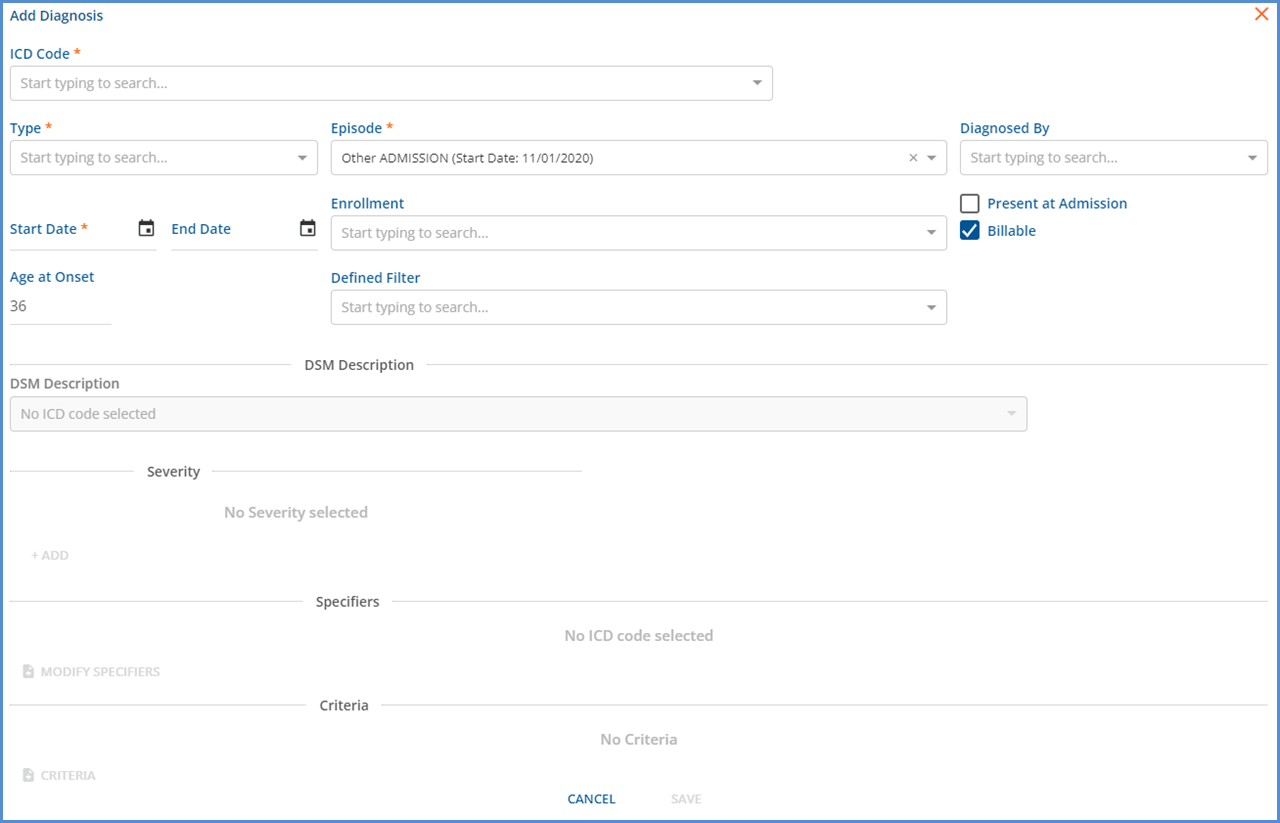
1. Click the Blue + (or + Add Client Diagnosis during initial entry) to add a new Diagnosis. Fields with an orange asterisk are required.

2. ICD Code - Use the down arrow to see the list of ICD Codes or use the smart search feature.
-
Typing a partial code like F10 in the ICD Code box produces a list of the Alcohol related ICD Codes.
-
Typing a search term like depress produces a list of depression related ICD Codes.
-
Highlight the appropriate diagnosis once displayed and click to select.
3. Type - Select the appropriate Type for the ICD Code that was just entered. The Choices are
-
Primary
-
Secondary
-
Tertiary
-
Rule Out
-
In Remission
-
Resolved
-
Provisional
4. Start Date - This is the date the diagnosis is defined.
5. End Date - This is the date the diagnosis is ruled out or resolved. Leave blank if the diagnosis is active.
6. Age at Onset - The system populates this field based on the client's date of birth and the Start Date entered for this diagnosis. This field may be edited by highlighting the calculated age and entering the desired number.
7. Episode - The system defaults to the open Episode with the most recent Start Date. Use the drop-down list to make a different selection.
8. Enrollment - Use the Enrollment field to associate this diagnosis to a client enrollment. This field may be left blank.
9. Defined Filter or Program - The label for this field depends on the selection made in the Diagnosis Matching in Service Entry section of the Configuration > Setup > Diagnosis page.
10. Diagnosed By - Select the name of the person responsible for the Diagnosis.
11. Present at Admission/Billable - A check mark indicates a true statement for Present at Admission or Billable. A blank box indicates the diagnosis was NOT present at admission or is NOT billable.
Once the required fields have been populated, the blue SAVE button at the bottom of the screen is enabled. Click SAVE to record the Diagnosis entry.
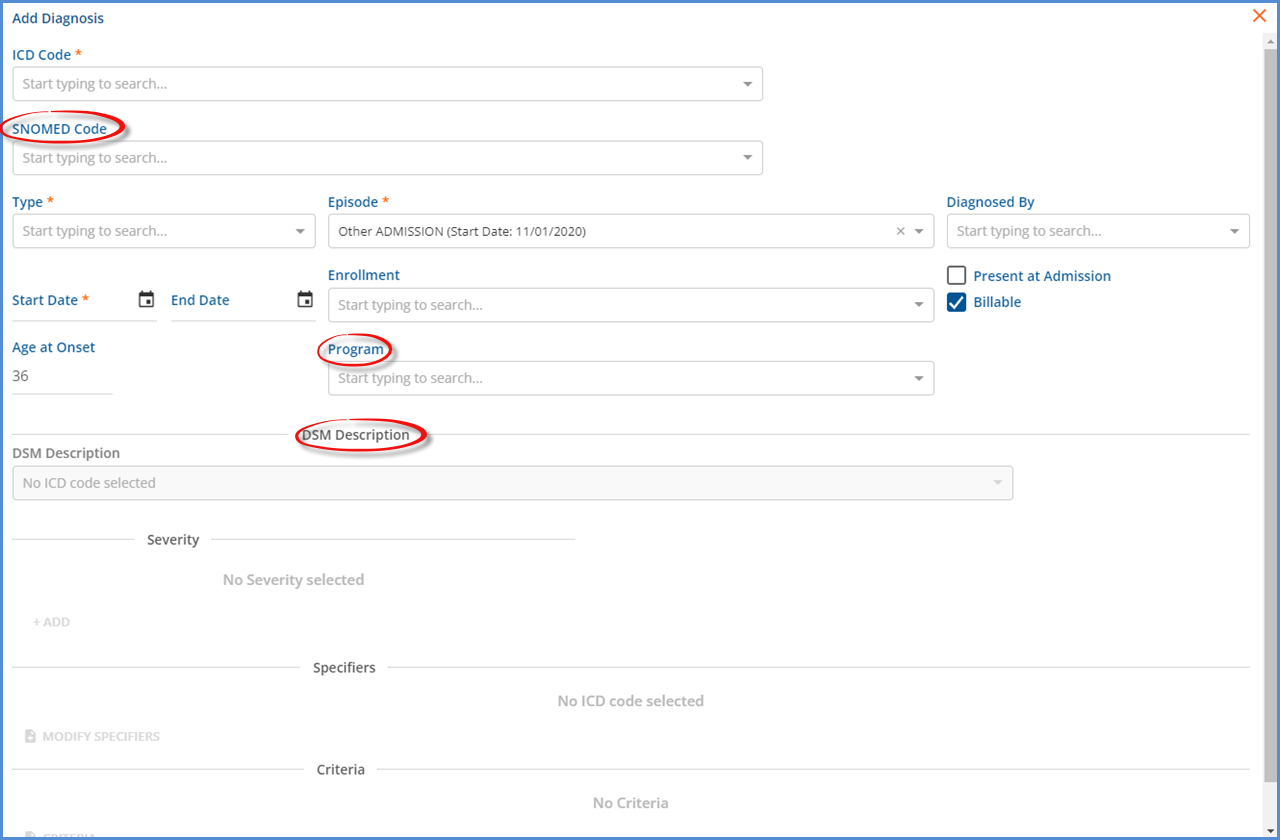
Additional information may be recorded with the Diagnosis depending on organizational requirements. These settings can be found in Configuration > Setup > Diagnosis. An agency may opt to include one or both options (DSM or SNOMED), or neither option.
If the Show DSM on Client Diagnosis box is checked, the Diagnosis entry screen has a DSM Description area as shown in the example below. Follow the on-screen prompts to complete.

If Show SNOMED on Client Diagnosis is enabled, the Add/Edit Diagnosis screen lists a SNOMED Code field directly beneath the ICD10 Code field. The image below is from an agency that has show SNOMED enabled AND show DSM enabled AND also has Program selected for the Diagnosis Matching on Service Entry option.

