Beginning with EchoVantage v2.36, Staff Schedules is a new Configuration option found in the Staff/Users section. Staff Schedules allows an organization to define or "Set" the default or typical schedule for an individual staff or a team of staff for up to one year from the current date. Time away like vacation or training days can still be managed using the Scheduler's Staff Time Events. Setting Staff Schedules, especially if they differ from the default of 8am-5pm, allows the Search for Next Available function found in the Vantage Point>Clinical Home>Scheduler to return more precise results.
**The number of segments available to schedule per day for an individual staff has been increased from 2 to 24 with the release of EchoVantage version 3.09. Additionally users can now specify a Category (Defined List) and Location (Component Code) for each time segment. These Categories and Locations will be included in the Scheduler's SFNA (Search for Next Available) function in a future release. The last section has examples of these schedule enhancements.**
Click HERE for more information on the updated Scheduler function.
Click HERE for more information on creating and maintaining staff Teams.
Viewing Current Staff Schedules
Navigate to Configuration>Staff/Users>Staff Schedules to display the Staff Schedules home screen.
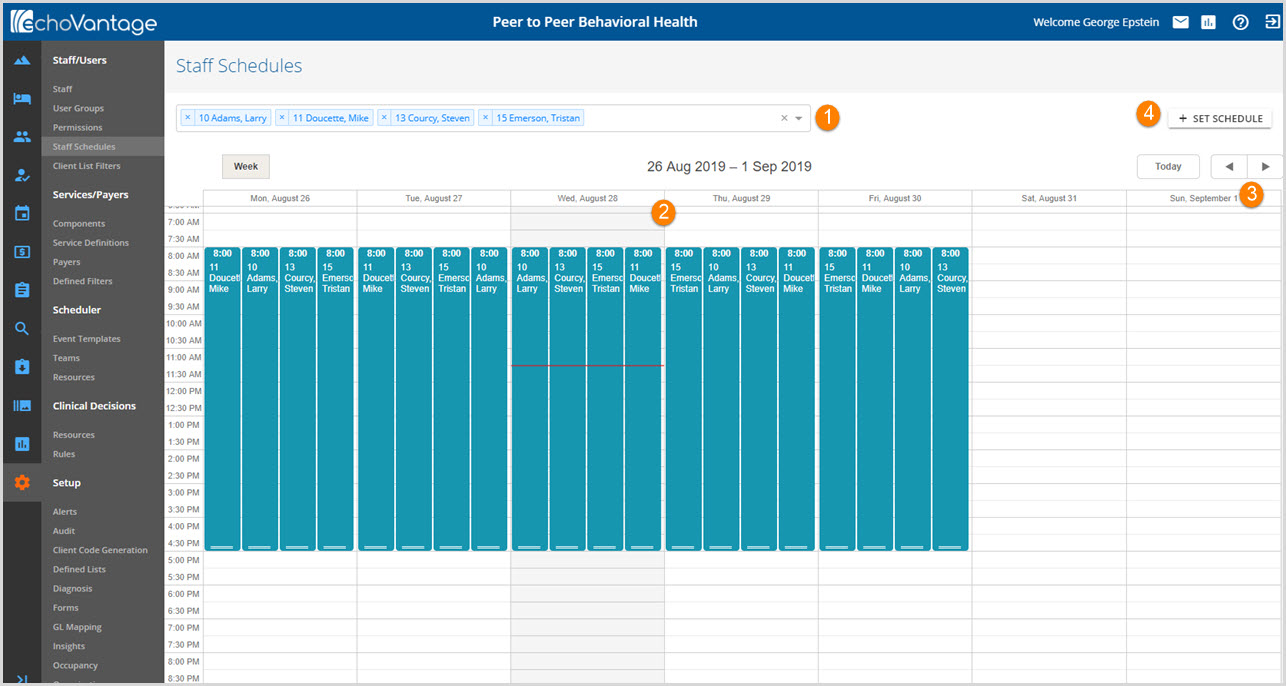
1. Use the drop-down listing to select Staff or Teams to show in the schedule preview.
2. The schedule preview defaults to the current week. Initially, the schedule preview displays the current default schedule for each user selected.
- Current Defaults are:
- Blocks from 8am - 5pm
- Days from Monday - Friday
- Clearing/Removing a Staff member from the Staff list in the search bar clears that staff's schedule from the preview.
- Clear a Staff by clicking on the small "x" on the left-hand side of the blue name box.
- Double-click on any staff's blue schedule block to view the schedule details for the currently selected week.
3. Use the left and right arrows to advance the preview back or forward one week at a time. Currently Staff Schedules may only be viewed by week.
4. Click on the + Set Schedule button to set schedules for staff or teams of staff. This opens the Set Schedules screen.
Setting Schedules
Schedules may be set for one or more staff or teams. The schedules may include up to 2 time periods per day. Setting schedules does not affect previously scheduled Events, even if they fall outside of the staff person's schedule.
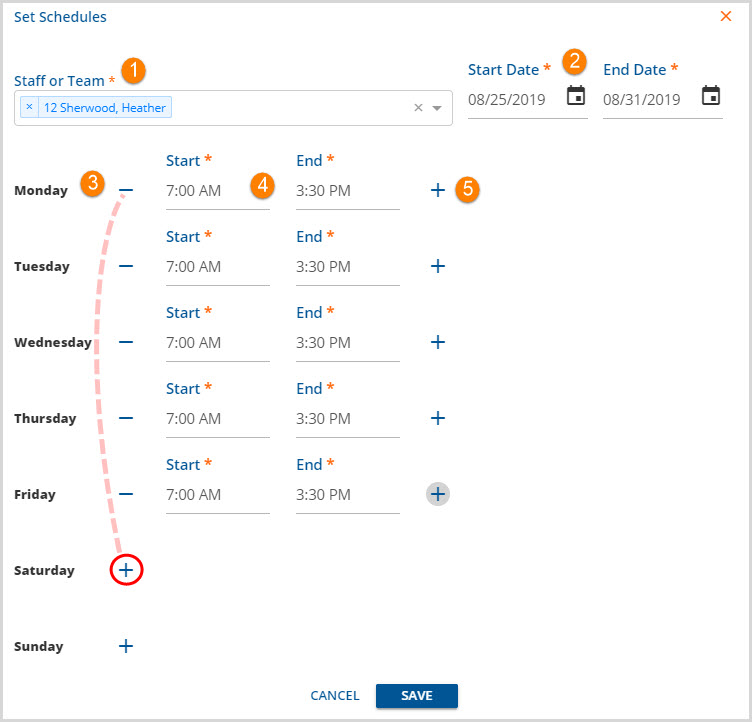
1. Staff or Team - Use the drop-down listing to select the Staff and/or Team to schedule.
- Multiple staff and/or teams may be scheduled at the same time.
- Remove a staff or team by clicking on the "x" to the left of the staff or team name.
- At least one staff name or team name is required.
2. Start Date and End Date - Enter the date range to which the schedule will apply.
- Start Date cannot be on or before the current date.
- End Date cannot be more than one year from the current date. The schedule will be set for the full week (Monday through Sunday) that includes the End Date.
3. Days - Click on the plus "+" sign of each day that will be scheduled. This expands the Start and End time fields.
- The plus "+" sign must be clicked for each day that will be scheduled.
- Any expanded Start and End Time fields require an entry or the SAVE will not validate.
- If a day was expanded in error, click the minus "-" sign to collapse the Start Time and End Time fields.
4. Start and End Time - Enter the starting and ending time of the scheduled work day.
- The Start Time entered must be before the End Time entered.
- Tab or click in the End field to navigate from Start to End.
- The time may be entered using just numbers and will default to AM or PM based on a 24 hour clock. For example,
- Entering 0800 in the Start time and pressing Tab results in 08:00 AM.
- Entering 0500 in the End time and pressing Tab results in 05:00 AM.
- Entering 1700 in the End time and pressing Tab results in 05:00 PM.
5. Click on the second plus "+" sign to added another set of Start and End times. A second set would be needed if split shifts, lunch breaks, or night shifts that work through 12:00 AM are being scheduled.
Remember to click the blue SAVE when all entry is complete to record the schedule. Setting recurring Staff Schedules will override any previously set individual schedules.
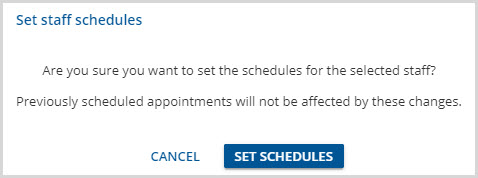
A confirmation box like the image above will appear. Click on the blue SET SCHEDULES to continue. Click on CANCEL to return to the Set Schedules screen.

A successful Set Schedules SAVE results in the on-screen message above.
If dates and/or times do not validate, the schedule will not save.
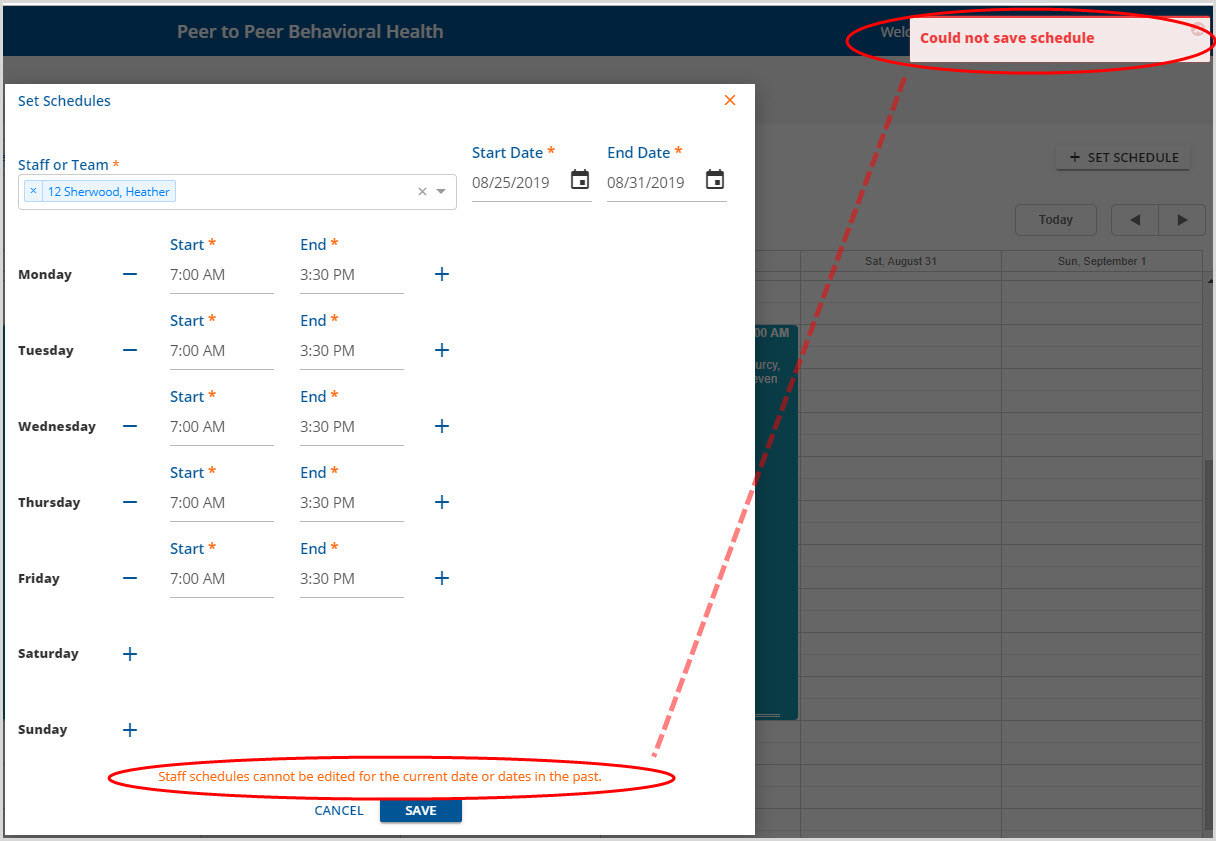
A red on-screen action box will indicate "Could not save schedule" and an error message with more detail will display in orange above the Cancel and Save buttons. Make the required edits and SAVE again to "Set" the Schedule.
Editing a Saved Schedule
There will likely be occasions when changes need to be made to a schedule that has already been set. There are several ways to edit a schedule. The method selected will depend on what and how much needs to be edited. Using each method is described in detail below.
1. Overwrite the existing schedule with a new schedule.
- Use this method when editing several consecutive days, weeks or months ie staff member goes on extended leave or changes from the night shift to day shift. This is also the most efficient way to correct a Team Schedule that was saved with errors.
- Follow the same steps as outlined in the Setting Schedules section above.
- **NOTE** This will overwrite any existing schedules that exist for the date range specified in the new schedule. Exercise care when using this method and entering dates.
2. Resize or Drag and Drop the schedule block.
- Open the Staff Schedules preview with the correct staff and week selected.
-
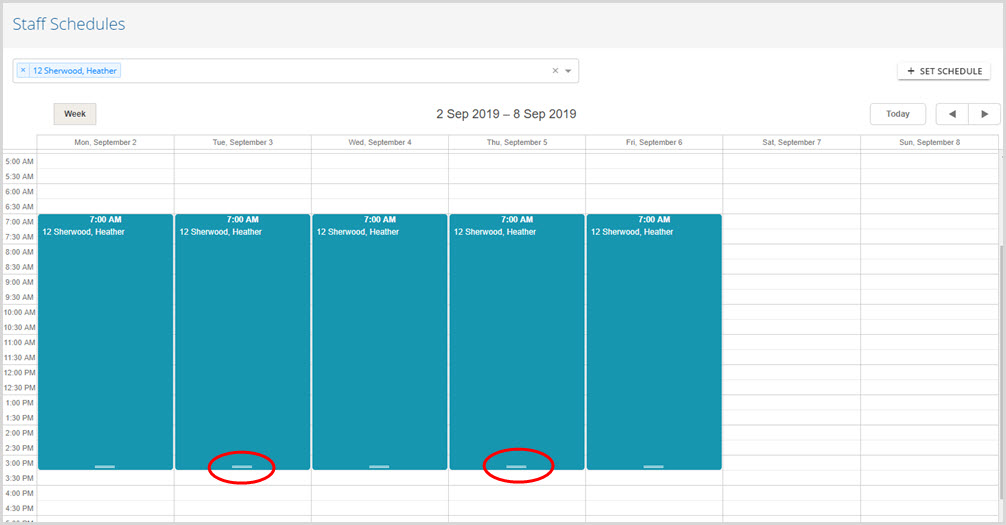
- Hover the mouse over the white line at the end of the schedule block (circled in red on Tuesday and Thursday) until a double-ended arrow appears.
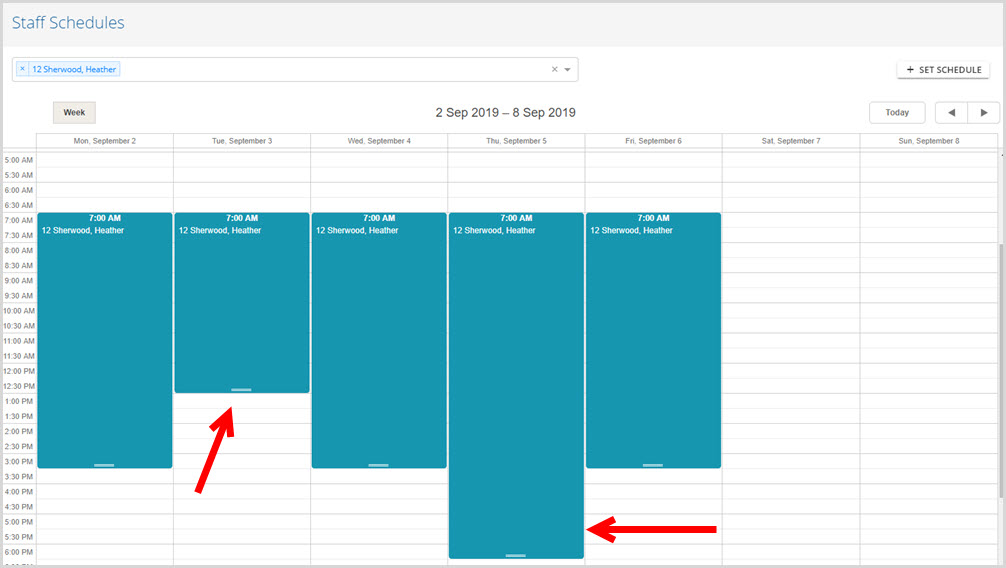
- Left-click and resize the block - up for earlier end time, down for later end time.
- A confirmation box displays as soon as the left mouse button is released.
-
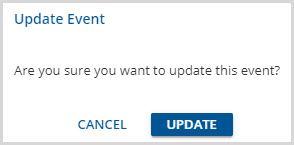
- To save the changes click on the blue UPDATE button. Click CANCEL to return to the preview without making changes.
- Resize all of the desired blocks, confirming each edit by selecting UPDATE.
-
- If the same number of hours will be worked but the Start and End times need to be updated, the entire schedule block may be dragged and dropped to complete the change.
-
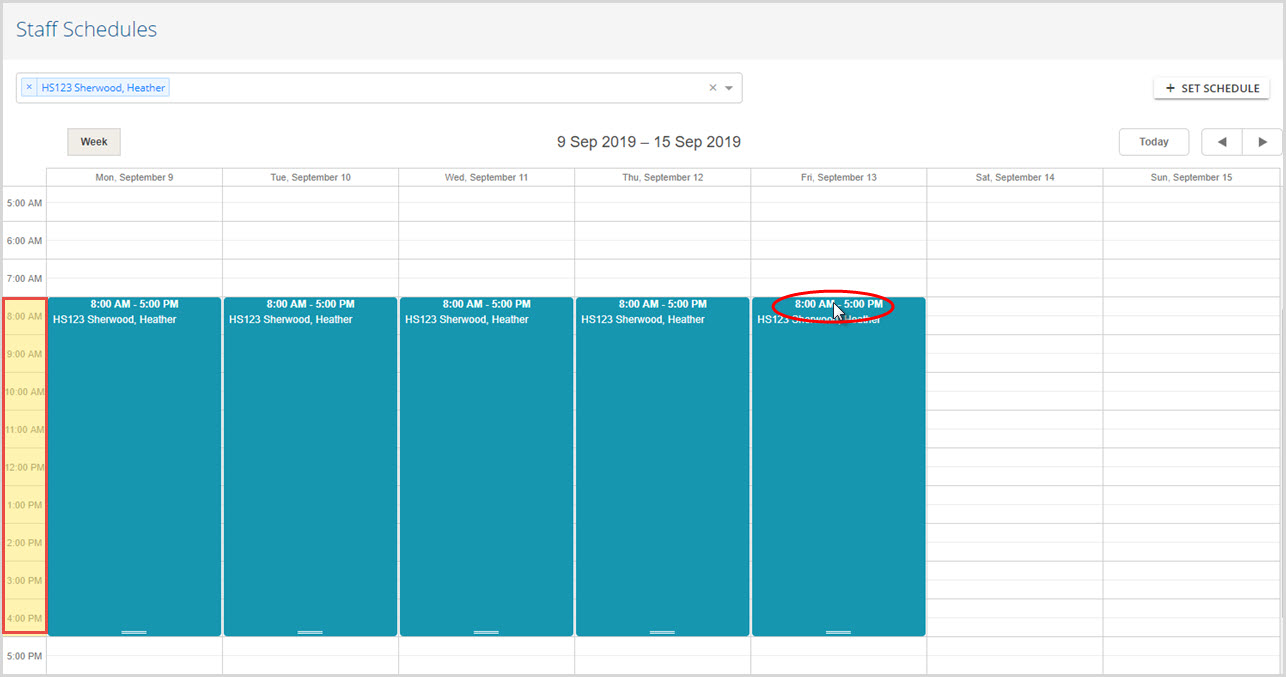
- Click and hold on the top of the schedule block to move, on the time. Note that the currently time block turns yellow.
-
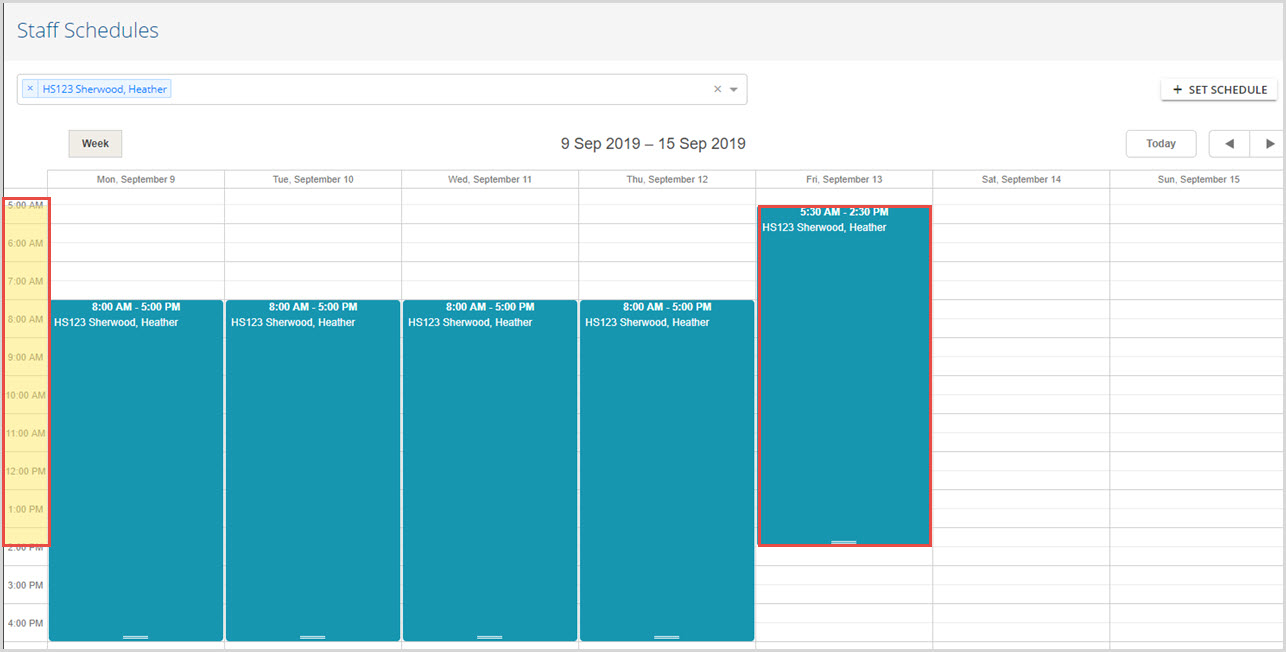
- Drag and drop to correct start time. Note that the new time block is yellow.
- An Update Event confirmation box will appear. Select Update to record the changes to the schedule block time.
- **Schedules may NOT be moved between days.**
3. Make changes using the Edit Schedule screen.
- This is useful when several days within the same week need to be edited. This is the only method that can add or remove a second set of Start and End Times.
- Open the Staff Schedules preview with the correct staff and week selected.
-
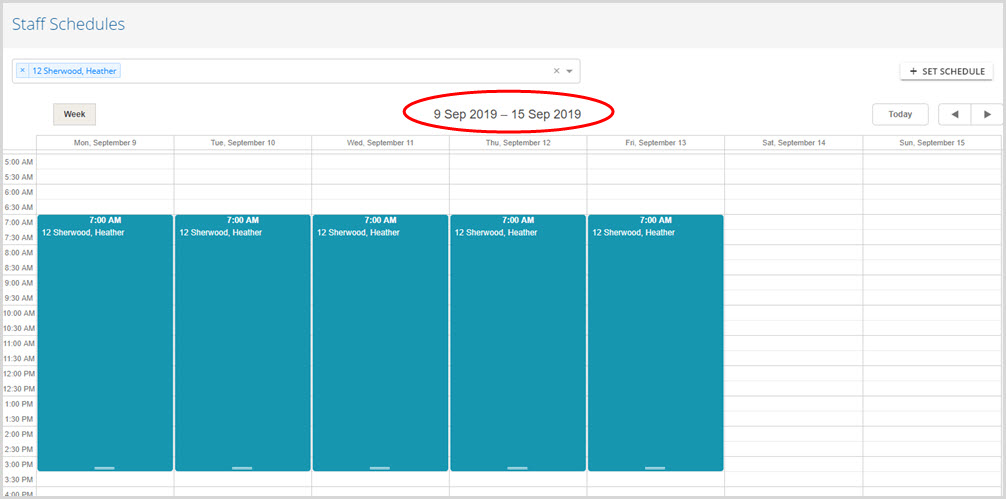
- Double-click on any schedule block to open the Edit Schedule screen.
-
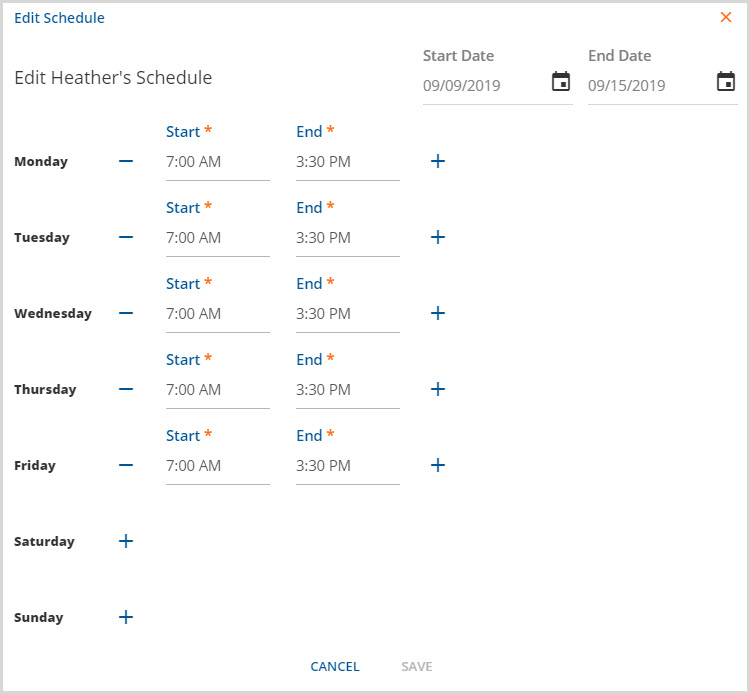
- This is essentially a pre-populated Set Schedules screen. Navigation and information entry works the same way.
- Staff Name is referenced.
- Start Date and End Date reflect the week selected in the Preview.
- The current Days with Start and End Times are populated. The dates may not be edited.
-
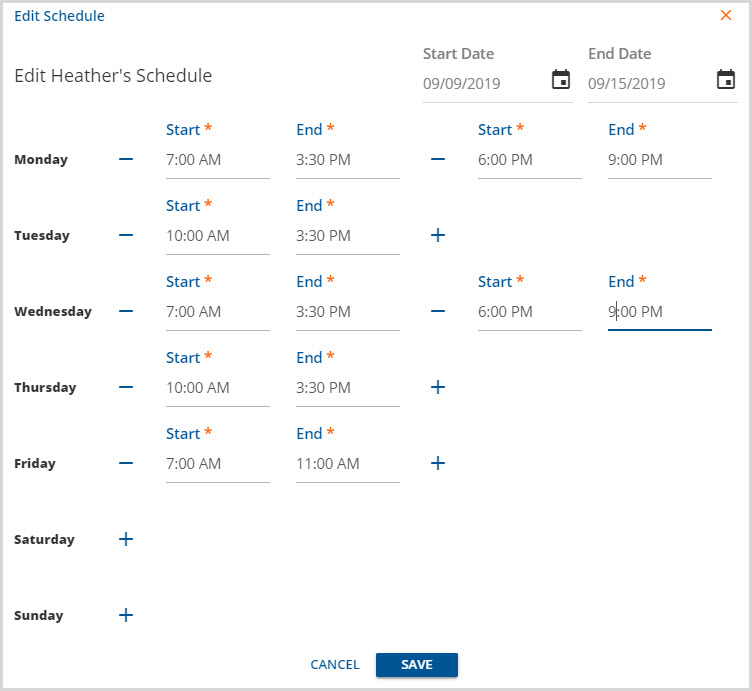
- The following edits were made:
- Monday and Wednesday were changed to reflect a second shift. The second plus "+" sign was clicked to add the needed times.
- The Start Time on Tuesday and Thursday changed to 10:00 AM.
- Friday's end time was changed to 11:00 AM.
- Clicking Save immediately records the changes and an on-screen message appears.
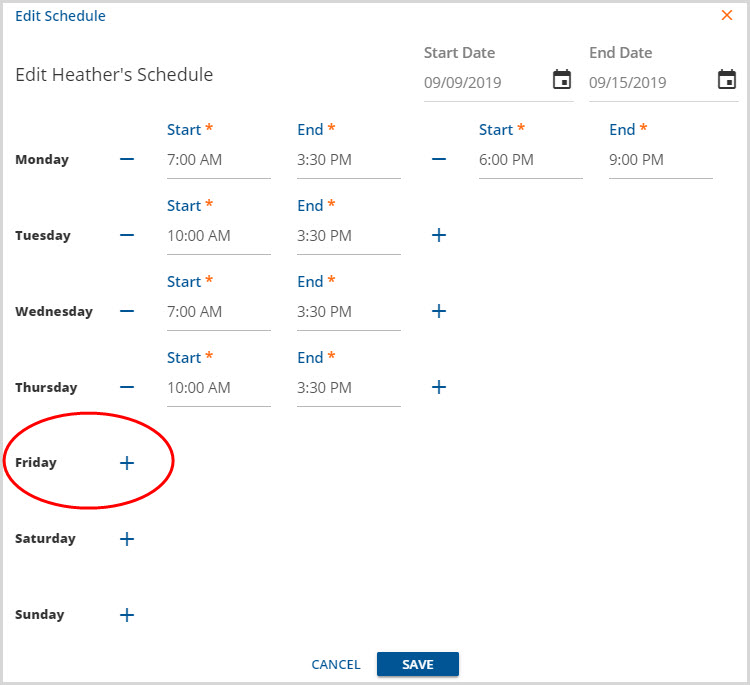
- To remove a second shift or delete a single day
- Double-click on a schedule block to open the Edit Schedules screen.
- Clear the Start and End Times.
-
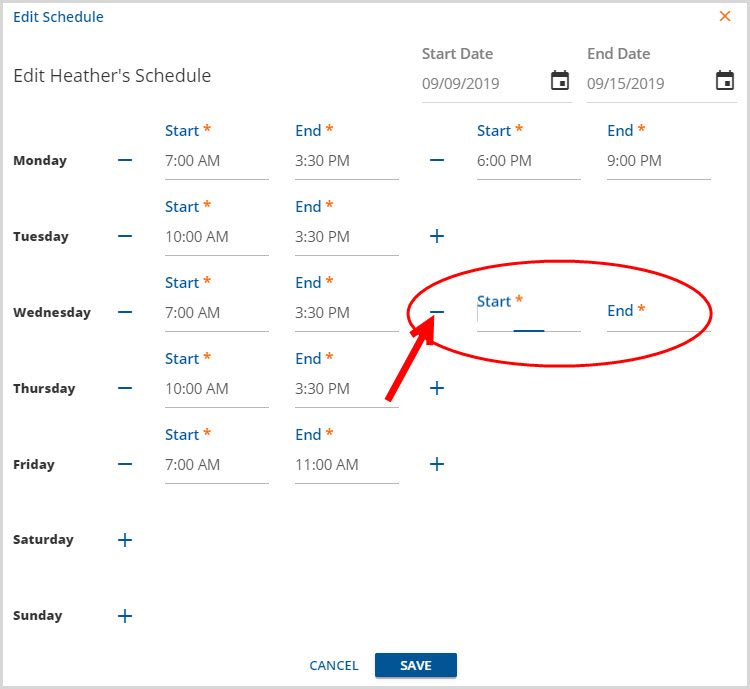
- Collapse the now unused Time Fields
-

- If a set of times is expanded, it requires entries. It must be collapsed to pass the validation and SAVE.
-
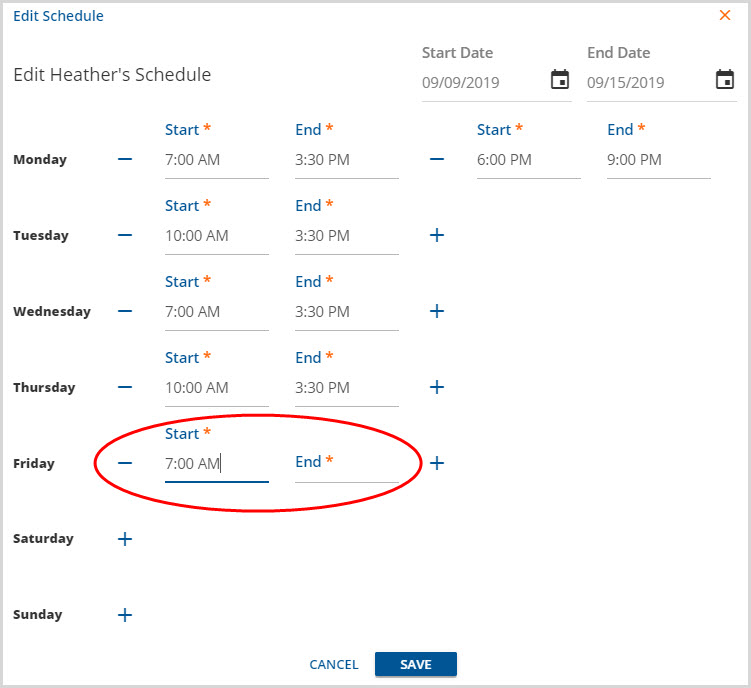
- The same process of clearing and collapsing the Start/End time may be used on the first set to delete an entire day.
-
Set Schedules in Version 3.09
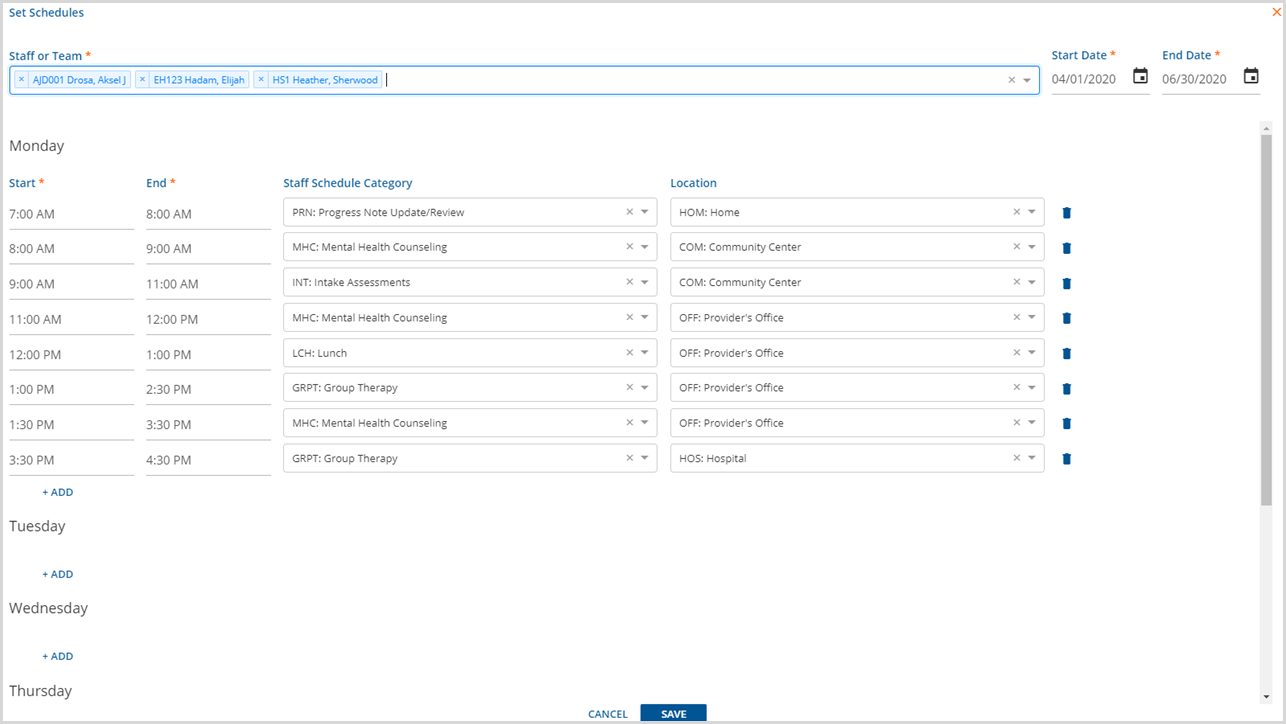
Version 3.09+
- The number of segments available to schedule per day for an individual staff has been increased from 2 to 24.
- A Category (Defined List) and Location (Component Code) can now be specified for each time segment.
- The Categories and Locations will be included in the Scheduler's SFNA (Search for Next Available) function v3.10.
