The Account tab in the Clients main application menu provides the Client's self-pay balance and primary payer at a glance provided the currently logged-in user has access to the menu item and the selected Client. Users can also enter payments received from the Client and generate a receipt. Payments entered here may be viewed in a table with other Client payments received throughout the day in the Client Payments main menu option. Click HERE for more information on Client Payments.
With the release of EchoVantage version 3.30, the Client Account tab can now be designated as Read Only.
- Define menu access in Configuration > Staff/Users > User Group > Menu Access.

- Existing access to Accounts remains unchanged, so Read Only must be specified for the applicable groups.
- Users with Read Only access can View Payments and Payment details and Print Receipts.
- Users with Read Only access can NOT add a new payment or Void an existing payment.
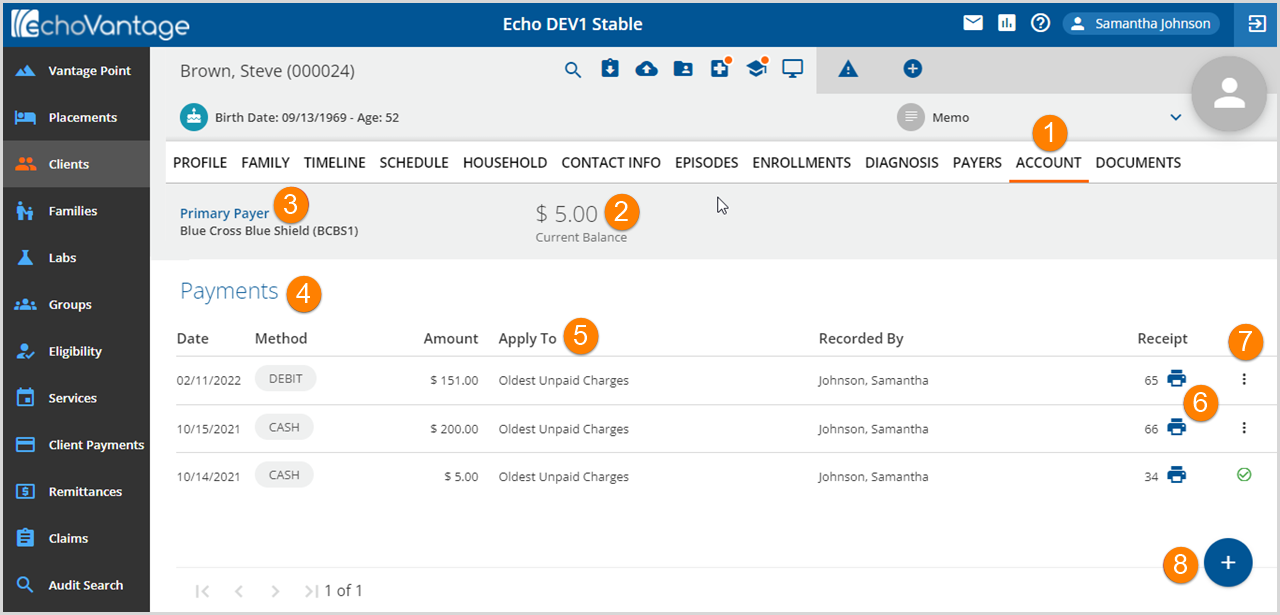
1. Account - The Account tab is located between the Payers and Documents tab in the Clients main application menu.
2. Current Balance - This displays the amount currently due from the client or the Self-Pay balance.
3. Primary Payer - This displays the current Primary Payer based on the setup in the Clients > Payers tab.
4. Payments - The Payments table is a list of payments received from the currently selected client.
- Date - Listed in descending date order. The payment date defaults to the date of entry.
- Method - The type of payment tendered; cash, check, etc.
- Amount - The amount of the payment tendered.
- Recorded By - The name of the user that entered the client payment.
- Receipt Number - The transaction number assigned to the payment.
5. An Apply To column was added to indicate how the type Client Payment is applied.
6. The Receipt Number is combined with the printer icon. The icon allows the receipt to be printed for any previously entered payment.
7. The status icon is a recent improvement with the release of EchoVantage version 3.30.
- The icons indicate the status or stage of the process of each Client Payment.
8. Click on the blue plus "+" to open the New Payment screen and enter a new client payment.
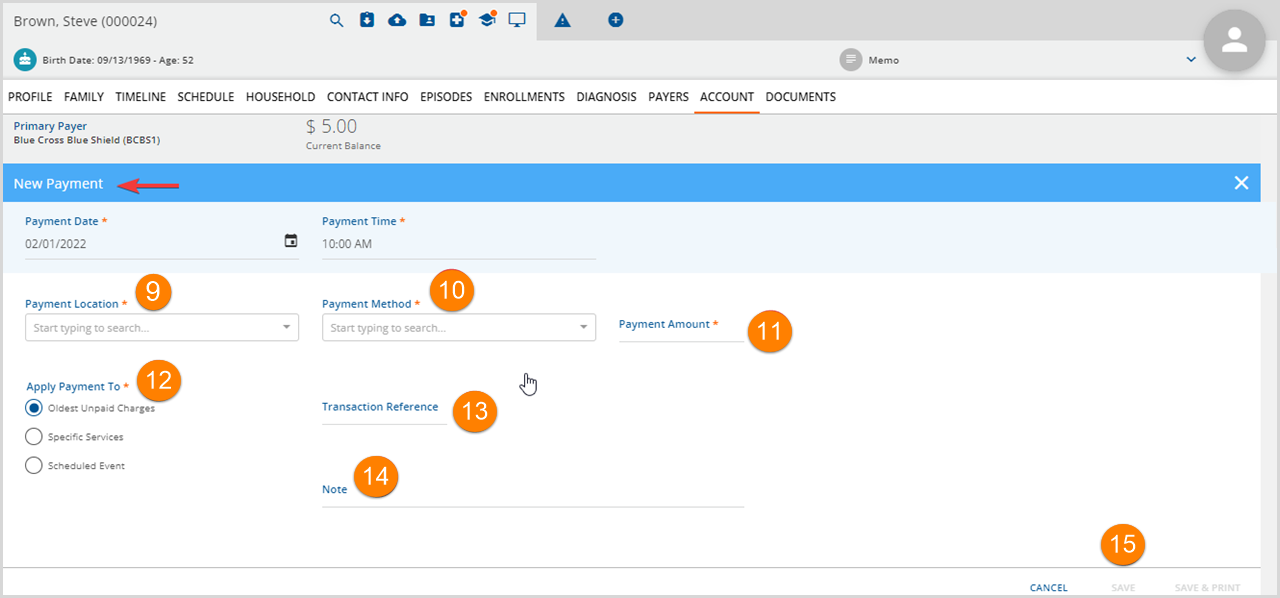
The Payment Date and Payment Time fields are located beneath the blue New Payment header. These fields default to the current date and time but may be edited to reflect the actual date and time received if payments are entered later in the day or even the next day.
9. Payment Location - Select a Payment Location from the drop-down listing. These locations must be defined by the agency in Configurations>Setup>Defined Lists>Payment Locations.
10. Payment Method - Select a Payment Method from the drop-down listing. This is not a defined list and the selections include:
- CA - Cash
- CC - Credit Card
- CH - Check
- DB - Debit Card
- EL - Electronic Payment
- MO - Money Order
11. Payment Amount - Enter the dollar amount of the payment received.
12. Apply Payment To - Select how the payment is to be applied. The selection here determines how the payment is applied to Charges and how the payment flows through the system. The options include:
- Oldest Unpaid Charges - The system automatically applies the payment to the oldest invoices after it is reconciled in the Client Payments menu option.
- Specific Invoices - A User must manually apply the payment to an invoice or invoices in the Client Payments > Apply Payments tab after the payment is marked as Ready.
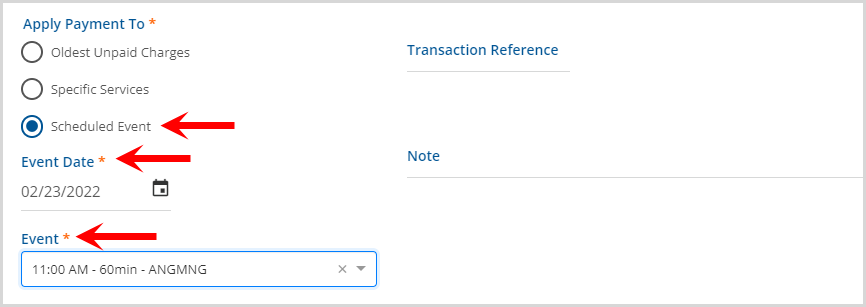
- Scheduled Event - When this option is selected, Event Date and Event fields display.
- The drop-down for the Event field is validated and only lists scheduled Events for the current Client based on the Event Date selected.
-
- Once saved, the Client Payment is then allocated to the selected Event and remains attached until,
- The Client Payment is fully applied to the Self Pay Charge resulting from the Service related to the event. The Payment Status is updated to Applied on the Clients > Account tab. This is automatically handled by the system.
- The Client Payment is partially applied, and the Service created from the specified event has a Status of DONE.
- The Client Payment remains in Pending Status until the associated Services has a DONE Status.
- After the Service is set to DONE and the APPLY_CLIENT_PAYMENTS job runs again, the Client Payment Apply To type is updated to Specific Service in place of Scheduled Event.
- The remaining amount is available to apply in the Client Payments > Apply Payments tab when the Client has an Active or Outgoing Self Pay balance.
- The event is deleted.
- A warning displays if deleting an Event with an allocated Client Payment.
-
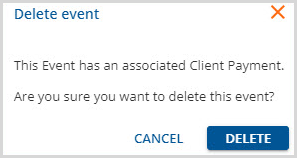
- If the Event deletion is confirmed, the allocated payment becomes an apply to Specific Services type of Client Payment, as above.
- Once a Client Payment is allocated to an Event, and a Self Pay Charge related to that event is generated, the APPLY_CLIENT_PAYMENTS job (which typically runs on the hour) automatically applies the Client Payment and generates a Ready Remittance. This automated process means no remembering to apply the Client's payment after Charges are created.
13. Transaction Reference - This is an optional user entered free text field that accepts a maximum of 20 characters.
14. Note - This is an optional user entered free text field that accepts a maximum of 250 characters. May be used to record additional direction or instruction for the user that reconciles the client payments.
15. Action Buttons - When the required fields have been completed, the action buttons will be enabled:
- Cancel - Allows the user to exit without saving or recording changes
- Save - Allows the user to Save the client payment entered
- Save & Print - Allows the user to Save the client payment entered and will open a printable receipt in a new tab. The receipt will be formatted similar to the example below.

Voiding a Client Payment
A payment on account that has NOT been Reconciled and marked as Ready in the Client Payments Reconcile screen may be Voided. For more detailed information on Client Payments in main application menu, click HERE.
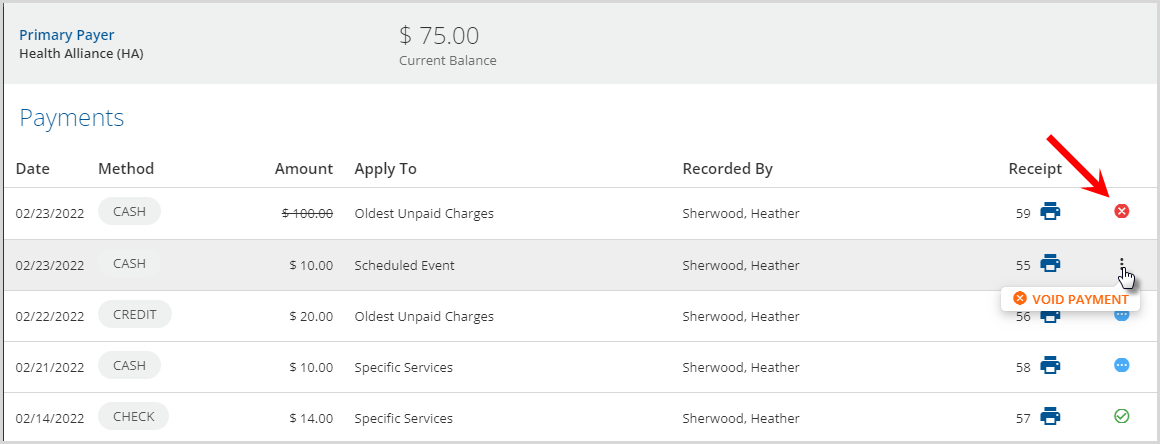
- Payments with a vertical ellipsis (three dots) are the only payments that can be voided because they have not been marked as Ready and reconciled.
- Select the ellipsis to display the VOID PAYMENT option.
- Click on VOID PAYMENT to display the void payment confirmation modal.
-
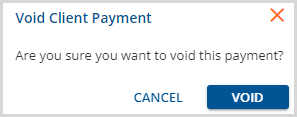
- Select the blude VOID to void the payment.
- Voided Payments continue to display but are marked as a VOID and are not included in Client Payment totals.
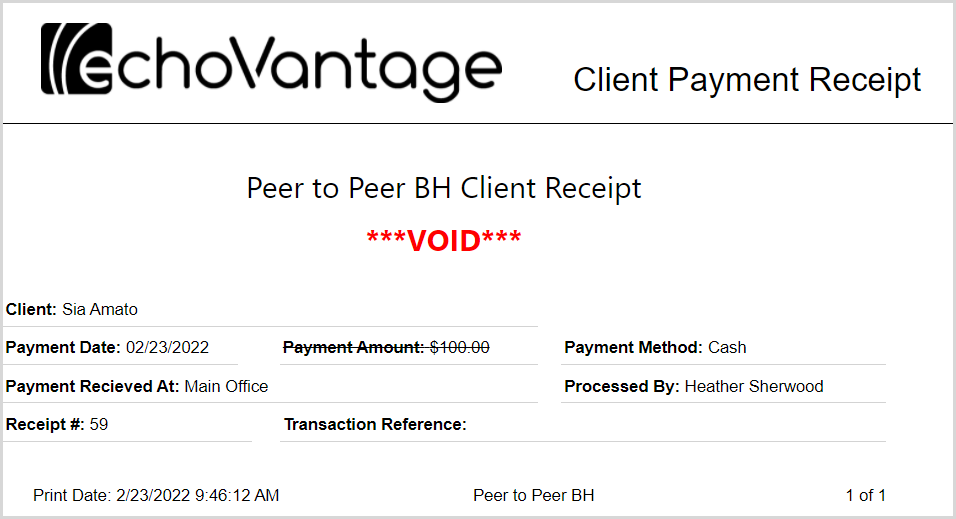
- The receipt is also updated to indicate that the payment was Voided.
