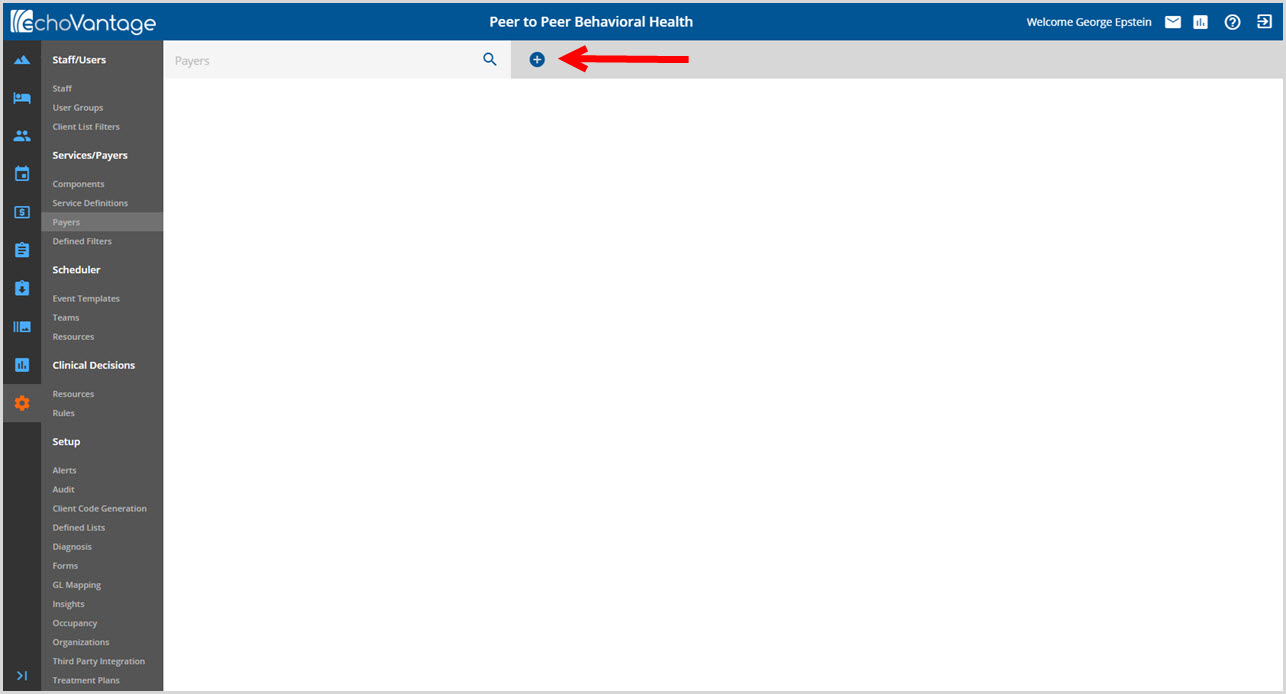
Before entering and processing services, producing bills, or entering transactions, the Payers involved in accomplishing these tasks must be set up. For new installations, the initial Payer screen is blank. Click on the blue plus "+" to add a new Payer.

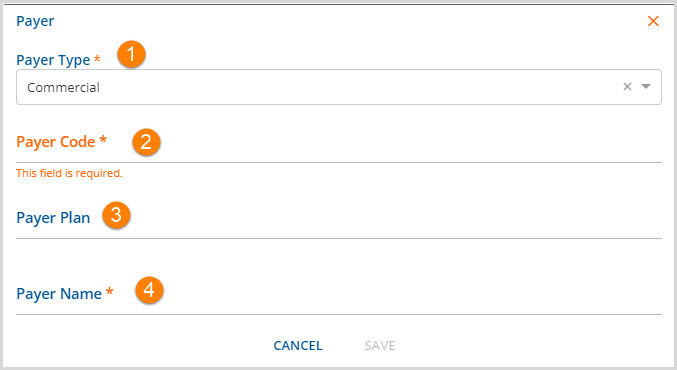
This opens the following screen.

1. Payer Type - Use the drop-down box to select the payer type. The application defaults to commercial.
2. Payer Code - Defines the code used internally by the organization for a payer. This is a required alpha-numeric field with a 15 character maximum.
3. Payer Plan - Use to further define the payer. This 15 character maximum, alpha-numeric field is not required.
4. Payer Name - Enter the payer name as it should appear on bills and reports. This is also the name displayed in the payer information bar. This field has a 45 character maximum.
Remember to click SAVE to record the Payer.
Once the Payer is added to the system, the following tabs are available to add and manage supporting information.
An exception to the tabs above is the Payer Type Self Pay. A Self Pay Payer Type does not have access to the RATES tab or the need for an NPI tab. For Self Pay, the base rate entered in the Service Definition setup defines the Self Pay rate. Click HERE to go to the Service Definitions RATES tab for additional information. The amount actually billed to the Client and the payment required is defined in the Client Fees section of the Self-Pay Client Payers tab. Click HERE for information on Client Fees in the Self-Pay Client Payer.
An existing payer may be selected to view and/or edit by typing any portion of the pay name or code in the search bar OR by clicking on a name from the displayed list.

