Remittance Entry records the transactions applied to existing billed charges, including payments, client fee adjustments, contractual obligations, and expected adjustments along with credit and loss transactions. Without all the steps preceding and including Remittance Entry, data will not populate the Unprocessed Remittances function of the Vantage Point menu’s Fiscal Overview tab.
Unprocessed Remittances Overview
- Payments and adjustments entered, but not posted to a charge.
- Display as a $ dollar amount.
- Task leads to Process Remittances. (Click the link to view instructions for Remittance Entry.)
- Successfully Processed Remittances start the Waterfall Billing process for Secondary Payers. Click HERE for more information on Waterfall Billing.

Select Unprocessed Remittances to navigate to the CREATE screen.
CREATE
Versions 3.10 and Earlier
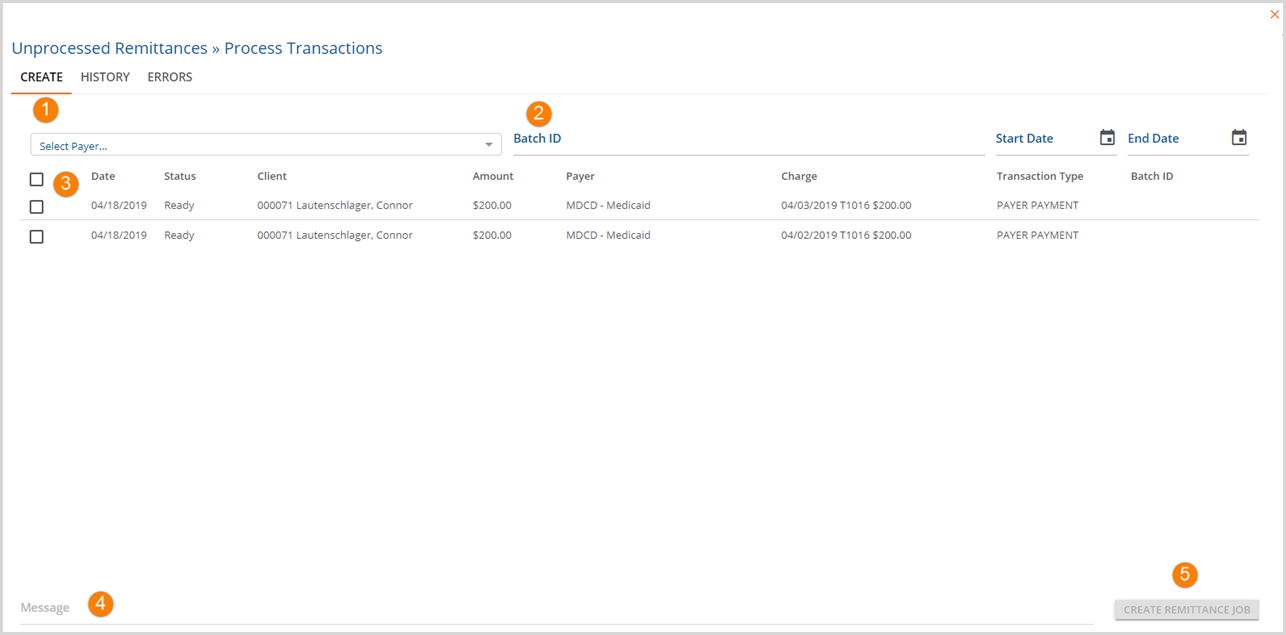
1. The first tab is Create. This screen displays all the remittances that have not yet been processed. The view can be filtered.
2. Select Payer - A payer is required to choose filtering criteria.
- Filters include:
- End Date
- Start Date
- Batch ID
3. Check boxes - Mark listings to select them for the job. (Clicking the checkbox next to Date selects/deselects all check boxes.)
4. Message becomes available after selecting at least one listing. Enter a unique description to identify the job (recommended).
5. Create Remittance Job becomes available after selecting at least one listing. Click to run the job with all marked remittances. This action changes the status to Batched for all remittances in the job. Job Created flashes momentarily when processing tasks complete successfully.
Version 3.11 Enhancements
In keeping with the enhancements made to the other Fiscal Overview tabs, Unprocessed Remittances has also been updated with the same performance enhancements. The initial screen does not load remittances and displays a "Please Search to See Results" message.
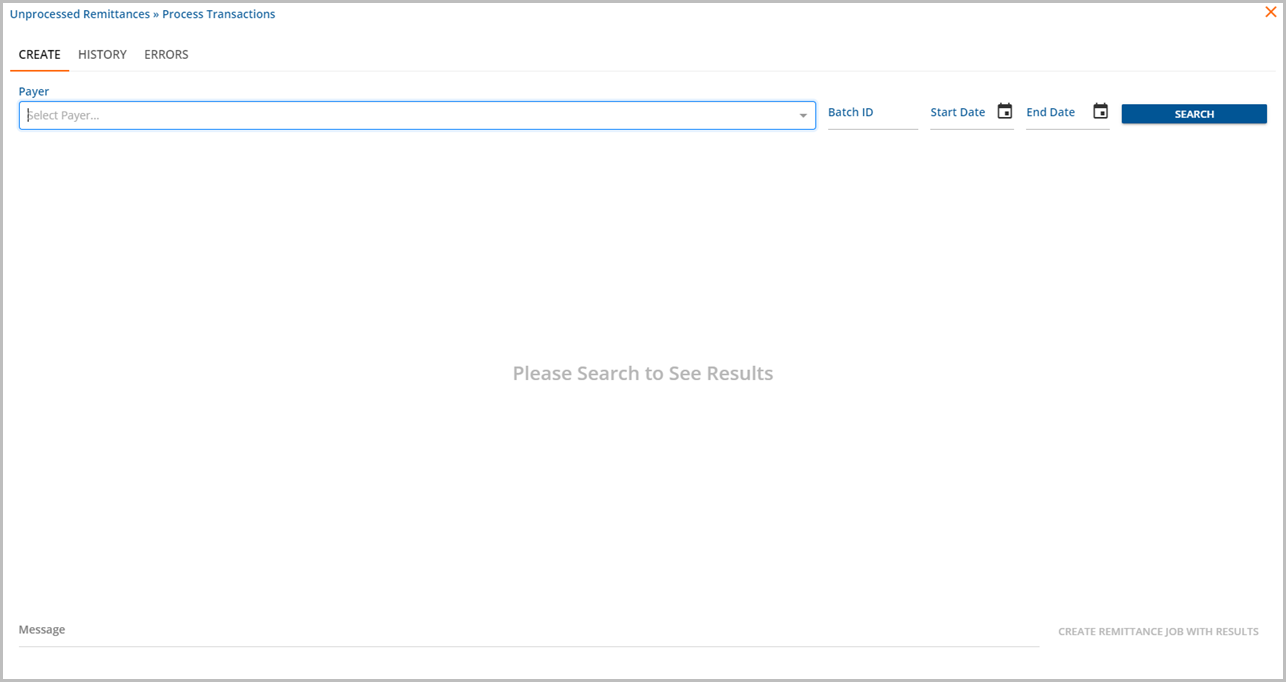
Clicking the SEARCH button without selecting a Payer or using any filters loads all unprocessed remittances.
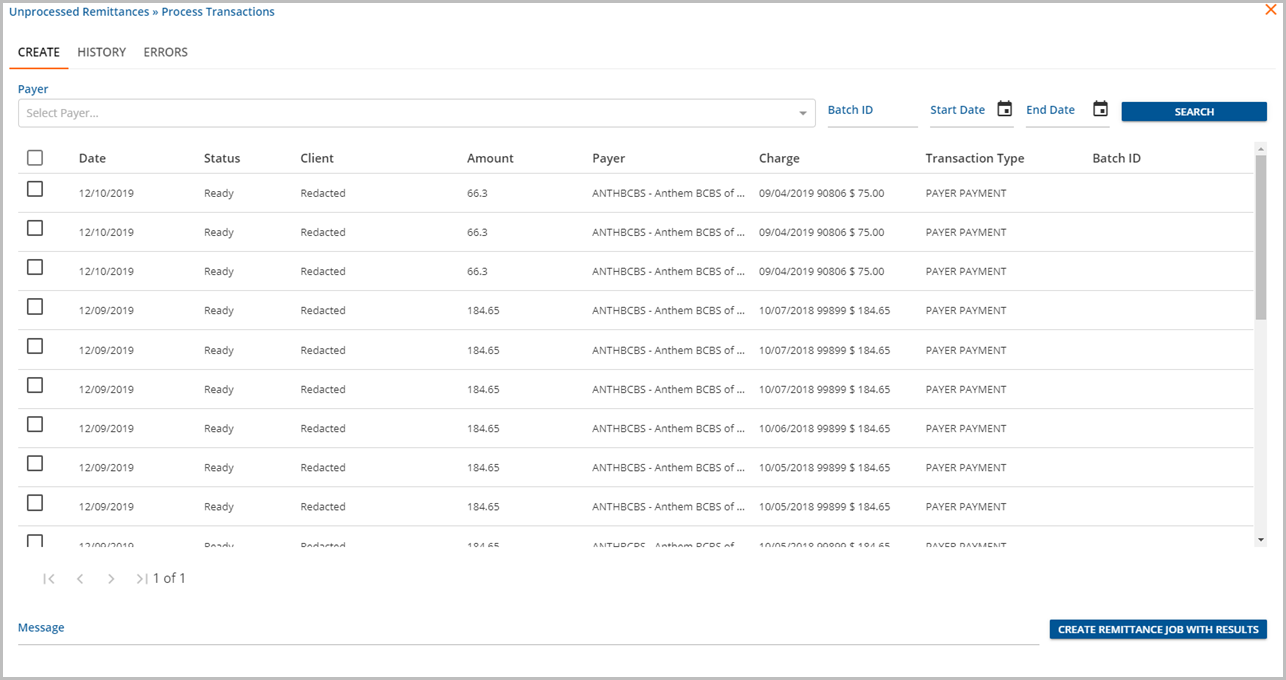
The results are paginated, displaying the first 50. The results can be refined by using the filters. These filters can now be used individually or in any combination. A Payer selection is no longer required.
- Payer
- Batch ID
- Start Date
- End Date
A Remittance job may be created with Results or Selection.
- Create a job with Results by performing a Search, entering a message, and then selecting the blue CREATE button without marking any checkboxes.
- The blue CREATE button indicates "Create Remittance Job With Results", shown above.
- This includes all results from the search in the job
- Even results displayed on other pages
- Create a job with Selection by marking a checkbox(es)
- The blue CREATE button indicates "Create Remittance Job With Selection" shown below.
- The includes any marked records in the job
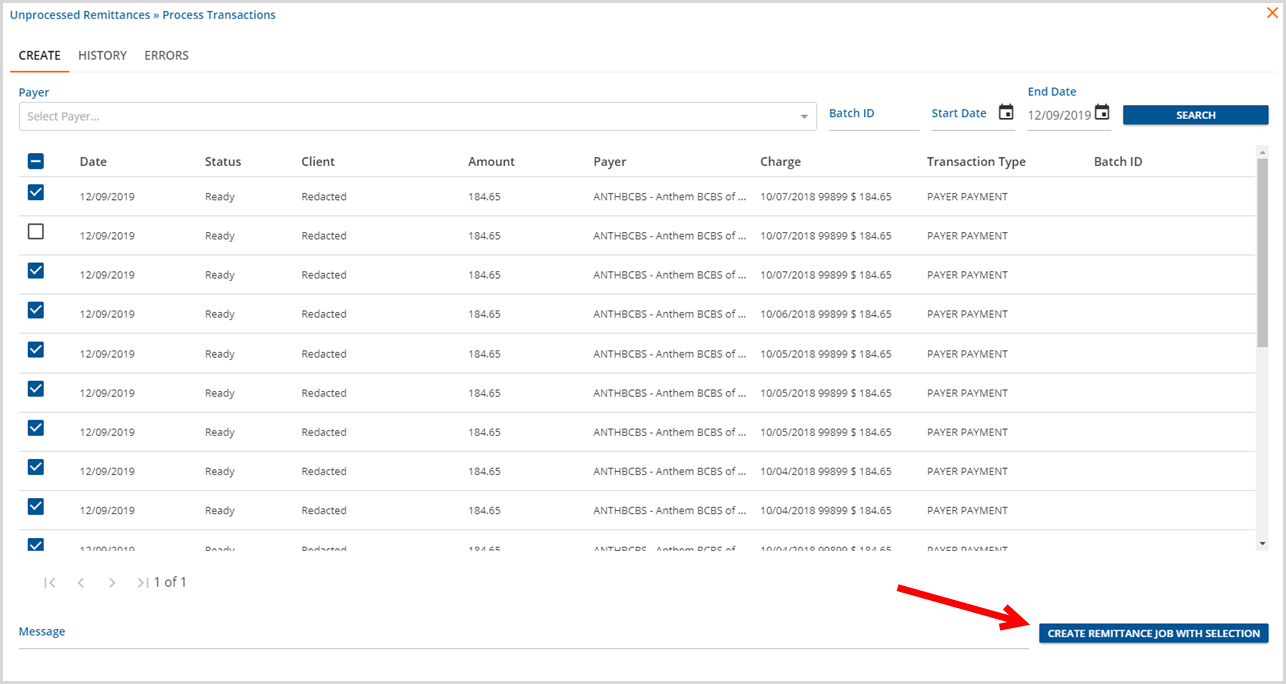
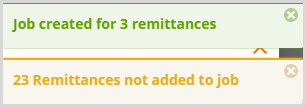
When the CREATE button is selected, a confirmation box appears with a count of the number of records that will be included. To continue, select CREATE JOB in the confirmation modal. A success Toast message (green box) displays indicating the number of records successfully added to the job. If any record fails to be added to the job, a Warning Toast message (orange box) displays with the count of items that could not be added. Previously only a single error message that the job could not be created was displayed.

|
|
HISTORY

6. Select the History tab to view job bath information.
7. The list of jobs can be filtered by Batch ID, Start Date, and End Date.
8. Finalize - Select if the job has zero errors, then Click OK to confirm. The batch can be Reversed which moves the remittances in the batch back to Unprocessed Remittances. Use the Retry option to rerun the batch.
- Record Saved flashes on the screen when the transaction completes successfully.
- Status - Status indicates which stage the selected job is in during processing.
- Preview indicates job is ready to Finalize, Retry, or Reverse.
- Pending indicates the job is waiting to process.
- In Progress indicates the job is processing.
- Done indicates the processing is complete.
- Reversed indicates the job was previously created but returned to Unprocessed Remittances state.
To view a list of remittances included in the job, click the batch. The batch will have an orange line on the left side indicating its selected.
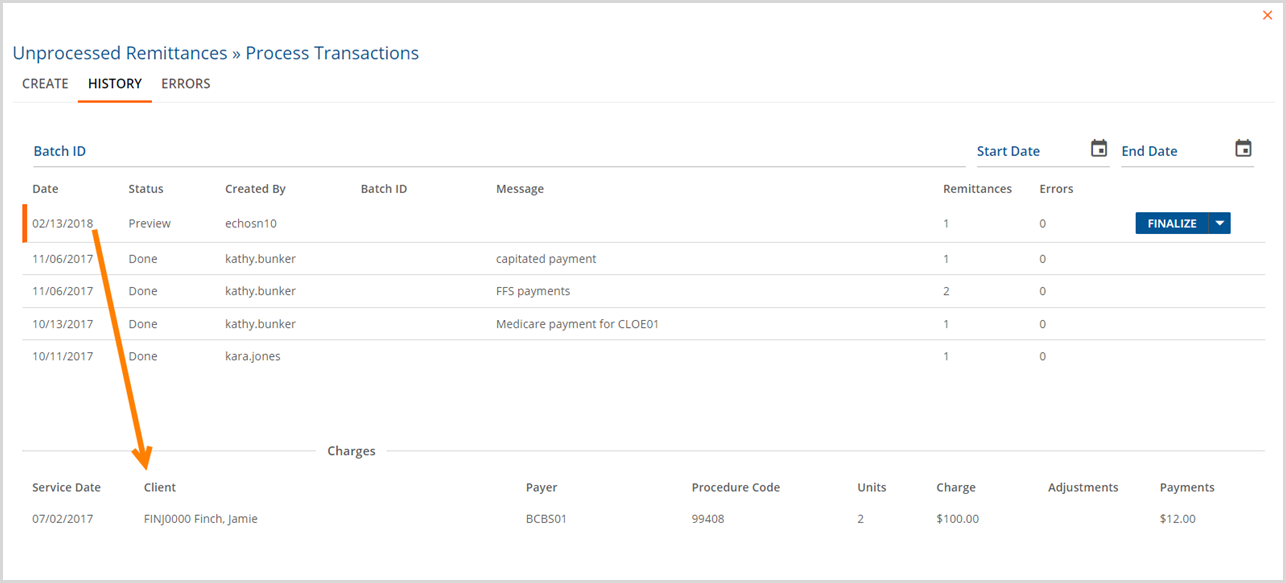
Additional detail on individual remittances can be viewed by clicking the remittance. Reprocessed charges will show once the option is clicked.
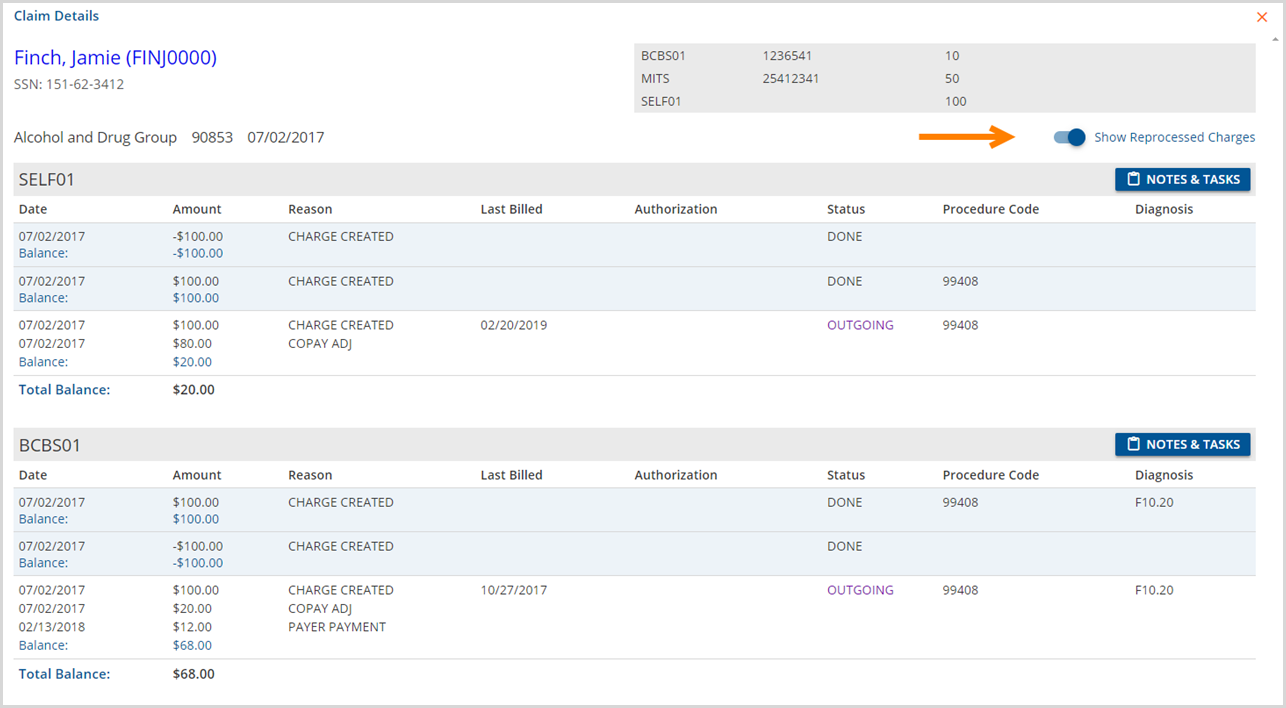
If the job processes successfully,
- Unprocessed Remittances clears by the job total Charge amounts, and Unposted GL Transactions increases by one.
- The Waterfall Process to secondary payers is triggered
- Waterfall charges are ready in Preview status under Unprocessed Services.
- Finalize (Retry or Reverse) the batch when ready.
- Click HERE for more information on Waterfall Billing.
ERRORS
If errors occurred during the Create job process, proceed to the ERRORS tab to view detailed information.
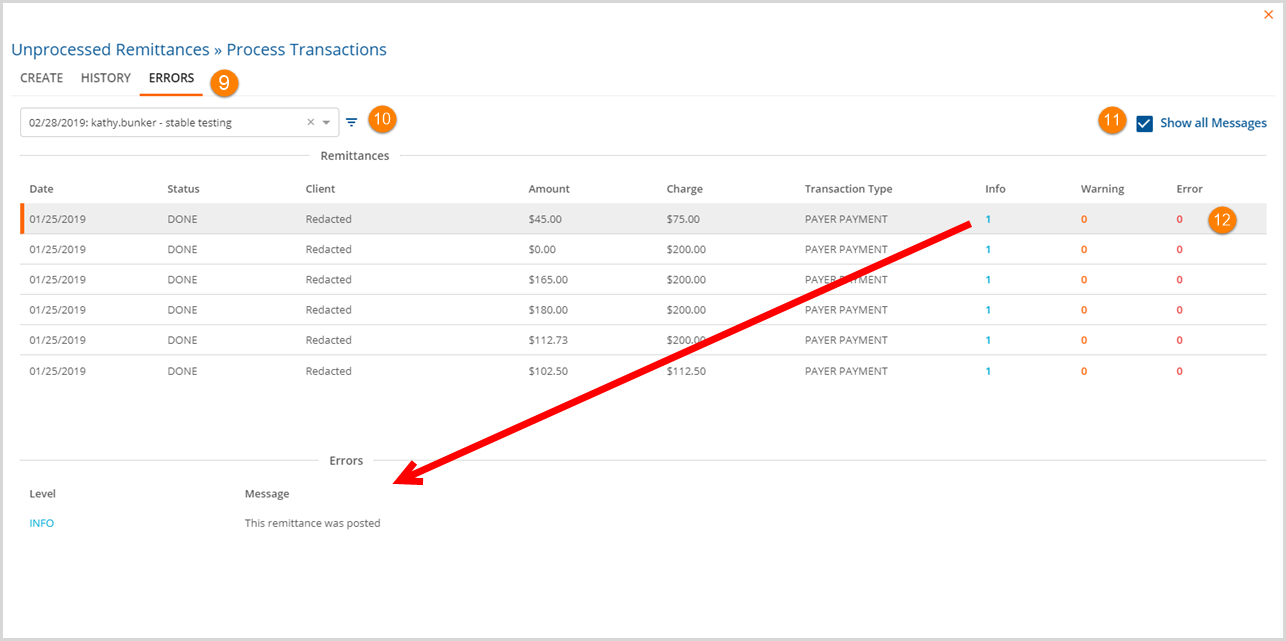
9. Select the ERRORS tab.
10. Select the batch from the drop-down list.
11. Check the Show all Messages box.
12. Click on the number beneath error for more detail.
