Beginning with EchoVantage release version 2.35 users can to perform an audit log search. Using the Audit Search main menu option, users can enter search criteria and view the results in the table that displays. Audit Search can be used to quickly and easily determine all users that have viewed or edited a Client's record, which staff changed a configuration setting, or even if a staff member viewed records they should not have been viewing.
User access to this menu option must first be granted via User Groups in Configuration>Staff/Users>User Groups. Click HERE for detailed instructions on enabling Menu Options for User Groups. Each agency may also add specific tables to the audit search via Track Changes in Configuration>Setup>Audit. Click HERE for more information on Audit Setup.
CREATING A SEARCH
Selecting the Audit Search main menu option displays the screen below. A search may be run without filters for all user activity from the start date and time in the database until the current date and time. Filters can be used to refine the search and display more targeted results. Available filter criteria are in the gray header area.
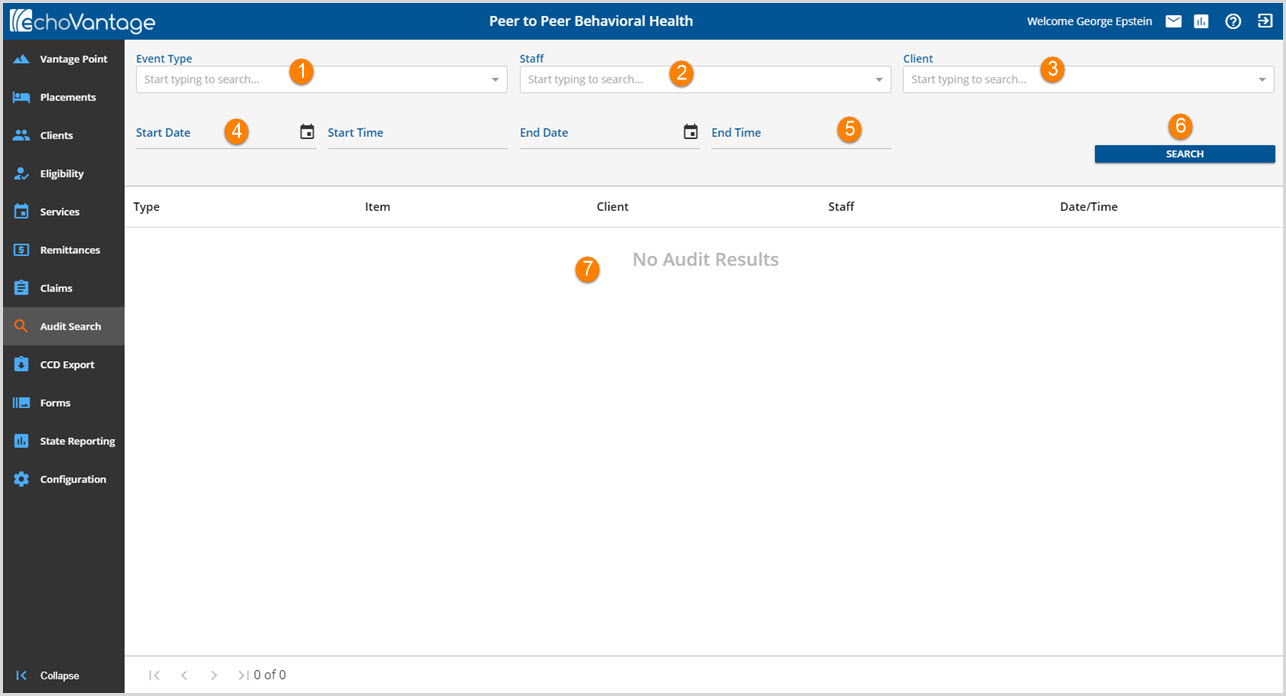
1. Event Type - One or more Event Types may be selected from the drop-down listing. Leaving this blank allows all Event Types to be returned in the Audit Search results. Available selections are:
- View
- Insert
- Update
- Delete
- Login
- Failed Login
- Copy
2. Staff - Select a Staff name from the drop-down listing to restrict the search results. Leaving this blank allows any Staff record that meets the other criteria entered to be returned.
3. Client - Select a Client name from the drop-down listing to restrict the search results. Leaving this blank allows any Client record that meet the other criteria entered to be returned.
4. Start Date and End Date - Enter a Start and/or End Date to define the date range the audit search will use to evaluate records.
5. Start Time and End Time - Enter a Start and/or End Time to limit the times within the specified date range the audit search will use to evaluate records.
6. SEARCH - Select the blue SEARCH button when all desired filters have been populated.
7. Audit Results - Audit Search results display beneath the grey shaded filter area. Results are paginated for easy viewing of multiple pages per the example below.
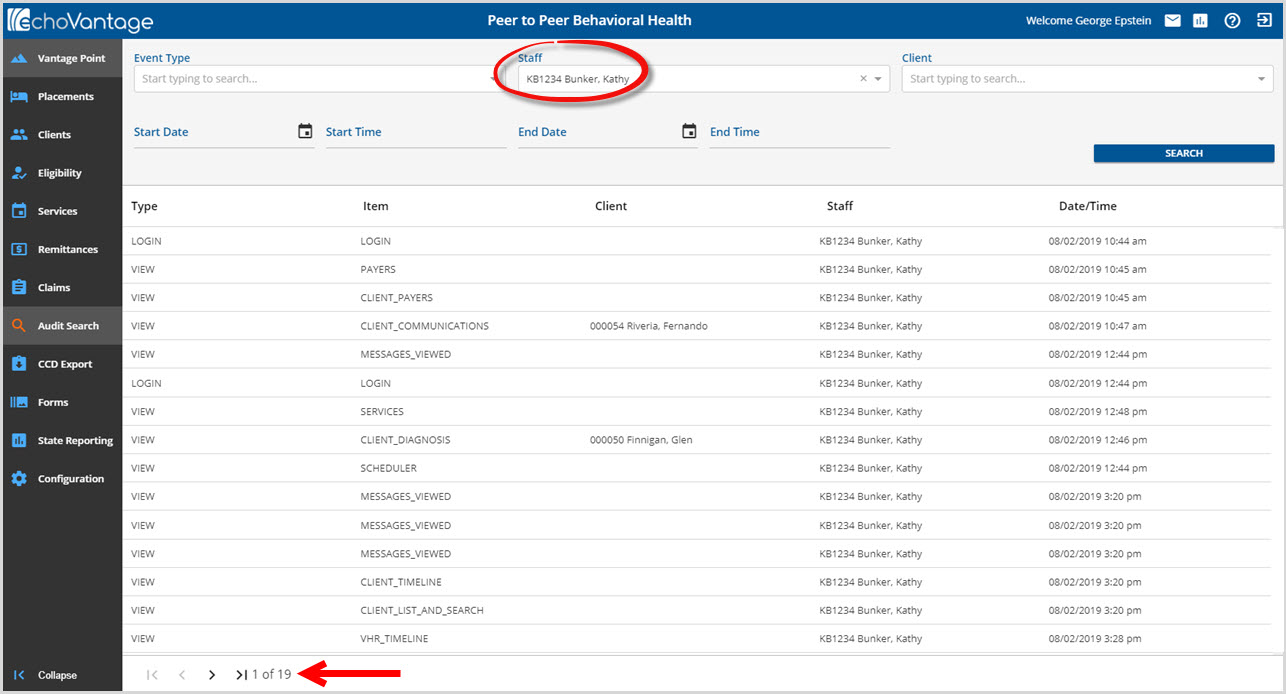
In the example above, only the Staff filter was used to obtain all activity for Kathy Bunker. The Audit Search returned 19 pages of results. Use of additional filters will further refine the results.
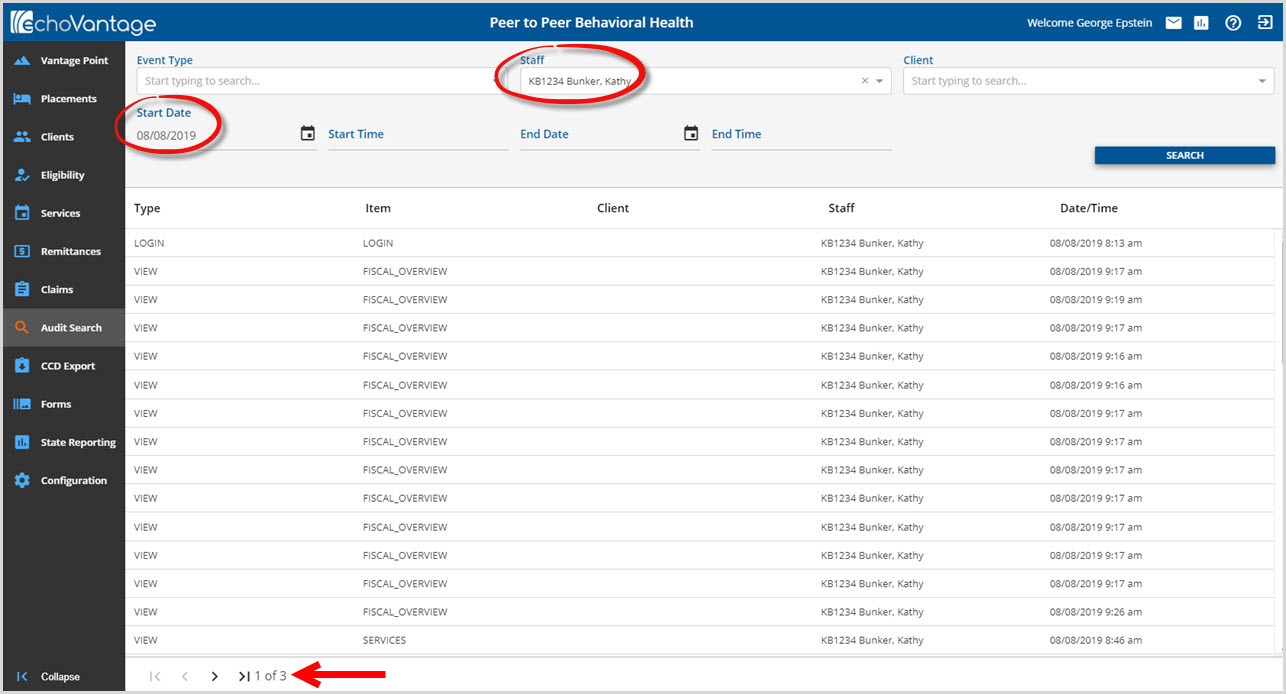
Adding a Start Date to the filters narrows the results down to three pages instead of nineteen.
VIEWING THE RESULTS
The results for Insert, Update, and Delete Event Types allow the user to see the details. Clicking on a result displays an Audit Details screen that shows the Original and New values. The changed information is displayed in a different font color. Null in the Original Value column indicates that the previous information was missing or not completed. This is very common when displaying the audit results due to a new Staff, Client, Payer, etc. Some examples are provided below.
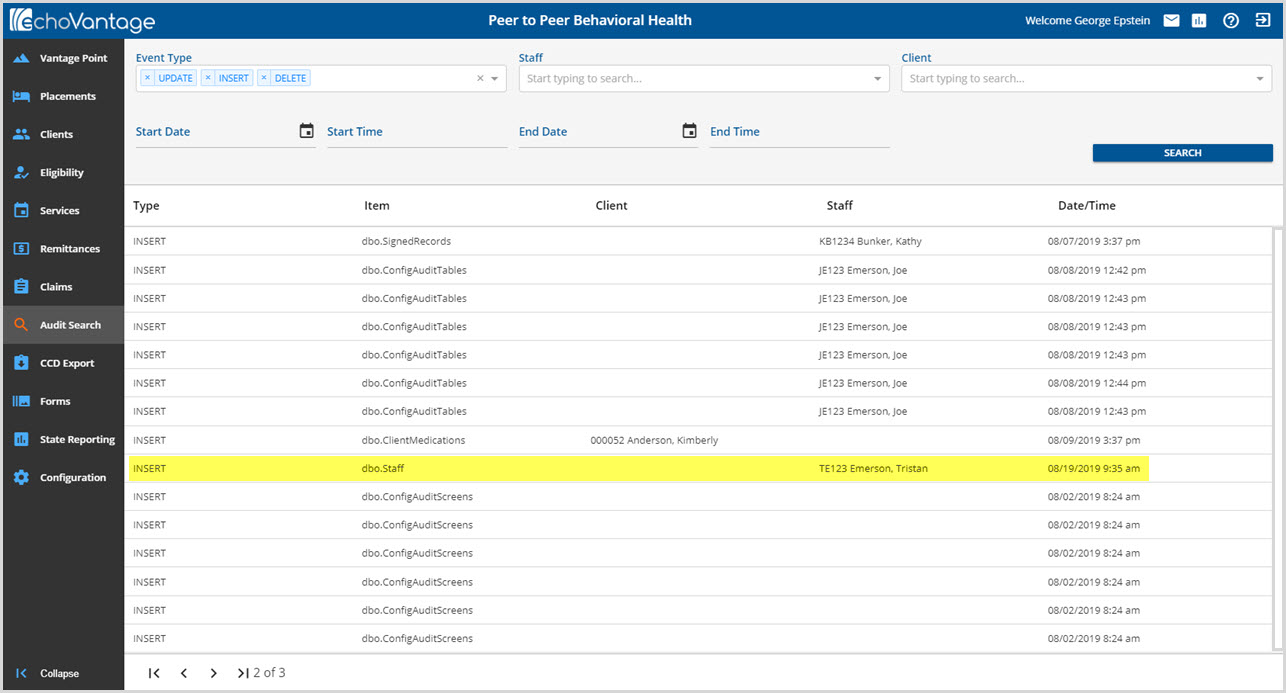
The highlighted record is an INSERT Event Type. Click on the row to display the Audit Details screen.
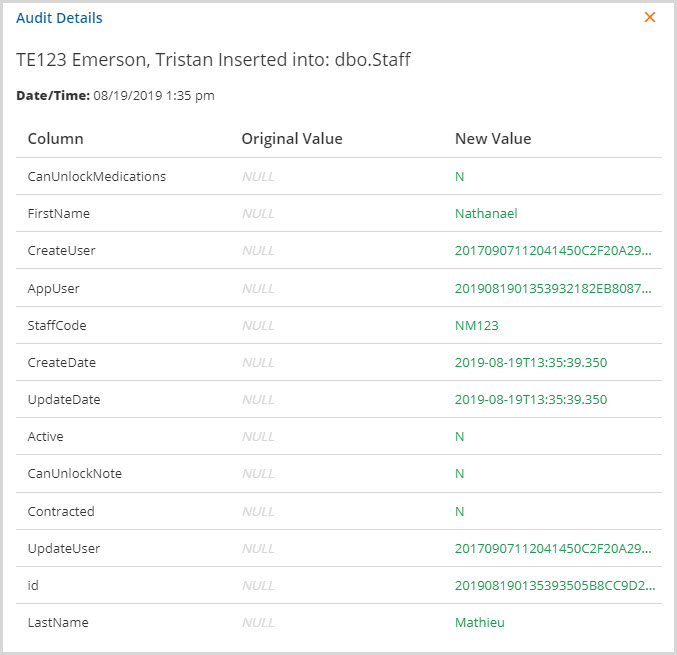
The details show that the Original Values are all NULL. The New Values are all green indicating that it is a database Insert for new entry, in this case a new staff member.
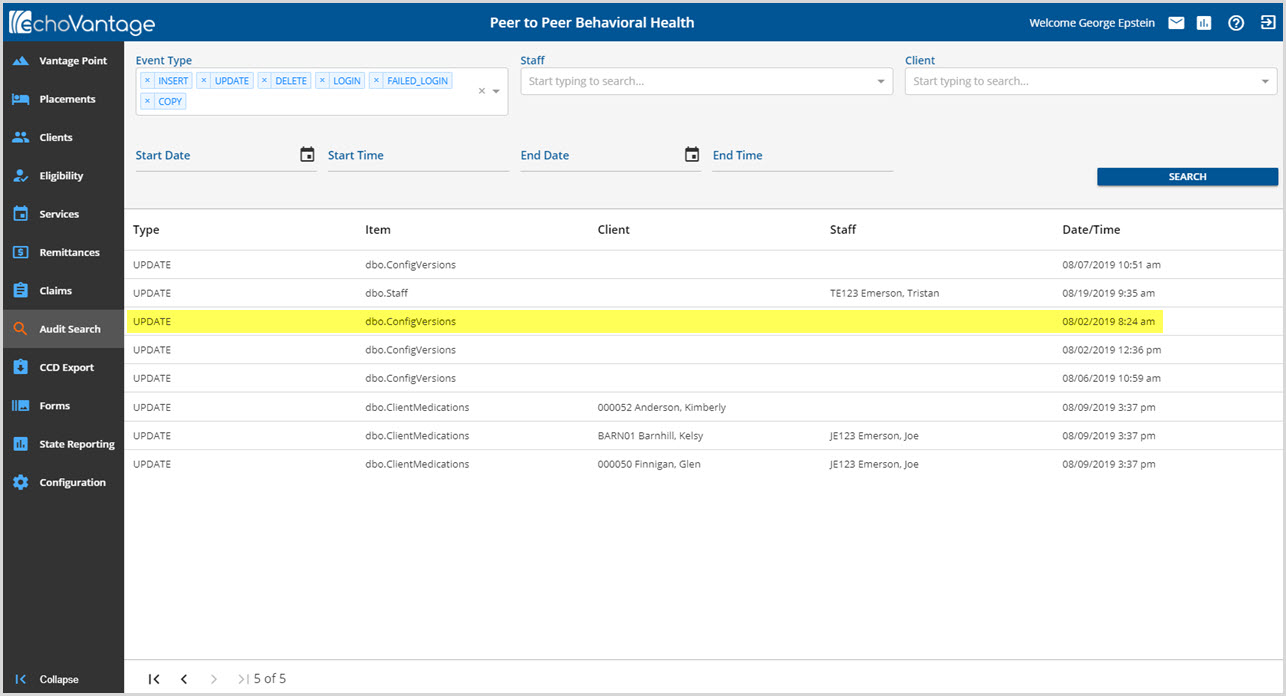
The highlighted row is an UPDATE Event Type. Clicking on the row once again will display the Audit Details screen.
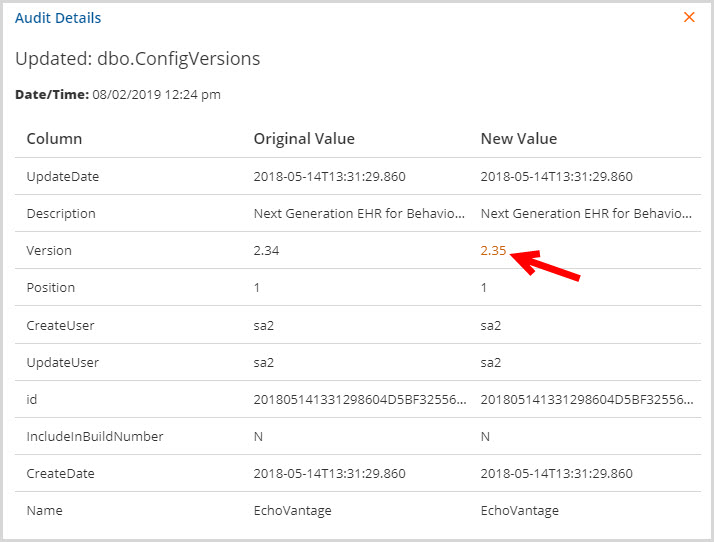
The details show that this Audit Search result was for an EchoVantage version update. The Original Value or prior version was 2.34. The New Value or updated version number is 2.35. Note that the 2.35 is displayed with an orange font.
If the value in field is too large to display in the Audit Details screen, click on the column and a new modal will pop up displaying the full entry.
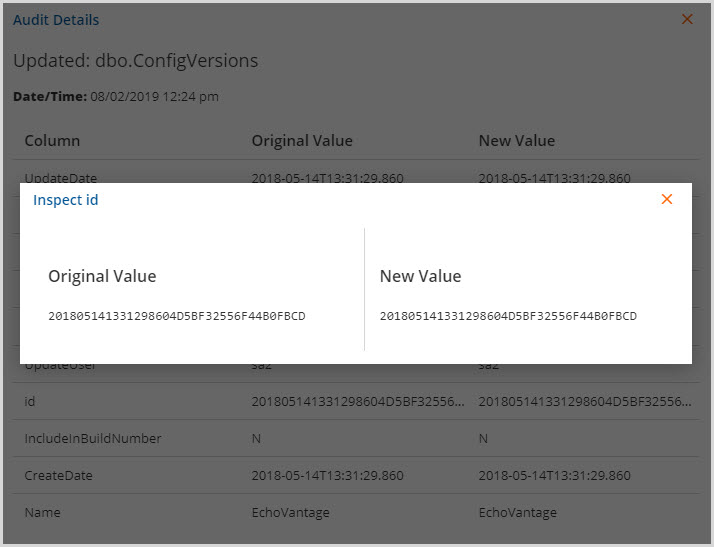
Clicking on either column for id displays the full entry for both the Original Value and the New Value.
