Clients must be active within the system to apply Services, process data, produce bills, or enter transactions. Adding a Client makes available the Timeline, Profile, Schedule, Family (in v3.26+), Household, Contact Info, Episodes, Enrollments, Diagnosis, Payers, Account, Documents, and any agency configured custom Client tabs which store Client-related details across multiple application processes.
In release version 3.26 a second Client type was introduced - Chartless Client. The Chartless Client functionality allows users to add individuals who are not receiving Services, like a parent, legal guardian, or caregiver, for example. Chartless Clients have a limited set of core tabs and are excluded from all Client drop-down lists by default, except when working in the Families feature.
For detailed information on Chartless Clients, click HERE.
For help with screen navigation and data entry, click HERE.
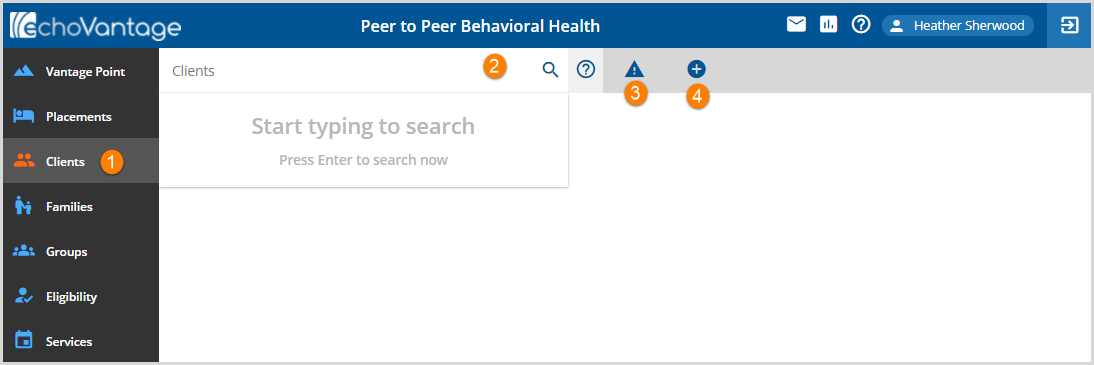
When Clients is selected from the main application menu, the following screen displays.

1. Clients - When the Clients main application menu is selected, the Client icon turns orange to indicate that it is the current selection.
2. Search Clients - The search list is populated after 3 or more characters have been entered. Perform 1 or 2 character searches by pressing enter. Select the blue circle with the question mark to see the list of keywords that can further refine the Client Search. Click HERE for detailed Client Search information.
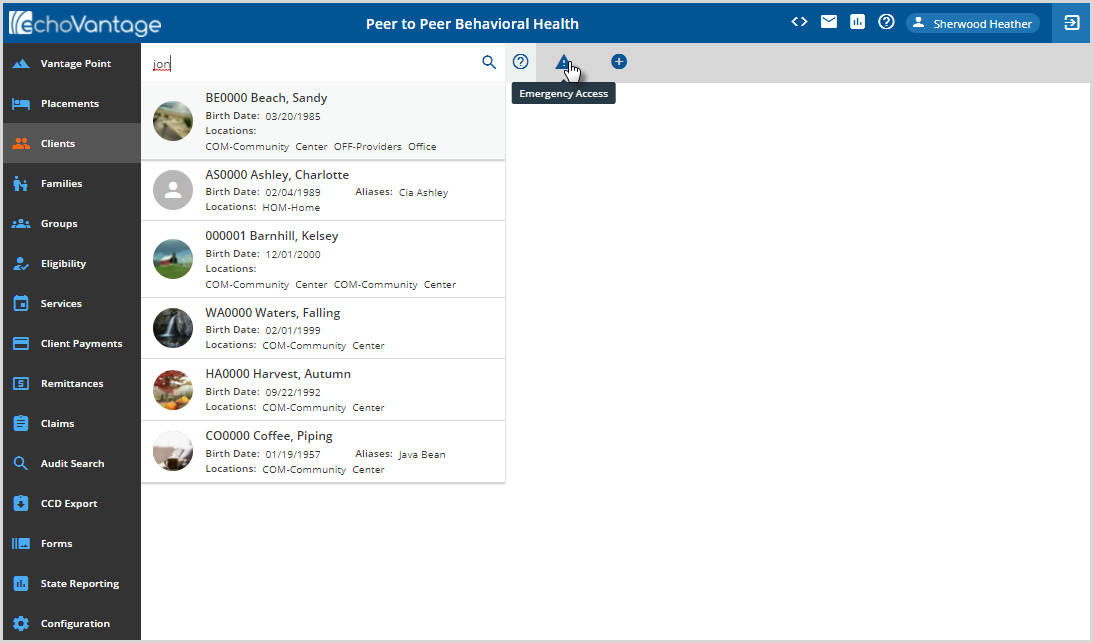
3. Emergency Access - The Emergency Access icon is only displayed when a Client List Filter is in place. See the information below for additional details.
4. Add New - The process for adding either a Client that has a chart or a Chartless Client begins in the Client's menu by clicking on the blue "+" plus.
- Both types of Clients are stored in the dbo.Clients table
- Each is identified by the HasChart column
- 'Y' for (charted) Clients
- 'N' for Chartless Clients.
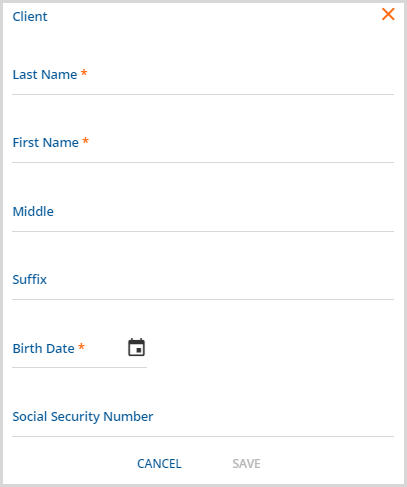
- Users that are members of a User Group that does not have the Chartless Clients: Create permission enabled in Configuration > Staff/Users > Permissions > Features, see the following screen.

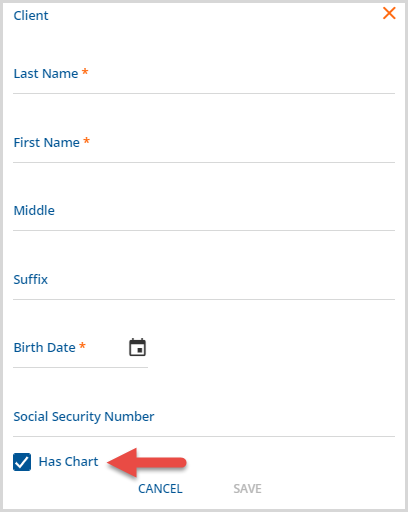
- Users that are members of a User Group that does have the Chartless Clients: Create permission enabled in Configuration > Staff/Users > Permissions > Features, see a Has Chart checkbox at the bottom of the (add) Client screen, like the image below.

- By default, the HasChart checkbox is selected.
- The minimum information required to add a new client depends on the method of Client Code generation selected in the configuration options.
- First Name, Last Name and date of birth is needed if client code is system generated.
- If the client code is set up to be user-defined or user-defined prefix, entry of the client code or client code prefix is also required.
- The client code settings can be found in Configuration>Setup>Client Code Generation.
- When the required fields are populated the blue SAVE button is enabled.
- When the entry is complete click SAVE to add the new client.
Emergency Access

When a user has a Client Filter configured, the user sees an “Emergency Access” button in the upper-right of the Client screen.
-
Users can search for a Client who is not in their configured Client Filter.
-
A Reason must be logged to gain access.
-
Access to that Client is granted for the rest of the current calendar day. (Until 11:59 pm)
Client Header
The client header is always displayed above the client tab set. The view may be expanded or collapsed. Information is pulled directly from the client tabs. The numbered sections below are the only action items on the header.

1. The selected Client displays in the search bar. Click in the bar or on the magnifying glass to clear the selection and start a new search.
Additional action items are available in the Client Header if the User is a member of a User Group with the appropriate Permissions granted. Hover over an icon to display the function. Links to more detailed information is included below.
- 2. CCD Export
- 3. CCD Import
- 4. Share Forms - powered by Echo InForms
- 5. Clinical Decision Supports
- 6. Educational Resources
- 7. Configure Client Portal Access
8. The Client Profile picture displays in the upper right-hand corner if configured in the Documents tab.
9. Click on the up or down arrow to collapse or expand the Client Header.
10. Memo - A memo is available for all clients. The memo icon is visible even when the header is collapsed. The icon goes from gray to blue when a memo exists. When the High Importance box is checked, the memo icon changes color to orange. Enter a memo by click beneath the memo icon and click SAVE when finished.
