To access the Client Portal enter https:<domain_name>/portal in the browser address bar; the domain name is the agency’s URL for EchoVantage. For example, if EchoVantage is normally accessed using https://p2p_echoehr.com, then the Portal address is https://p2p_echoehr.com/portal. The portal login screen is similar in appearance to the EchoVantage login screen.
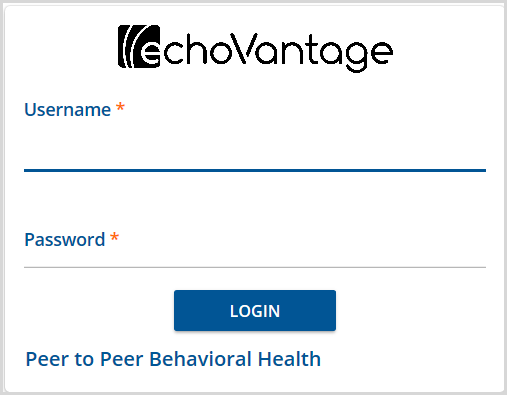
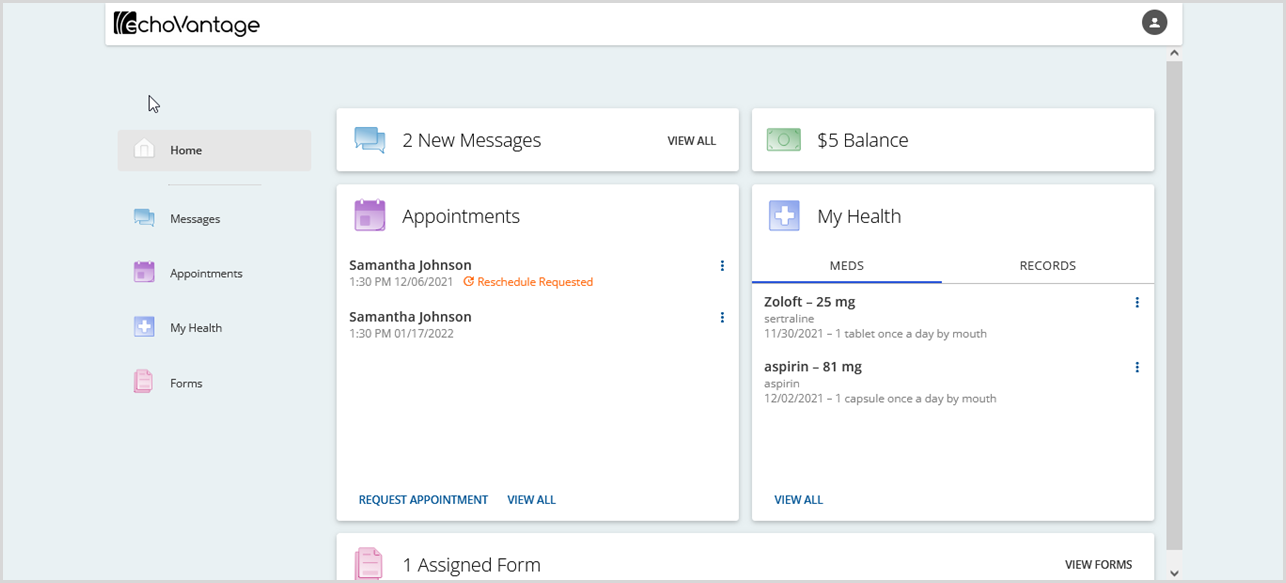
Clients enter their credentials and select the blue LOGIN button. Once logged in, the screen defaults to the Home page, and they see a Card for each feature (Component Access) enabled in the configuration. The VIEW ALL option links to the detail page of the corresponding left-hand menu item. In the example below, all five features are enabled.
Messages
The Messages card displays a count of new direct messages, if any. Clicking on View All or selecting Messages from the left-hand menu displays the details for All Messages.
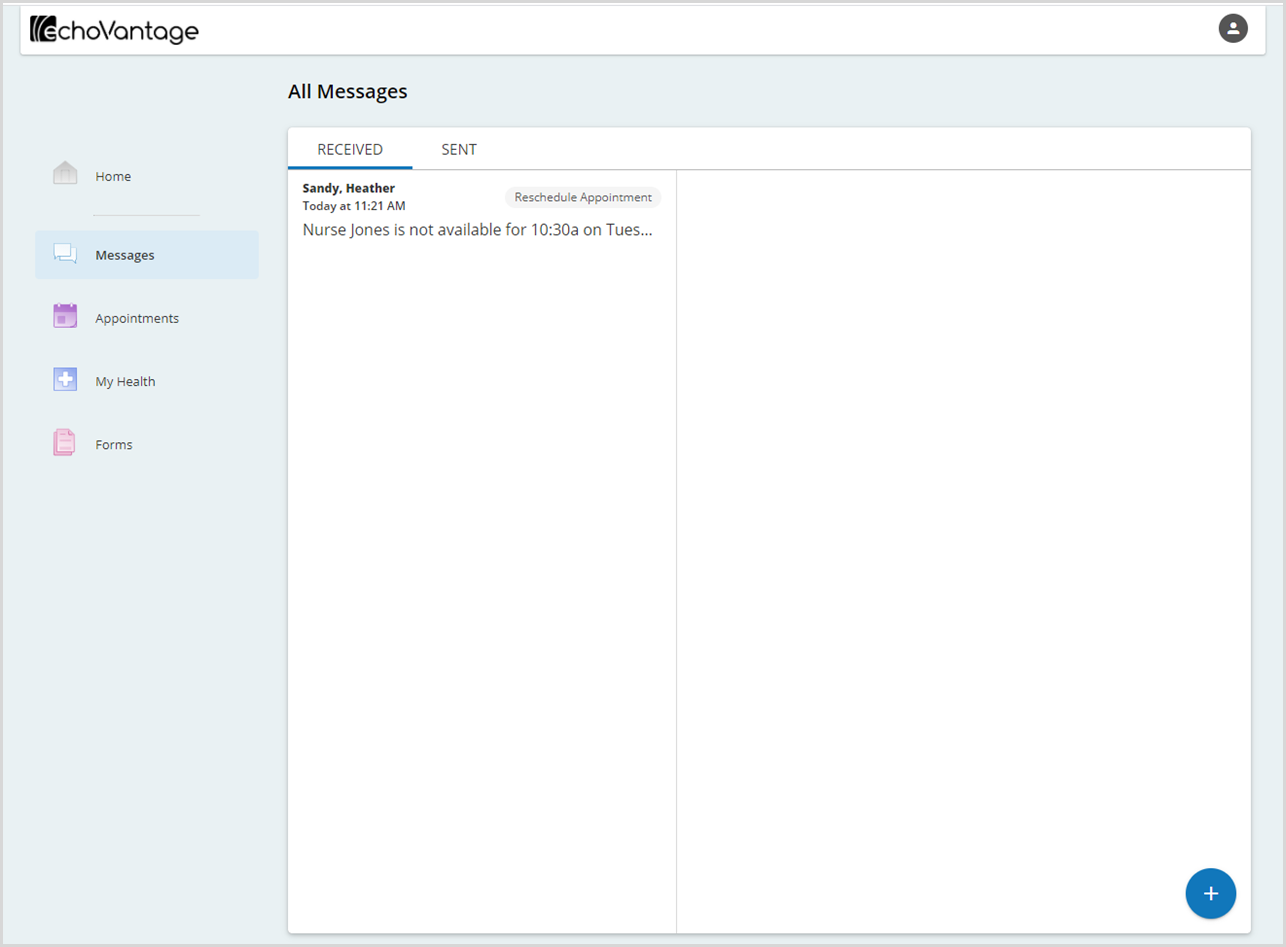
Messages are divided into two tabs, RECEIVED and SENT. These messages are direct messages between the Group Mailboxes configured in EchoVantage and the Client Portal. Messages do not use Staff or Client email addresses. Navigating and interacting with the messages is the same in both tabs.
- A card displays for each message with summary information.
- The first names of the sender and recipient are listed in bold.
- The date and time the message was sent or received displays beneath the names.
- The predefined message subject is listed to the right with a gray background.
- A preview of the message body shows beneath the date and time.
- Click anywhere on the message card to view the full details.
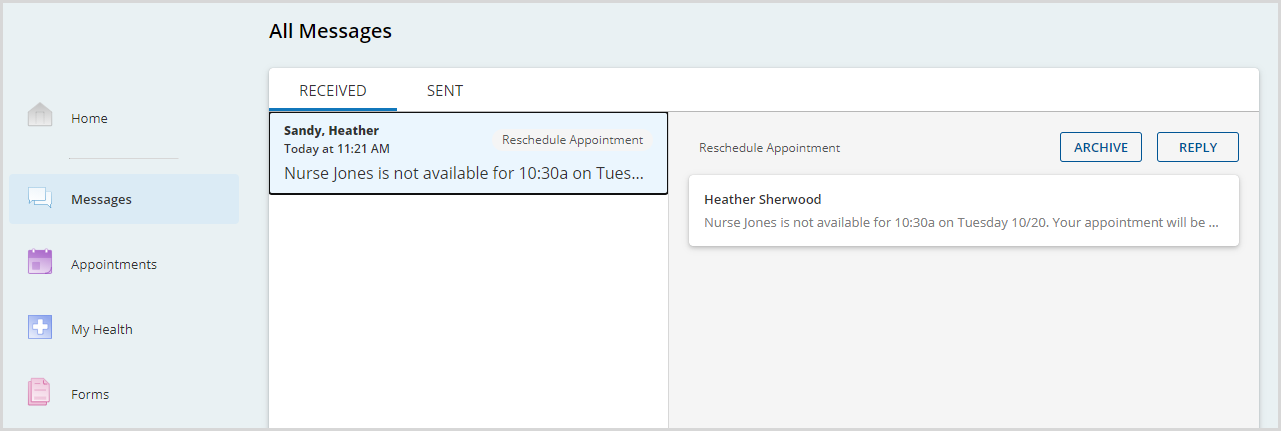
- The full message displays in the right-hand pane.
- Select the REPLY button to respond to the email.
- A card displays beneath the original message.
-
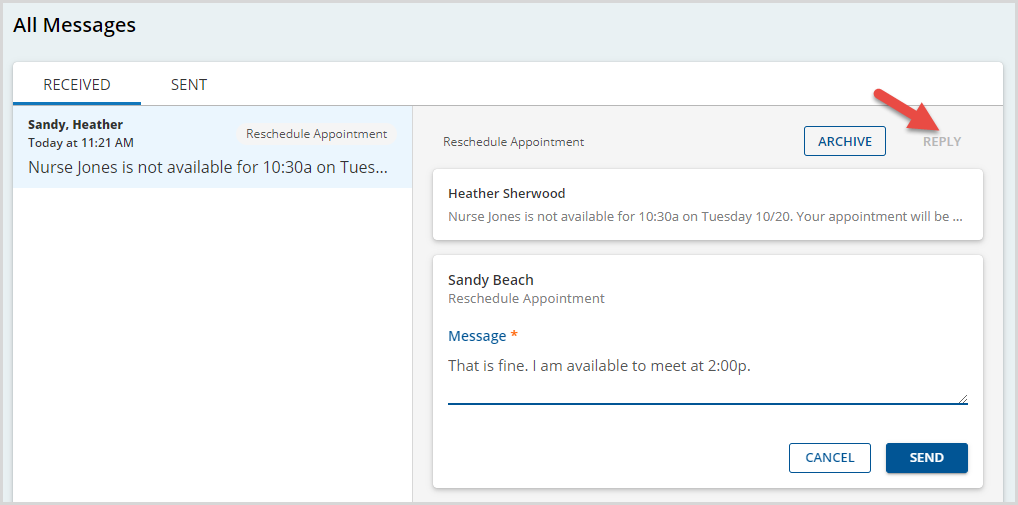
- Enter the response text in the required Message field.
- Select SEND to complete the reply.
- The message is automatically routed to the original message Group Mailbox.
- After new messages are viewed, the New Messages count is updated (after a polling interval) on the home screen. If there are no new messages, the card indicates this, as shown in the image below.

- Select the ARCHIVE button to remove the message from the list permanently. Archived messages cannot be recovered from within the Client Portal.
Appointments
The Appointments summary card displays any scheduled or requested appointments. A Group Mailbox must be configured for the "Send Appointment Requests to" setup option in Configuration > Setup > Client Portal for Appointments to be fully functional within the Client Portal. Clicking on an appointment opens the details of that appointment on the scheduled tab of the details screen. Several additional actions are available from the summary card on the Home page.
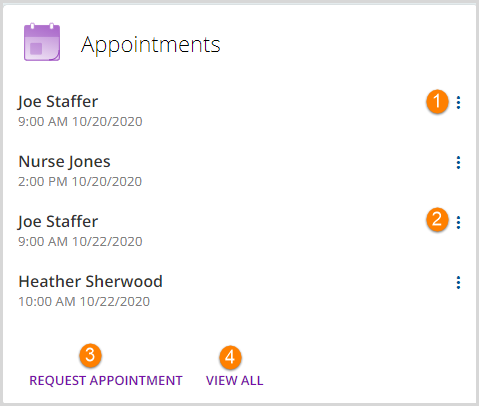
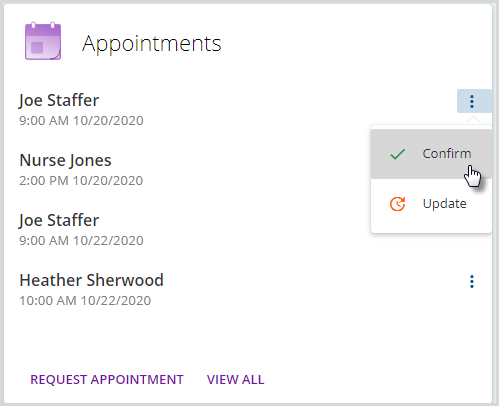
1. When the current time is within 48 hours of the scheduled appointment, options are available to Confirm or Update the appointment.
- To confirm an appointment, click on the ellipsis (three vertical dots) and click Confirm.
-
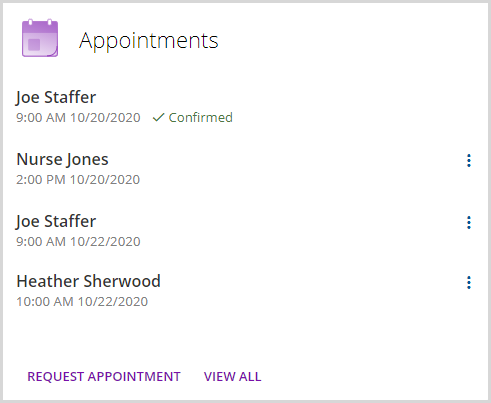
- An indicator displays on the summary card for confirmed appointments.
-
-
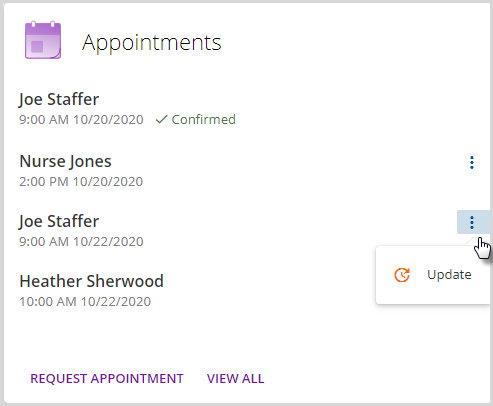
- To update an appointment, select the Update action after clicking on the ellipsis.
- An Update Appointment box displays like the image below.
-
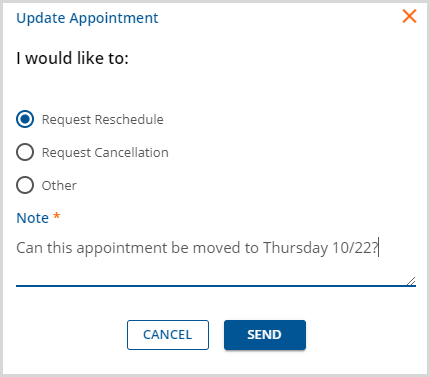
- One of the three update reasons must be selected, and a message in the Note section is required.
- On SEND, the update reason is indicated on the summary unless Other was selected. The request is also sent to the Group Mailbox configured to receive Appointment Requests.
-
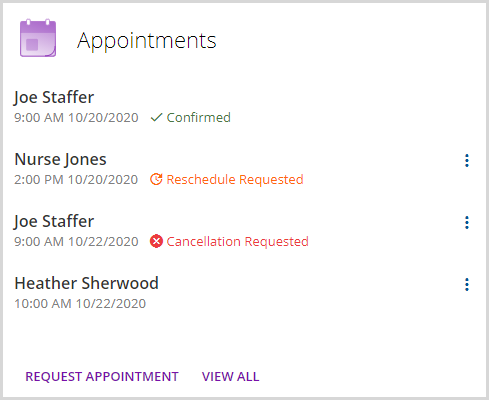
2. When the current time is more than 48 hours in advance of the appointment, only the Update option is available when the ellipsis is selected.
3. Click on Request Appointment to create a new appointment request—the following screen displays.
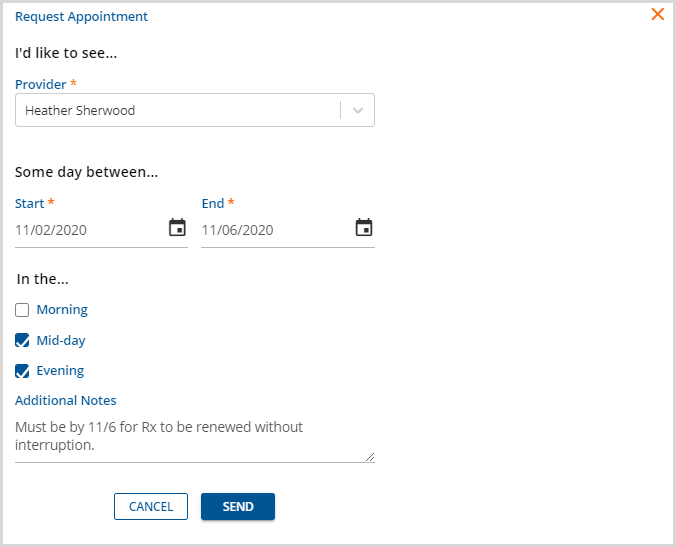
- The Provider and Start and End Dates are required fields.
- The time of day checkboxes and Additional Notes are optional fields.
- Once SEND is selected,
- The request shows in the Pending tab of the Appointments detail screen.
- The request also shows in the Group Mailbox configured for Appointment Requests.
4. Clicking on VIEW ALL redirects the user to the Appointments detail screen. This screen is divided into two tabs.
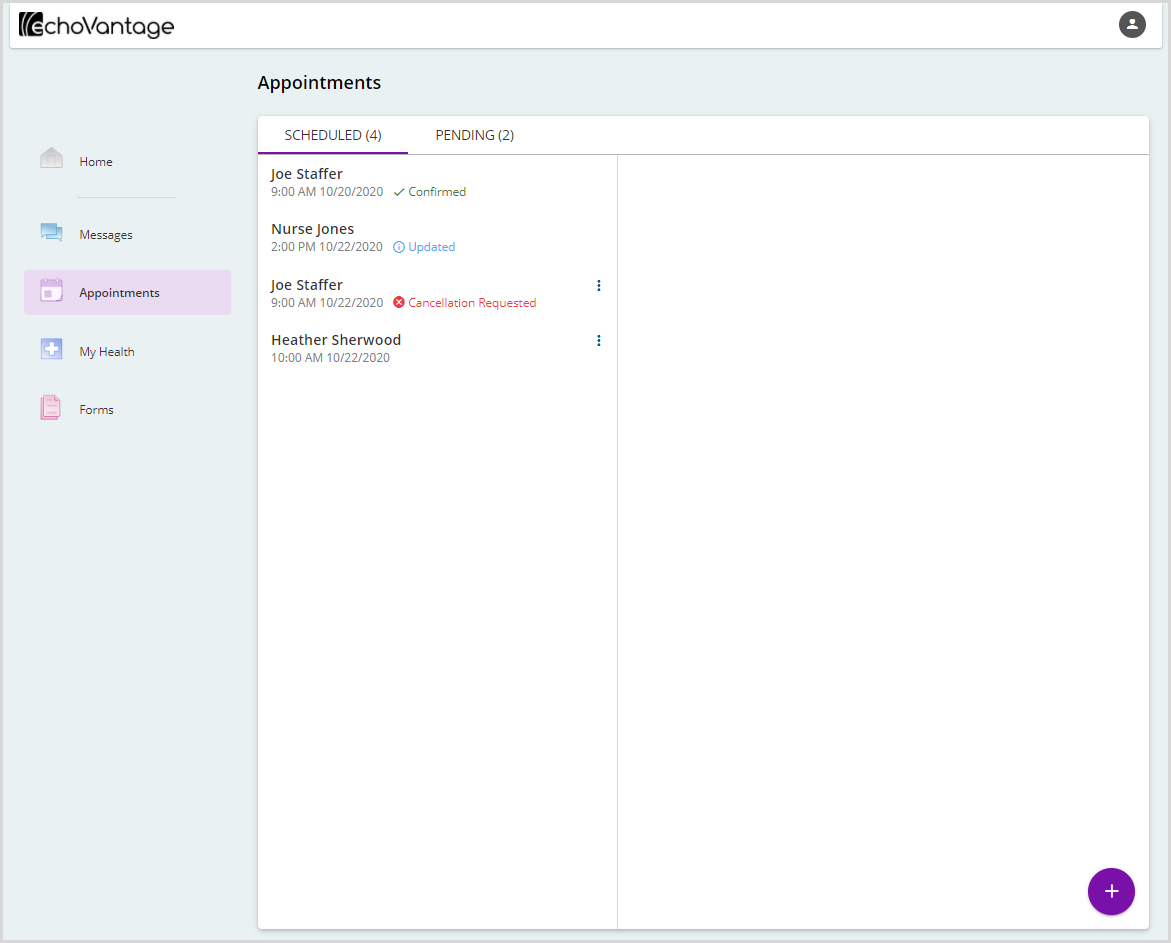
- SCHEDULED - Lists all currently scheduled appointments with the current count.
- These are the same appointments listed on the Home screen summary card.
- The same actions are available when the ellipsis (three vertical dots) is selected - Update only if more than 48 hours in advance and Confirm if within 48 hours.
- A new appointment can be requested by clicking on the purple plus "+" sign in the bottom right-hand corner. This displays the same Request Appointment screen covered in number 3 above.
- PENDING - Lists any pending appointment requests and a count of new or unaddressed requests.
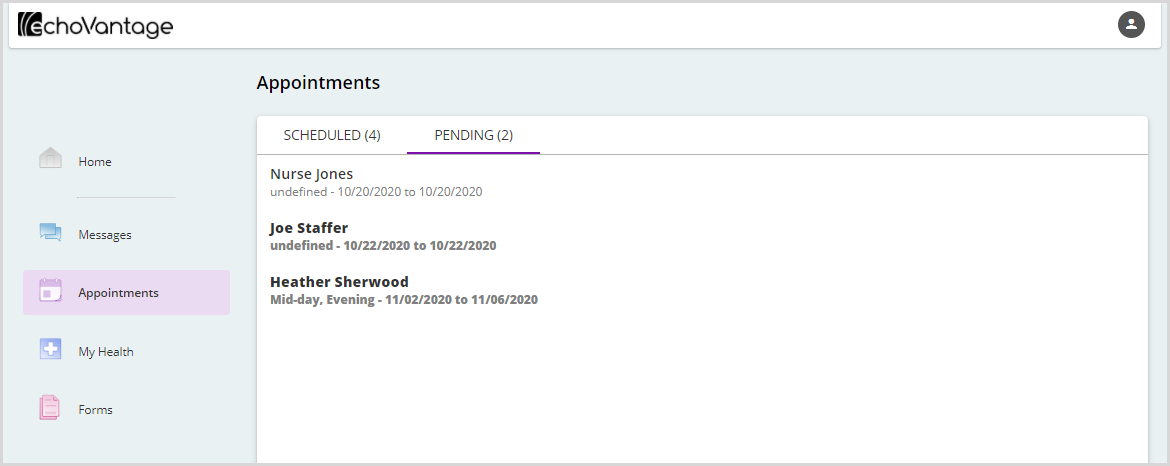
- This tab displays pending new appointment requests and update requests, such as a reschedule or cancellation.
- A Pending request displays in bold until it is updated in the Group Mailbox in EchoVantage, i.e., marked as Complete or Action Taken.
- After the message is updated in EchoVantage,
- The Pending request is no longer bold.
- The Scheduled tab is updated appropriately.
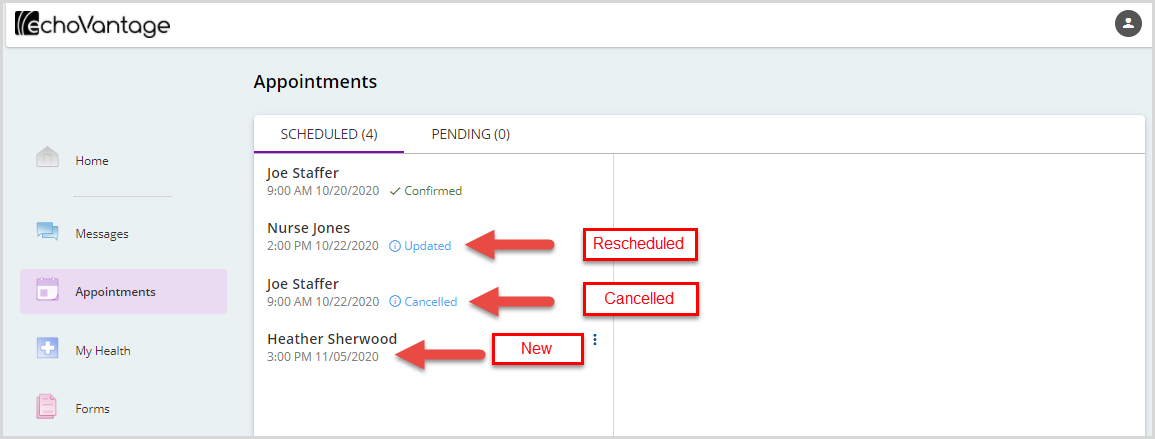
- A new appointment was added.
- Or an existing appointment updated or canceled.
- The image below has examples of updated and new appointments on the Scheduled tab.
- Clicking on any appointment on the SCHEDULED tab displays the details of that appointment in the right-hand pane.

My Health
The My Health card on the Home screen displays both the MEDS and the RECORDS tabs. Please note that the "Send Medication Renewal Request to:" setting in the Client Portal setup must be configured.
In the MEDS section of the summary card,
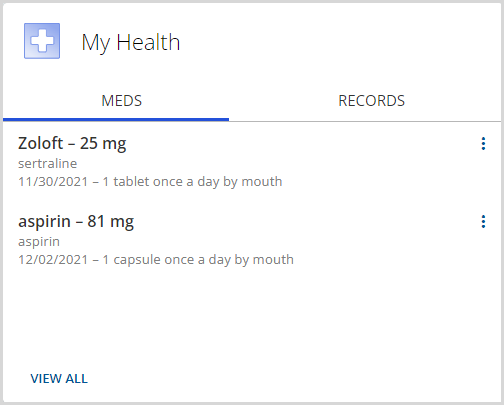
- Only the Client's active medications are listed.
- Select VIEW ALL to display the My Health details screen.
- Click on the ellipsis (three vertical dots) to start the Request Renewal process and click on Request Renewal to display the request screen.
-
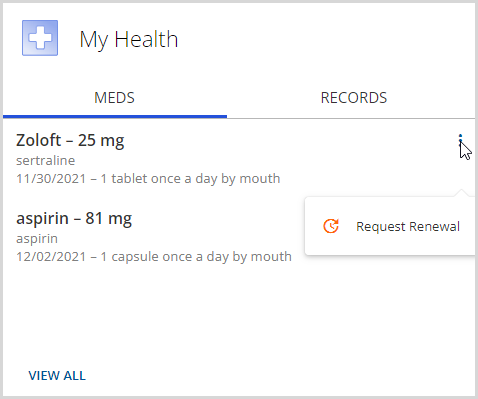
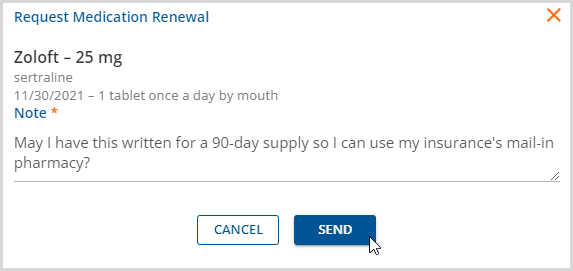
- A message must be included in the note field before SEND is enabled.
-
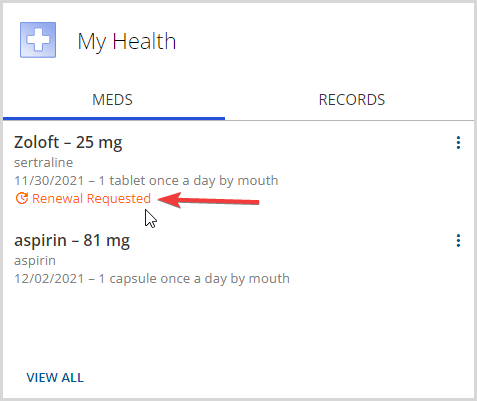
- Once sent, a Renewal Requested icon is displayed beneath the medication.
-
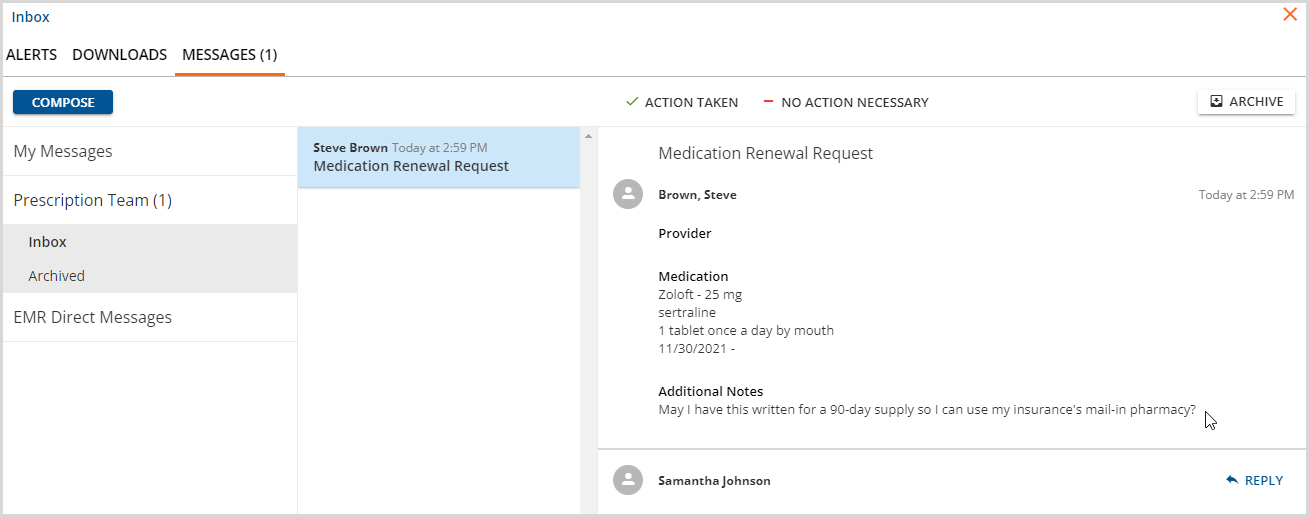
- And the request is sent to the configured Group Mailbox.
-
In the RECORDS section of the summary card,
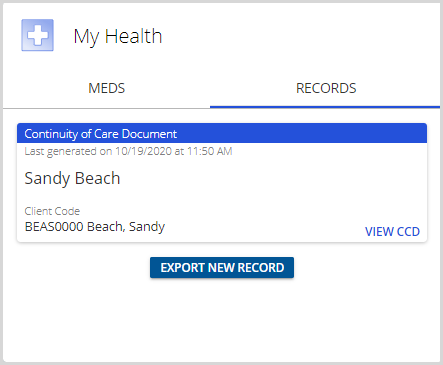
- The most recently generated CCD, Continuity of Care Document, is displayed.
- Click on the blue VIEW CCD to view the full details of the Continuity of Care Document.
- A new CCD export record can be created by selecting the blue EXPORT NEW RECORD button.
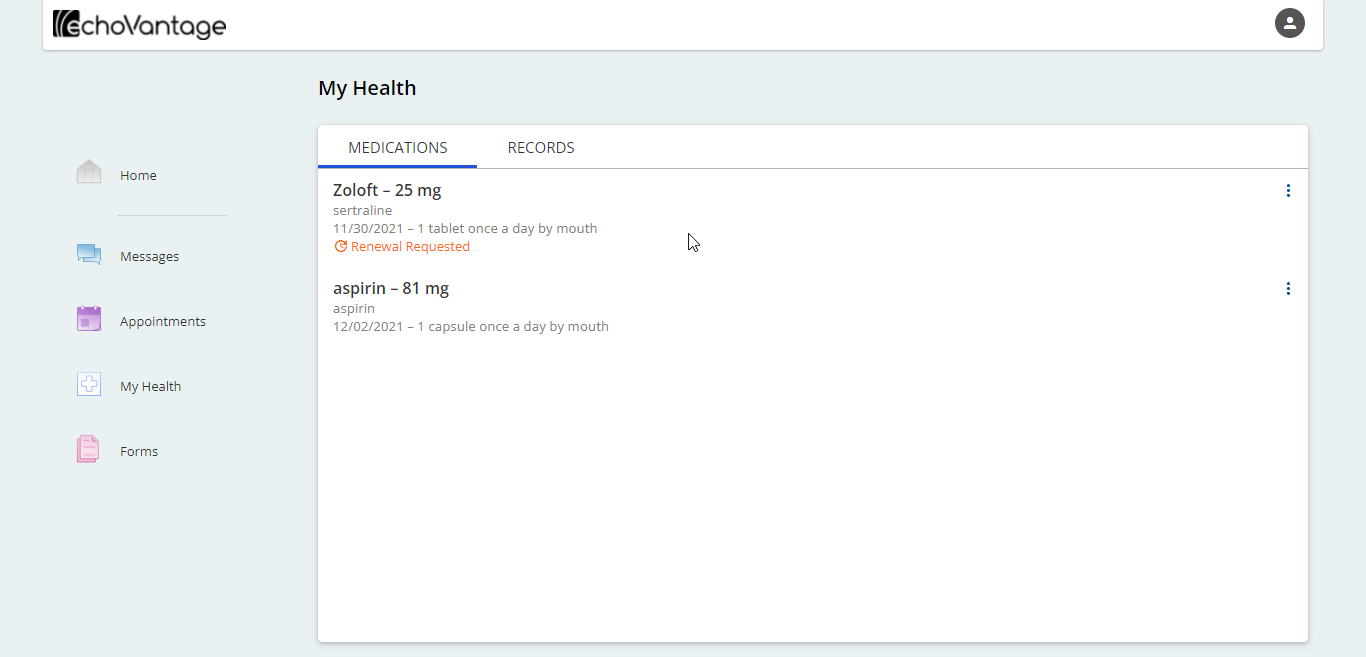
The details screen for the My Health menu option contains the same information and available actions as the summary screen and lists inactive medications.
Forms
The Echo InForms feature allows the sharing of forms to the Client Portal for a client to review, complete, and sign. Click HERE for detailed information on configuring and sharing forms using InForms. The Echo Informs product is released on a trial basis and is not part of the core portal functionality. Additional cost and licensing information will be shared at a future date.
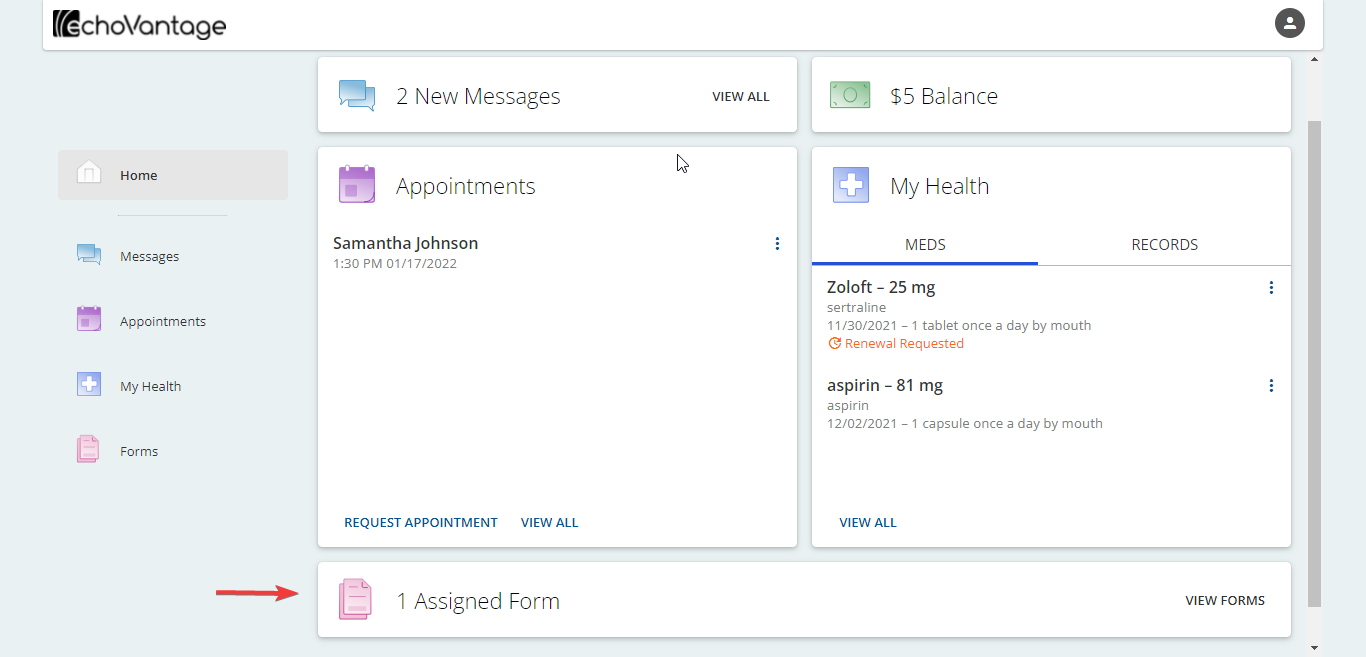
Once Forms are shared with the Client Portal, they show as assigned forms on the Forms summary card along with a count. Click on the Forms menu item or on the red View Forms to access the details.
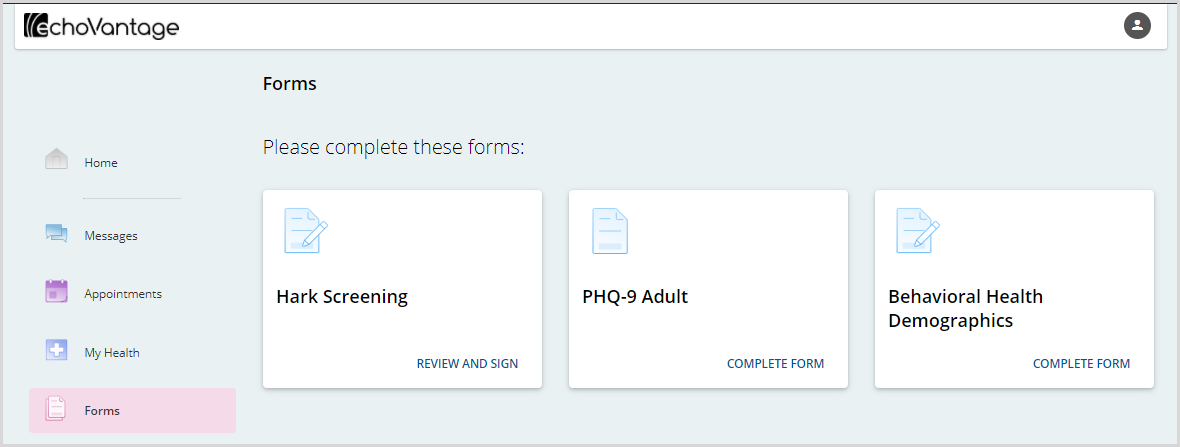
- A card displays for each form that was shared to the Client Portal.
- The button in the bottom-right corner grants access to each form and also describes the expected action(s):
- Complete Form
- Review Form
- Sign Form
- Review and Sign Form
-
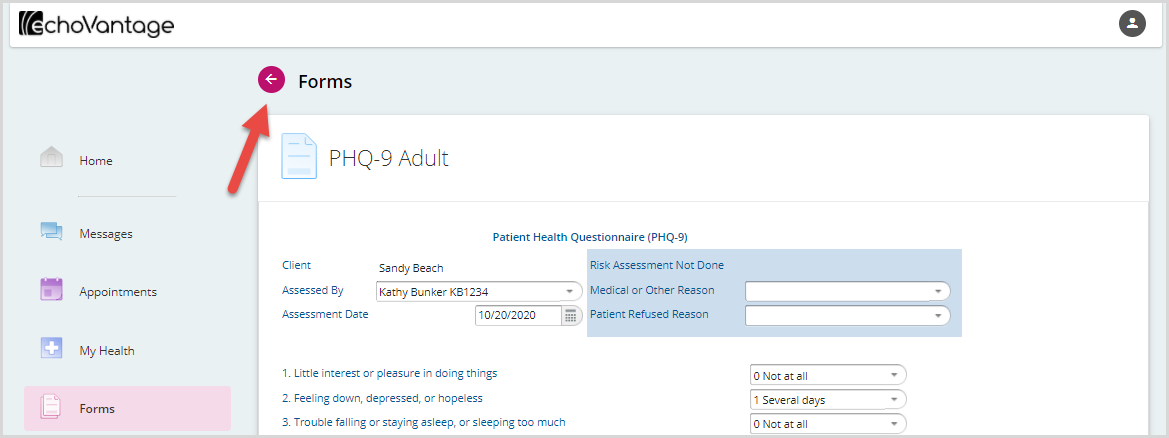
- When all required actions are completed on a form, the action buttons, Save or Cancel, are disabled. Select the magenta left arrow at the top to return to the assigned forms.
-
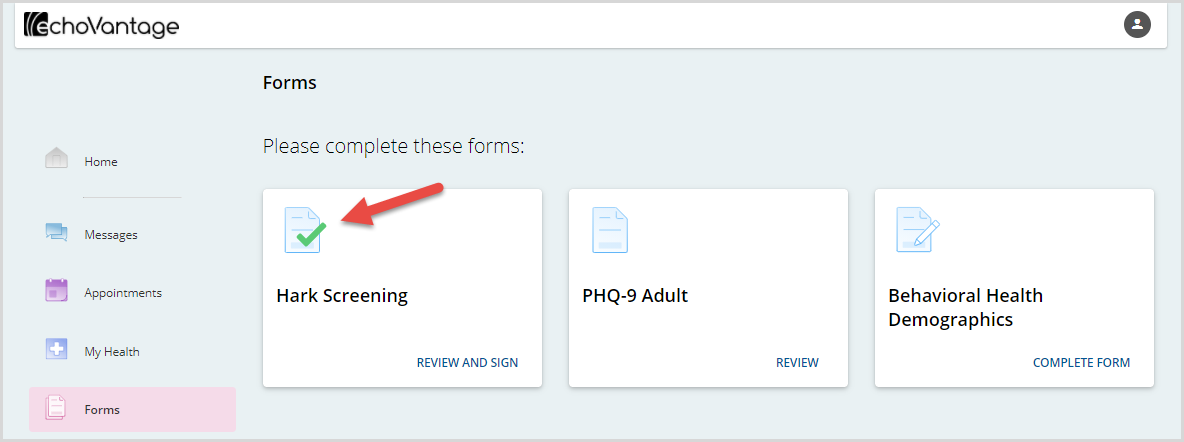
- As forms are completed, a green check mark indicates progress.
Forms are shared with the Client Portal until they are cleared from the Share Forms feature in the Client Header. Once cleared, the Forms summary card returns to the No Assigned Forms state.

