The following steps cover the required configuration for Azure SSO to work with EchoVantage.
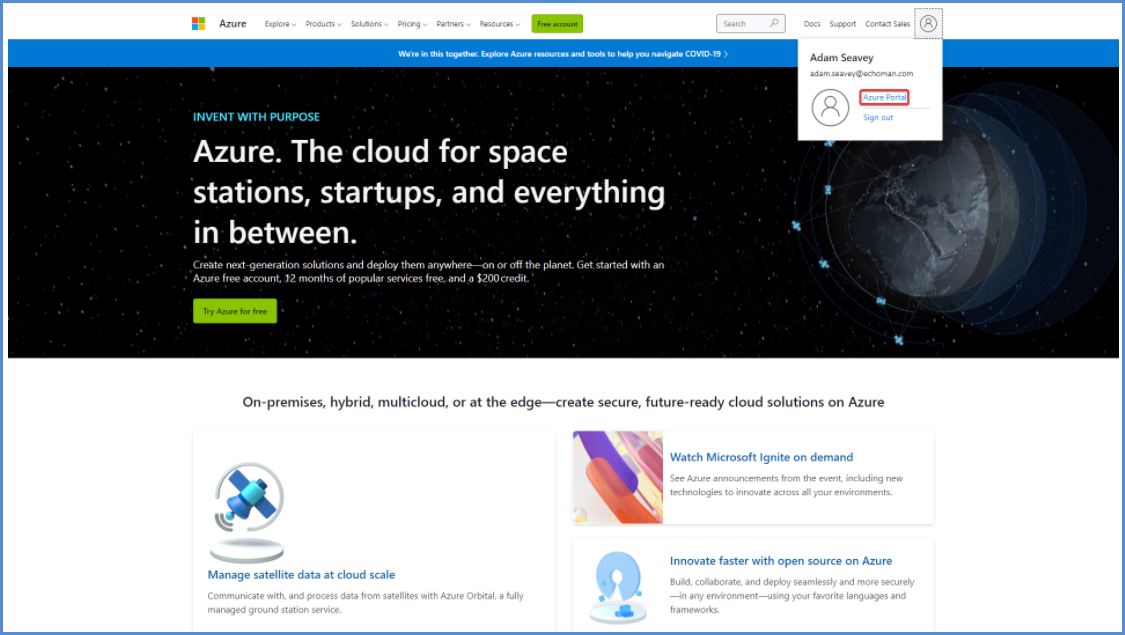
Step 1: Go to the Azure Portal
This should be portal.azure.com, or can be accessed by clicking Azure Portal from the account popover after signing in on azure.com.
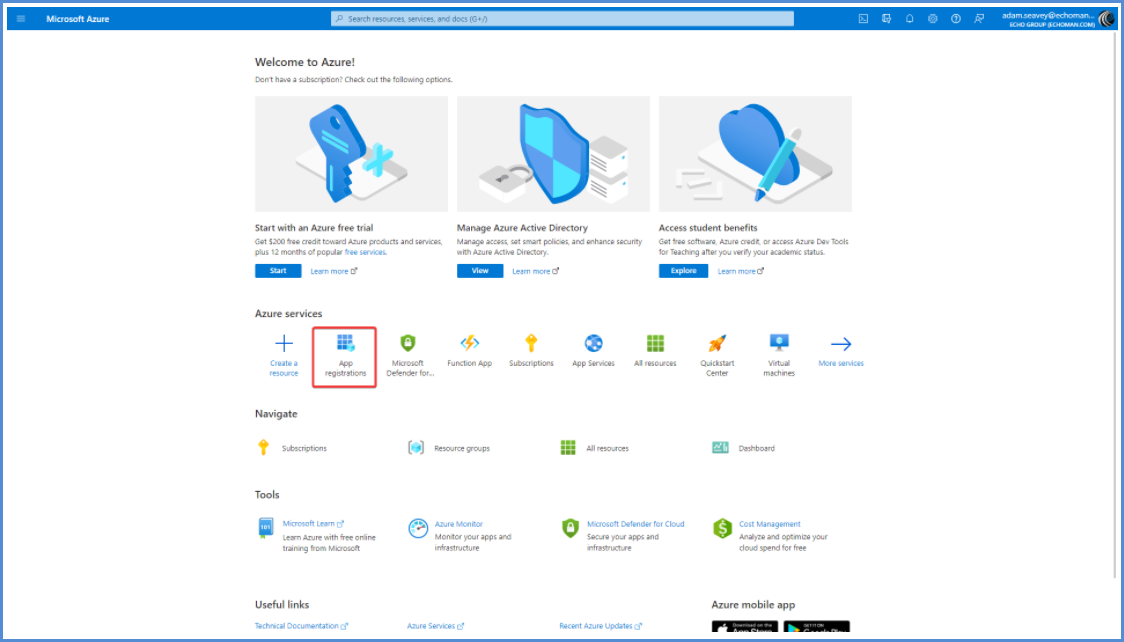
Step 2: Add a new App registration

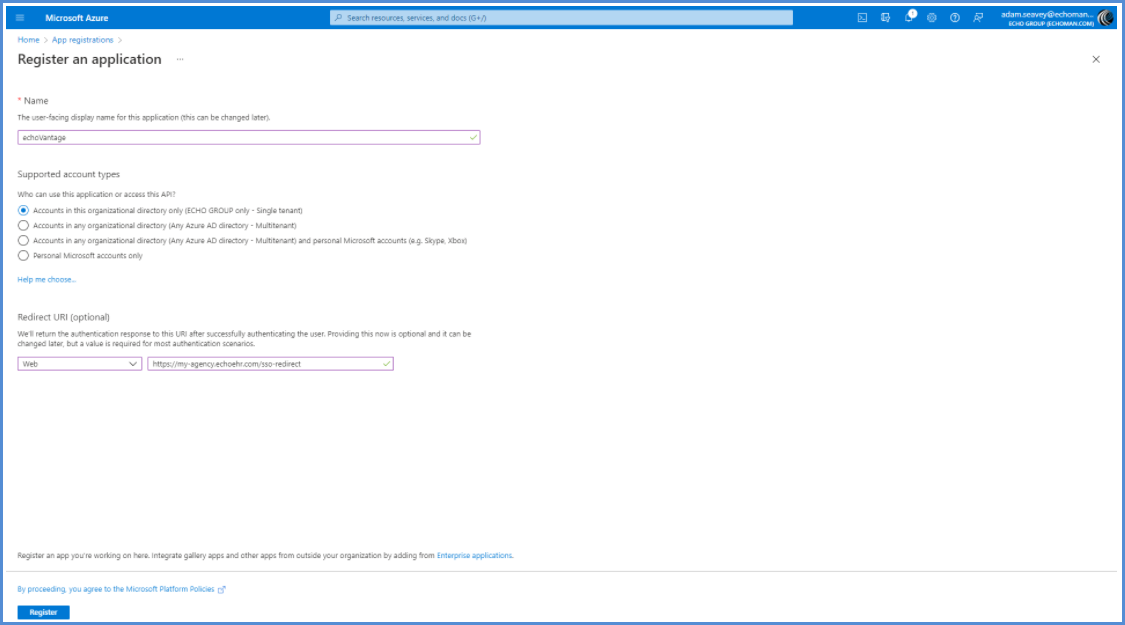
Step 3: Fill out the App registration form
Make sure you replace my-agency here with the URL you use to login to EchoVantage.
Write this URL down; you will need it for later. We will need this in Step 7.
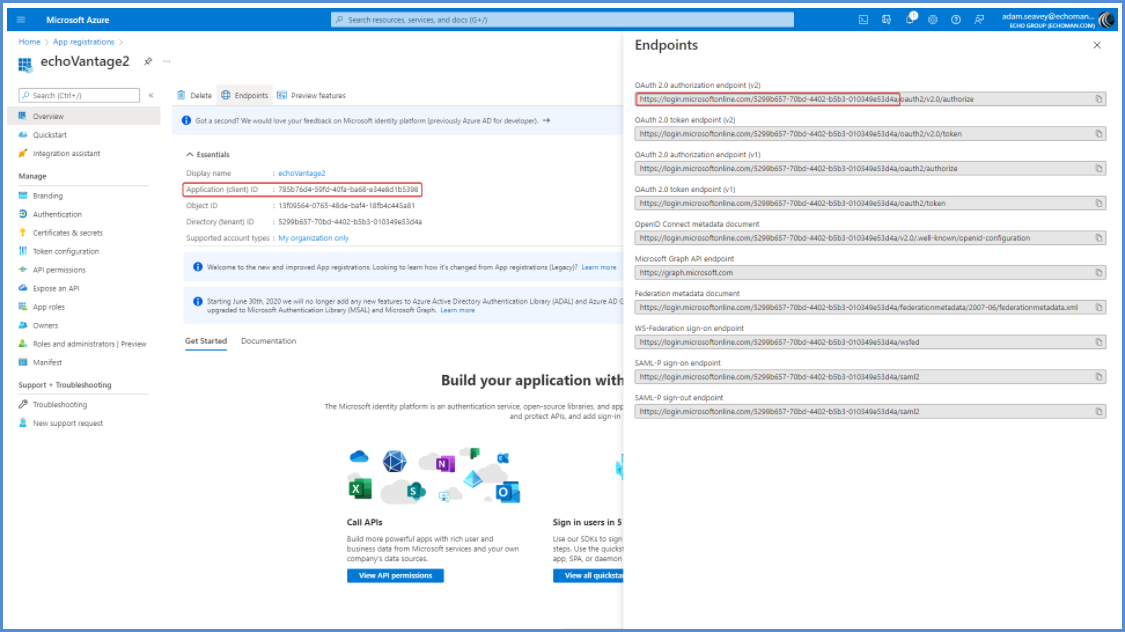
Step 4: After registering the App, note the Client ID and OAuth endpoint values
Take note of the Application (client) ID and the outlined portion of the OAuth URL corresponds. This is needed in Step 7.
Step 5: Add a new Client Secret for the application under the Certificates & secrets → Client Secrets section
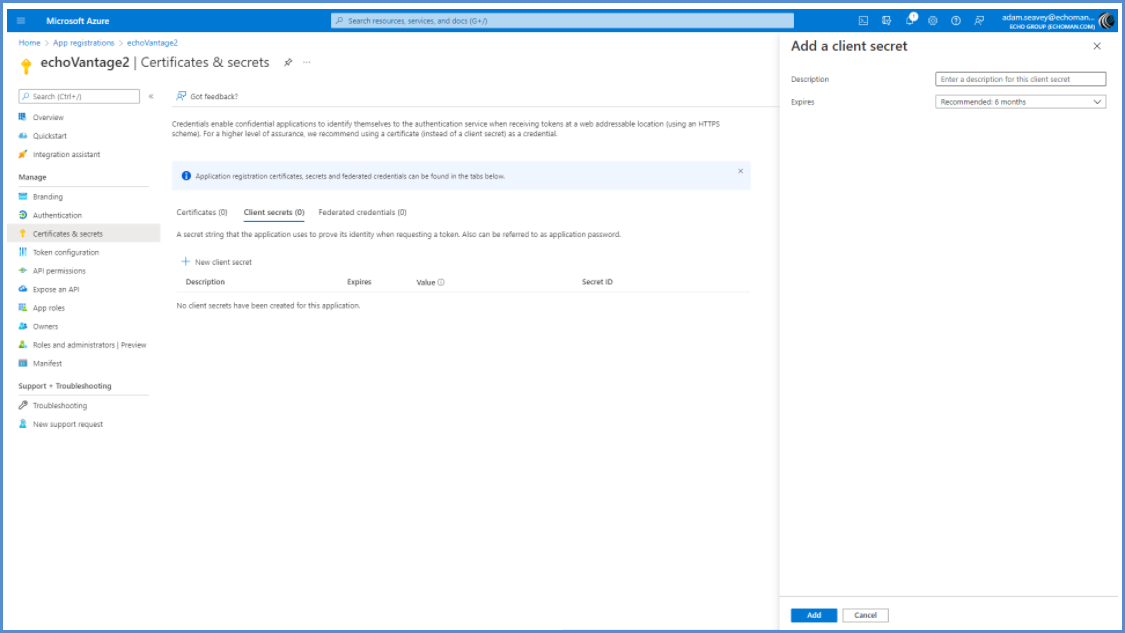
After saving you should see a new entry in the table which looks like

Take note of and copy the Value, as it becomes hidden after leaving the pages and a new secret will need to be created if it is forgotten. This value is needed in Step 7.
Step 6: Configure returning access tokens under the Authentication tab
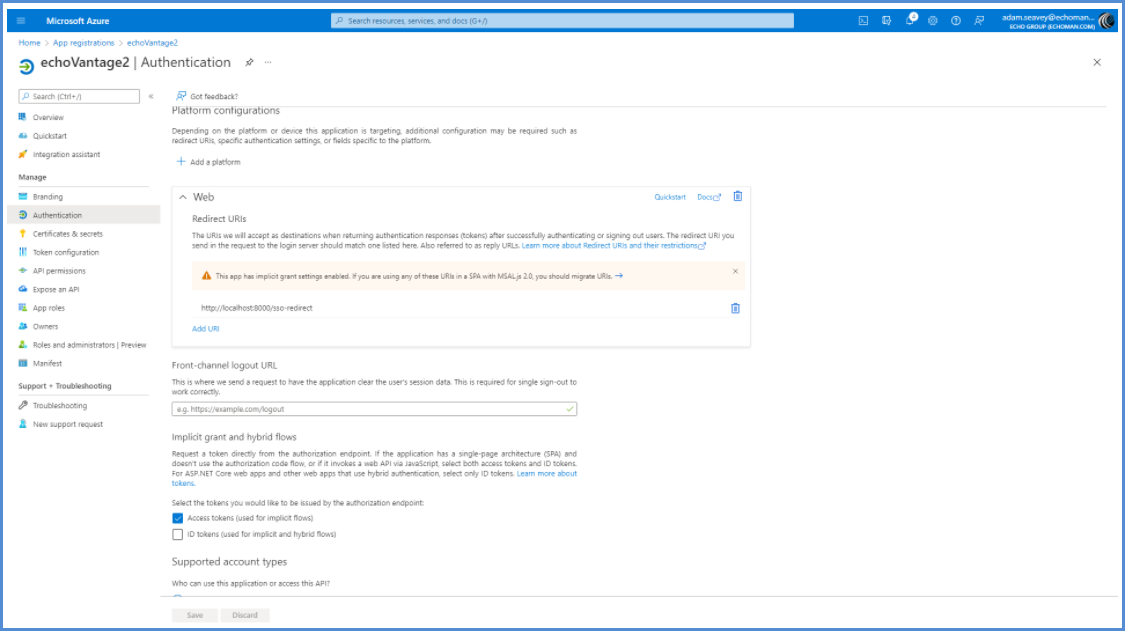
This page also includes a section to add more redirect URLs which allows multiple environments.
Step 7: Work with Echo to finish configuring your Azure integration
In order to finish configuring your integration, the following information must be sent to Echo.
- Redirect URL (Step 3)
- Client ID (Step 4)
- Client Secret (Step 5)
- Base URL (Step 4)
Granting Staff Members Access to EchoVantage via Azure SSO
|
Once the Azure SSO is configured to work with EchoVantage, configure the application access for any new and existing users that will access EchoVantage via Azure SSO. Step 1: Navigate to Configuration > Staff/Users > Staff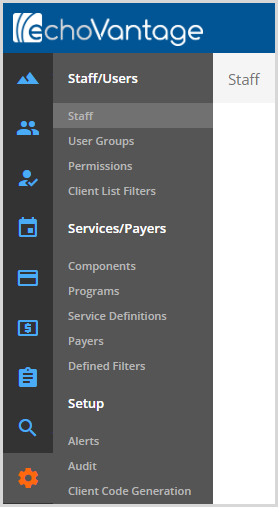
Step 2: Select the staff and click the Application Access iconStep 3: Set the Staff’s username to match that user's email associated with their account in Azure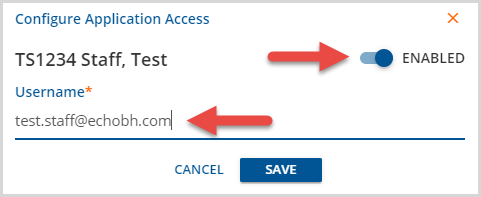
|
